Imagine this: you launch a QR code marketing campaign with a form to capture new leads. People scan the code and fill out the form. Now, to better manage the form data, you want to upload it to your CRM. But, will you do that manually every time someone submits their response? No, that is just not practical!
That’s where the API integration feature in QRCodeChimp forms comes into play. This feature lets you seamlessly integrate your forms with your CRM system. Connecting forms with your CRM automates data transfer, reduces risks of manual errors, and facilitates data management with streamlined access to customer data. In a CRM user survey run by Resco, 74% of businesses acknowledged the role of CRM systems in improving access to customer data.
In this blog, you’ll learn how to integrate form responses with a CRM platform using QRCodeChimp to ensure data organization and consistency across all integrated systems, including sales and customer support systems. Read on for the detailed steps.
Steps for API integration in QRCodeChimp forms
Follow the simple steps to integrate an API into your QRCodeChimp forms.
Method 1: API integration in forms at the Account Settings level
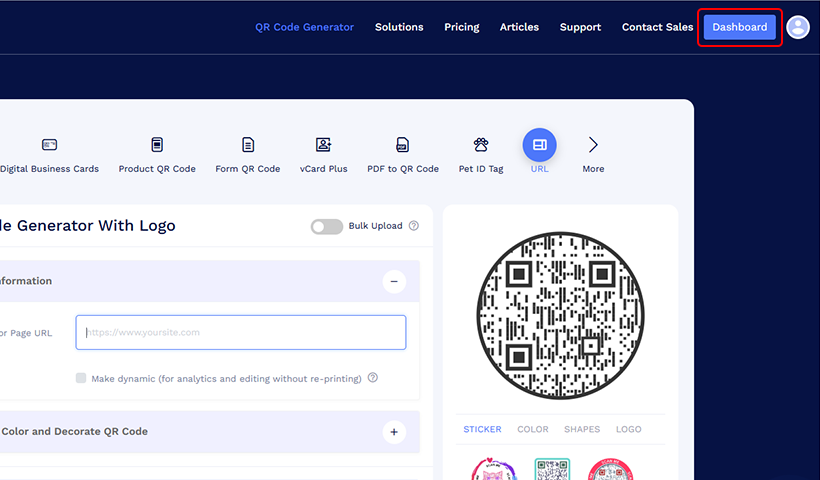
Step 1: Log in to www.qrcodechimp.com and go to Dashboard.
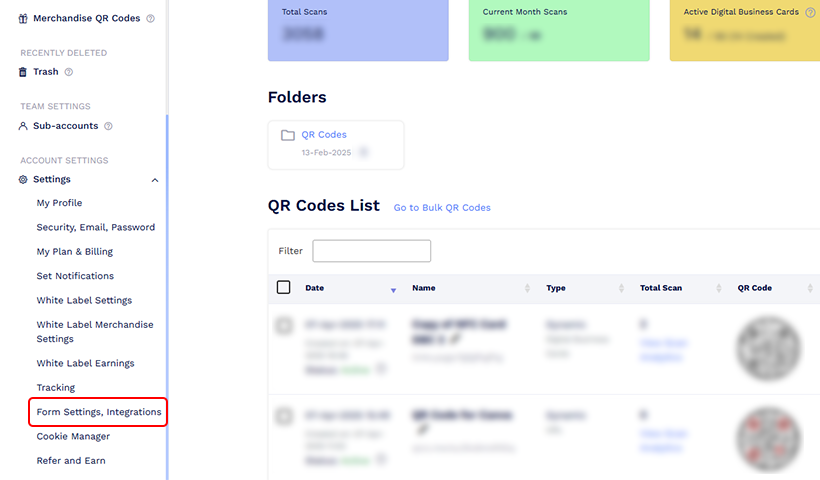
Step 2: On the left-hand navigation bar, click on ‘Form Settings, Integrations’ under Account Settings.
Step 3: Select the “I accept the Forms usage terms and data privacy policy…” box. Then, fill in the Support Email, Terms and Conditions, and Privacy Policy fields.
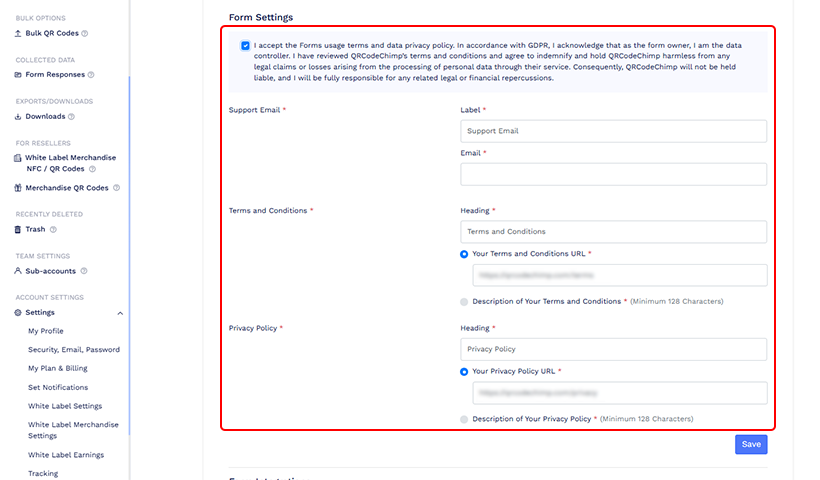
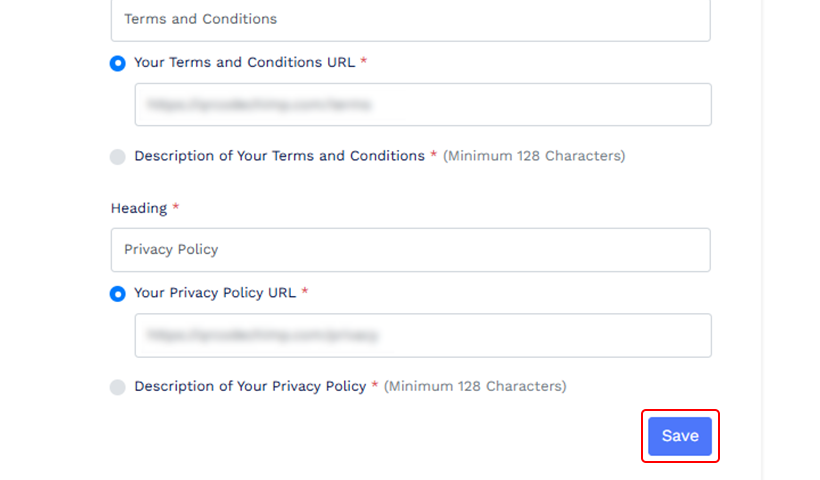
Step 4: Click on ‘Save’ to enable Form Settings.
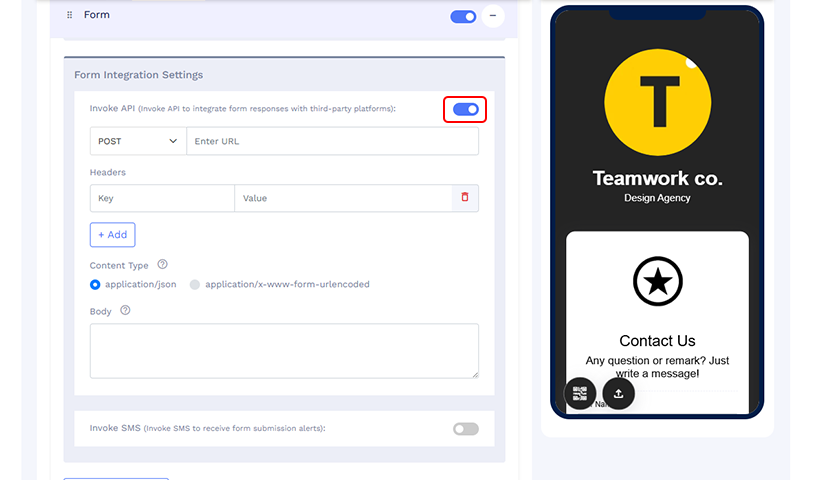
Step 5: Now, to enable Form Integration Settings, turn on the toggle button alongside ‘Invoke API (Invoke API to integrate form responses with third-party platforms).’
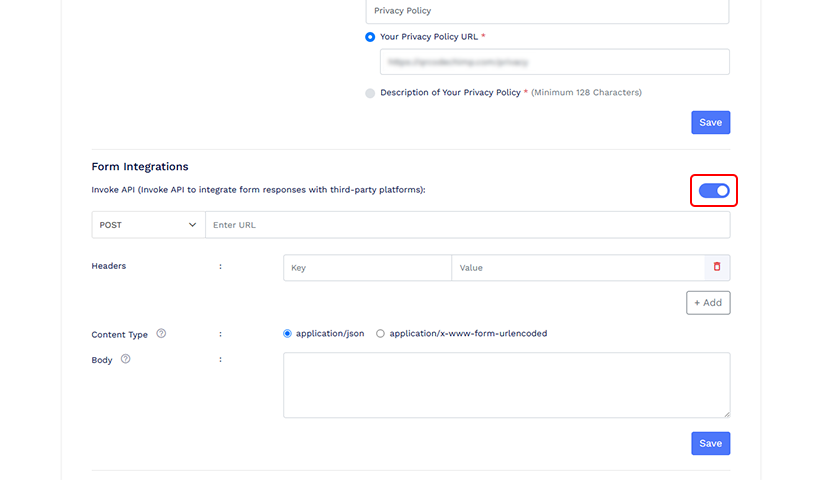
Step 6: Then, enter your CRM’s API URL.
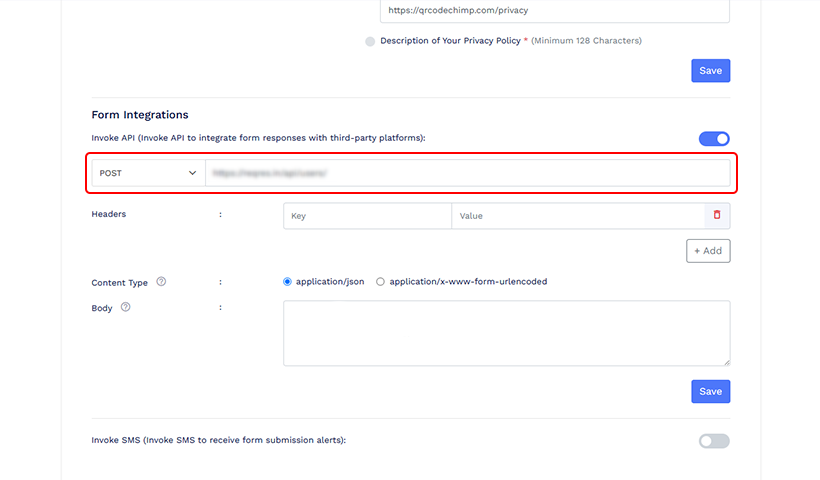
Note: Before entering the URL, you must select one of the HTTP methods: POST (used for real-time, customizable requests) or GET (used to retrieve pre-configured data). Your API service provider will provide the method.
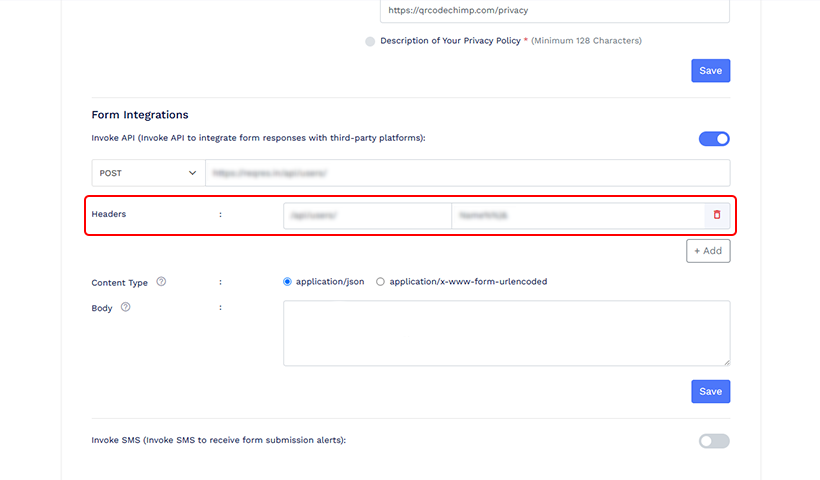
Step 7 (Optional): Enter the Key and Value under ‘Headers’ if needed.
Note: If you select GET, you don’t have to write the API Invocation Body. But you do for the POST method. So, the following steps are necessary if you have selected the POST method.
Step 8: For API Invocation Body, strictly follow this syntax:
Name=%%REQUEST.Name%%&Email=%%REQUEST.Email%%&Phone=%%REQUEST.Contact%%
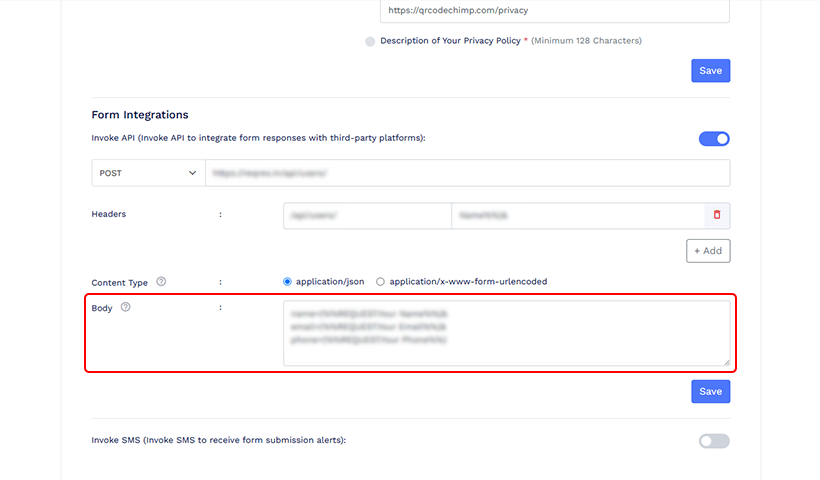
Note: You can change the syntax according to your form’s input fields. For instance, if you want to add the user’s enquiry to your CRM on top of name, email, and phone, you can add one more text body in the above syntax.
Name=%%REQUEST.Name%%&Email=%%REQUEST.Email%%&Phone=%%REQUEST.Contact%%&Enquiry=%%REQUEST.Enquiry%%
Step 9: For Content Type, the ‘application/json’ format is pre-selected. You can also choose the ‘application/x-www-form-urlencoded’ format, depending on which format the API server supports.
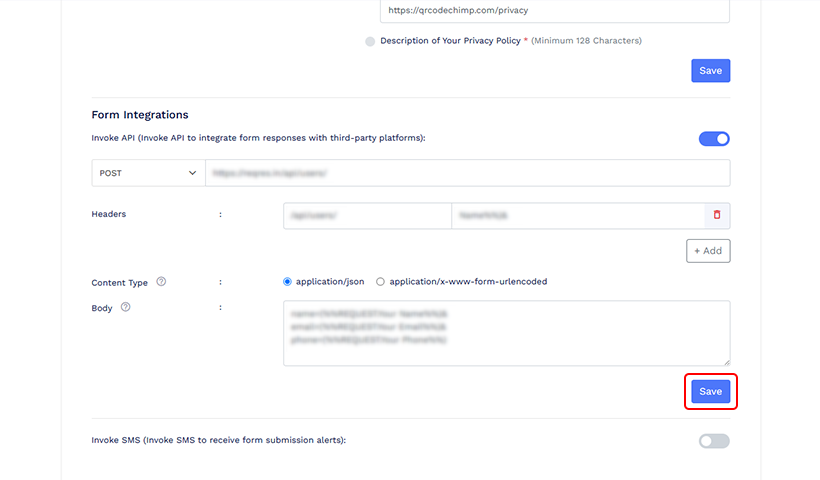
Step 10: Finally, click on the ‘Save’ button below to save the above settings.
Method 2: API integration in forms at the Form level
You can also enable Form Integration Settings at the Form level, i.e., when you use the Form QR code solution or add the form component to another QR code.
Step 1: Sign in to www.qrcodechimp.com and select the Form QR code solution on the Solutions page. Choose a page template.
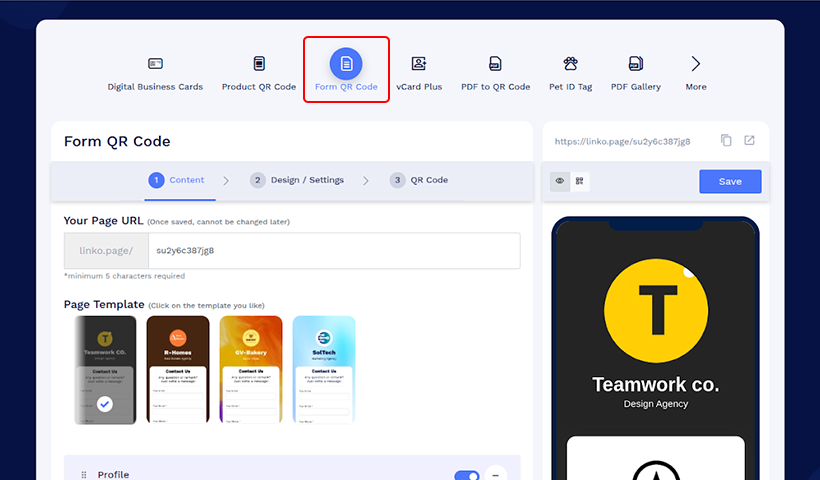
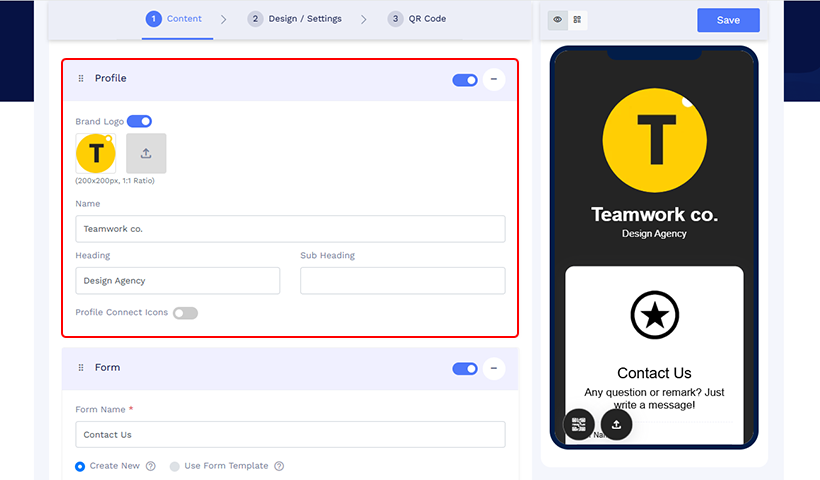
Step 2: Provide information in the profile and form (form settings and form content) sections.
Step 3: Complete the terms and privacy policy.
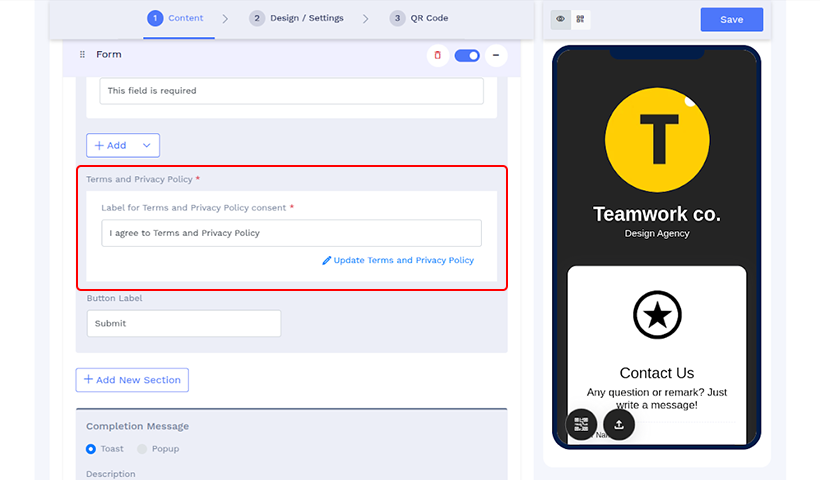
Note: If you’ve already integrated the API at the account level, you can skip this section.
Step 4: Enable or disable the form integration settings.
Note: The section will be pre-filled if you’ve already integrated the API at the account level. You can enable or disable by switching the toggle.
Step 5 (Optional): Enable “email me on form submission” to get email notifications.
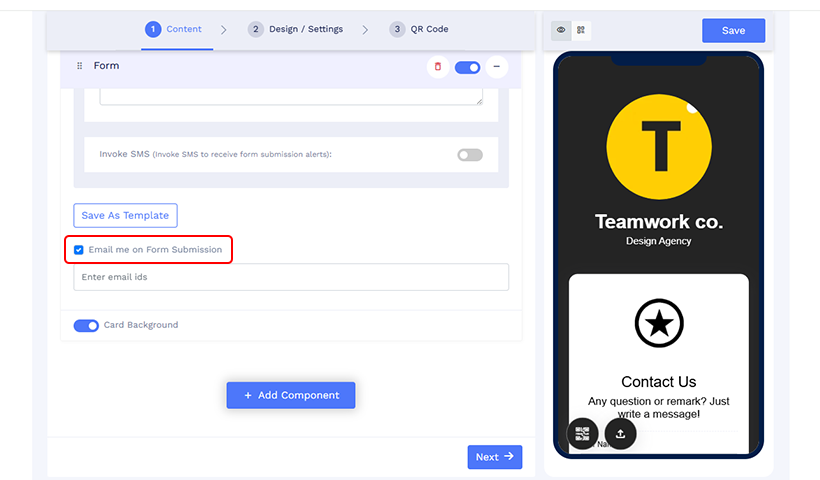
Step 6: Click “Save” to complete the API integration at the form level.
How to connect QRCodeChimp forms with your CRM system using Zapier
As QRCodeChimp is a listed app on Zapier, you can easily connect it to your CRM system through Zapier’s software integration platform. Using integration platforms like Zapier to integrate form data into your CRM, you can further streamline data transfer workflows, automate several processes, and save more time.
Here are the steps to connect QRCodeChimp forms with your CRM platform using Zapier. Also, here we’re using Google Sheets as your CRM to demonstrate the integration process.
Part 1: Integrating QRCodeChimp forms with Zapier
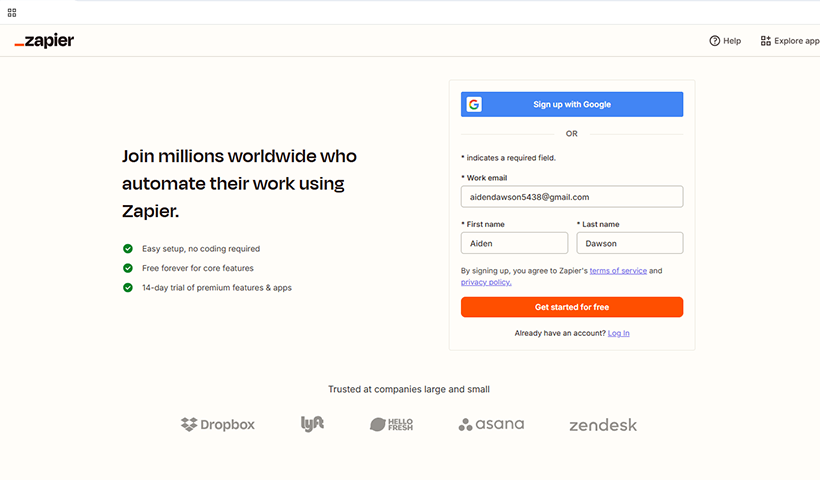
Step 1: Sign in to your Zapier account.
Step 2: Navigate to the top left corner and select ‘Create’ to create a ‘Zap.’

Step 3: Click on ‘Trigger’ and select ‘Webhooks by Zapier.’
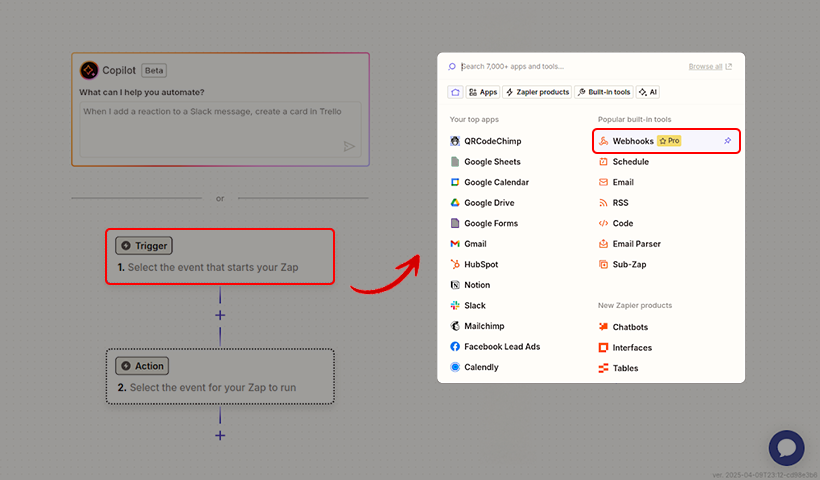
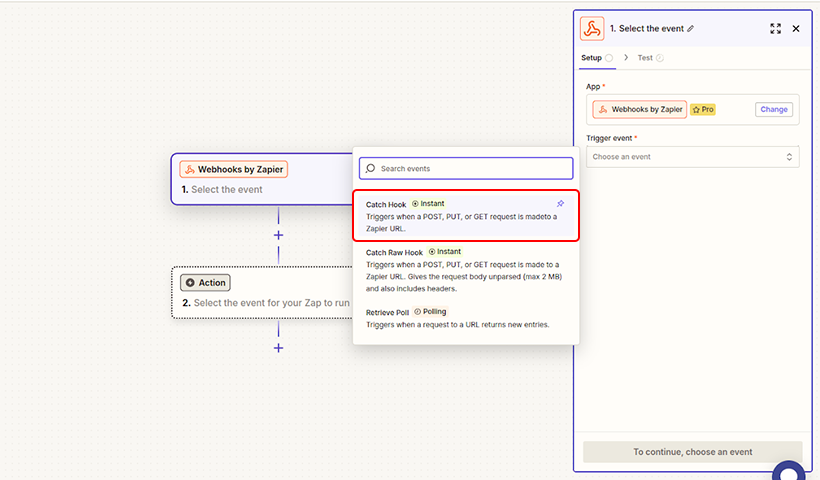
Step 4: Click on ‘Trigger event’ under the Setup tab and select ‘Catch hook.’
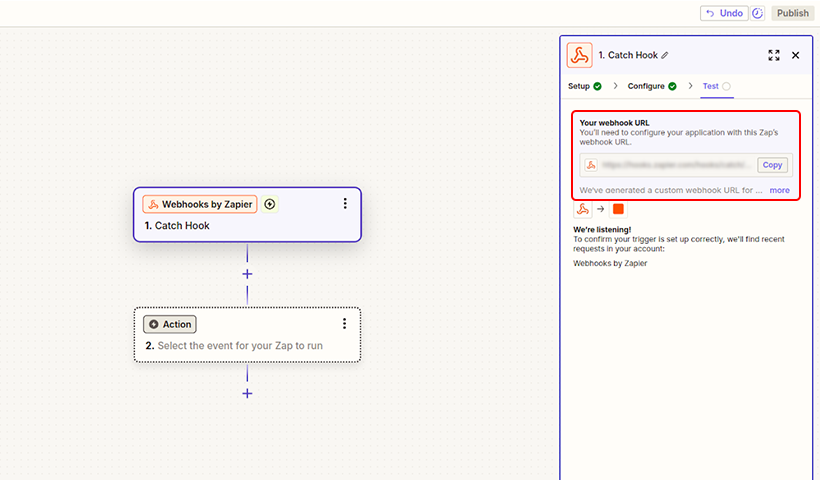
Step 5: Go to the Test tab and select Copy to copy your webhook URL.
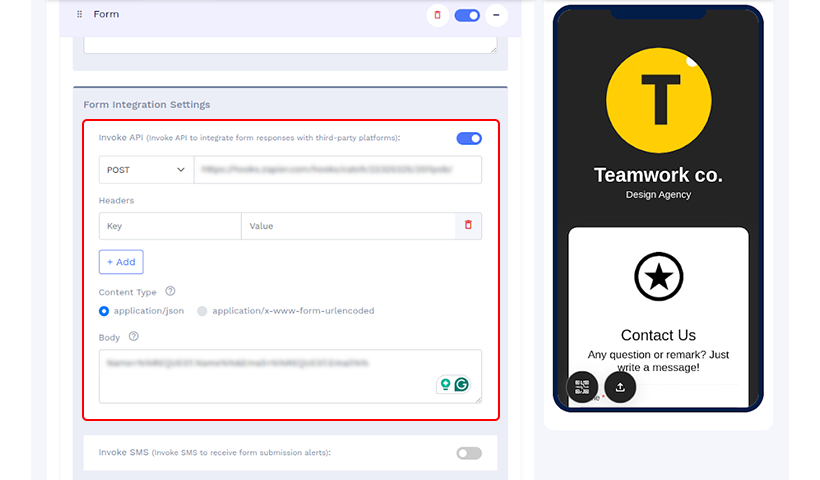
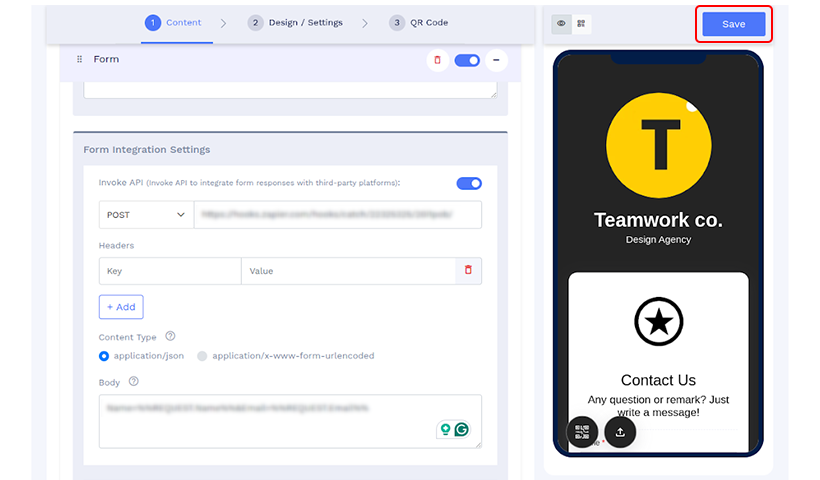
Step 6: Now, go to QRCodeChimp Form Integration Settings, select the HTTP method, and paste the URL. Then enter the Key and Value under ‘Headers’ (optional) and write the API Invocation Body in the following format:
Name=%%REQUEST.Name%%&Email=%%REQUEST.Email%%
Step 7: Click on the ‘Save’ button to save the form.
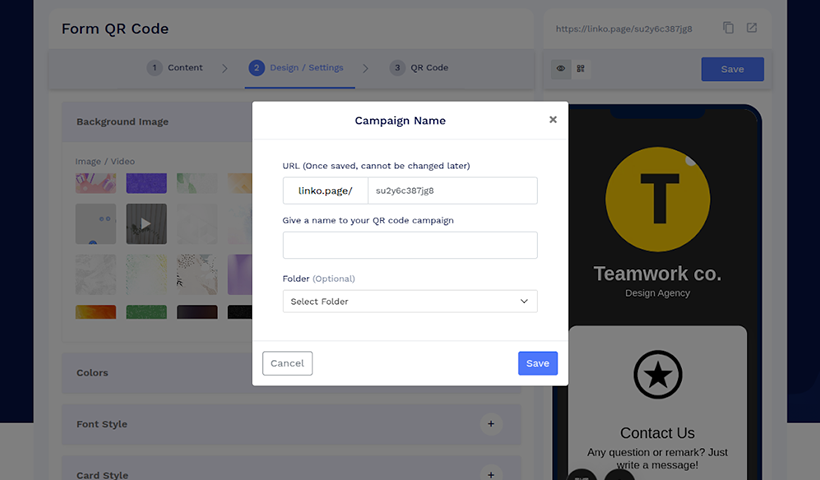
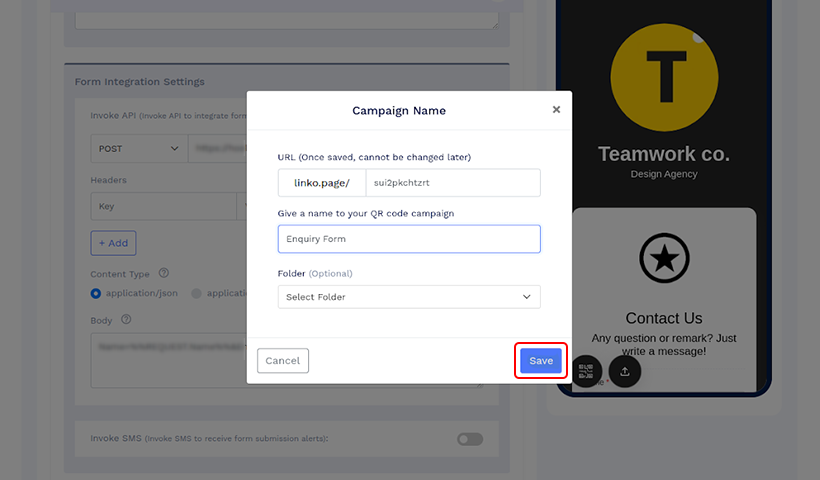
Step 8: A pop-up will appear. Enter your campaign name and click on Save.
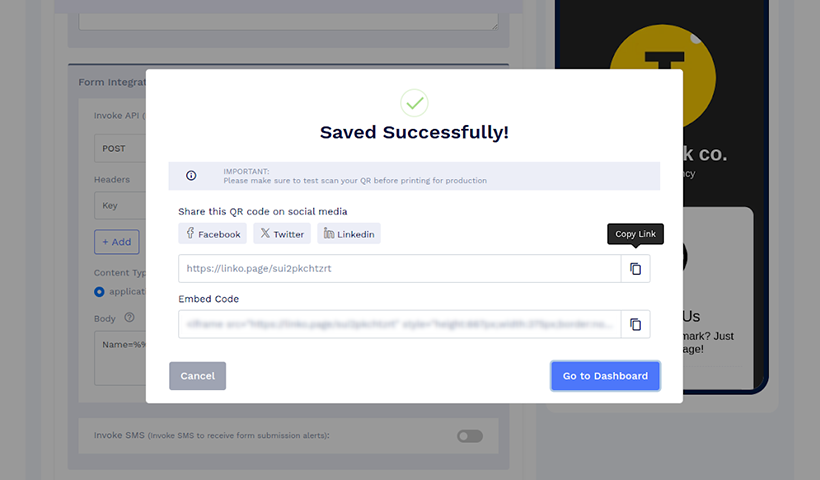
Step 9: Another pop-up saying ‘Saved Successfully’ will appear. You will see the form link below as “https://linko.page…” Copy the link.
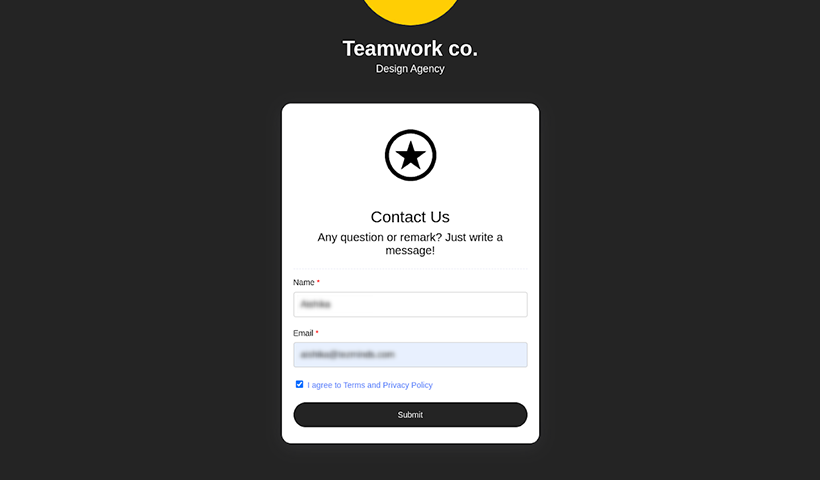
Step 10: Now, open the form on Google, fill it out, and then submit it as a dummy form.
Part 2: Integrating Google Sheets with Zapier for automated data transfer
Step 1: Go back to Zapier and click on ‘Test Trigger’ to confirm if your Trigger has been set up correctly. Your form data record will appear on the tab as ‘request A.’
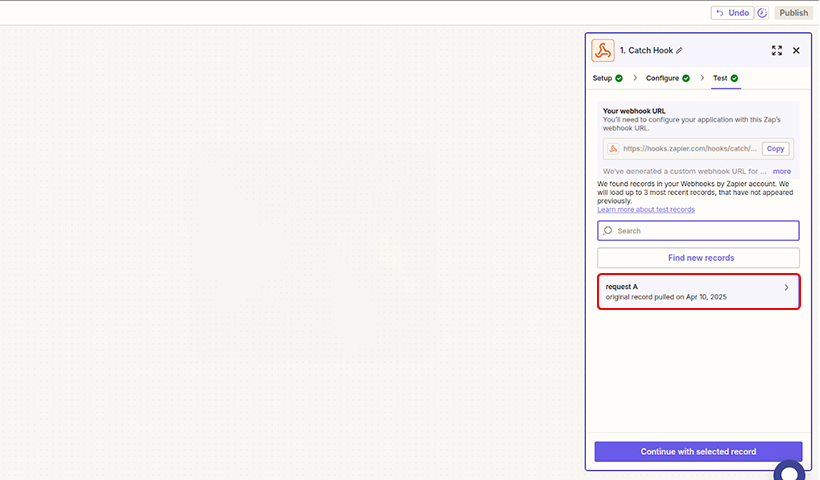
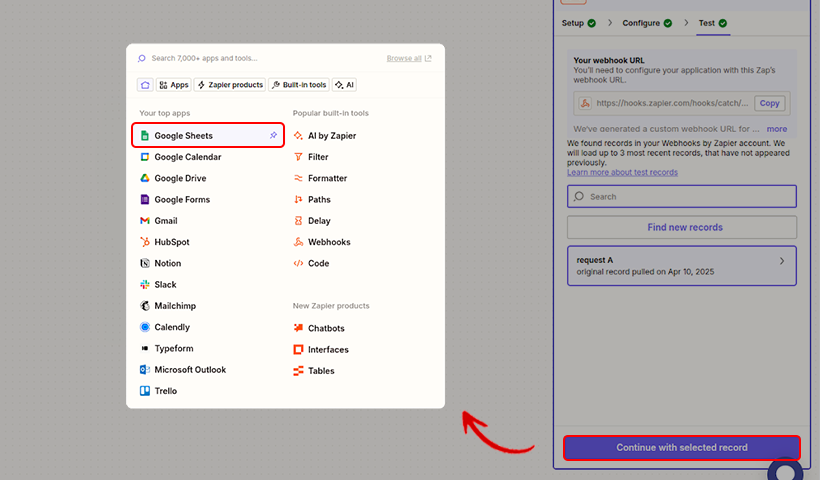
Step 2: Click on ‘Continue with selected record’ and select Google Sheets.
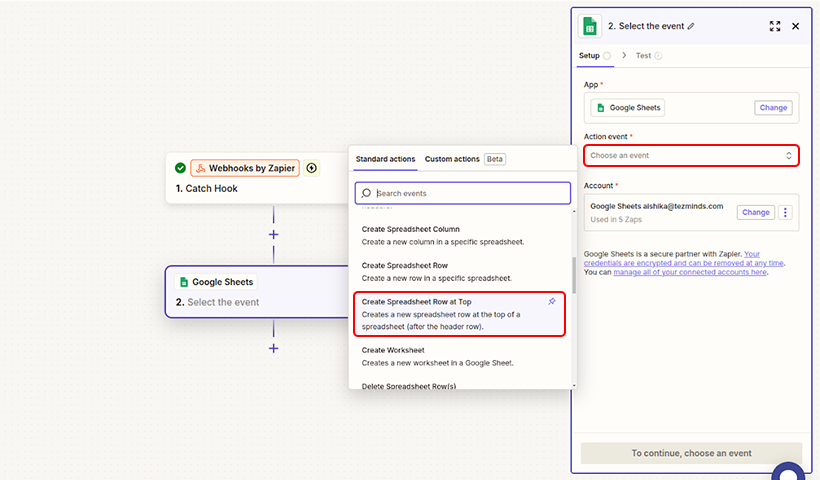
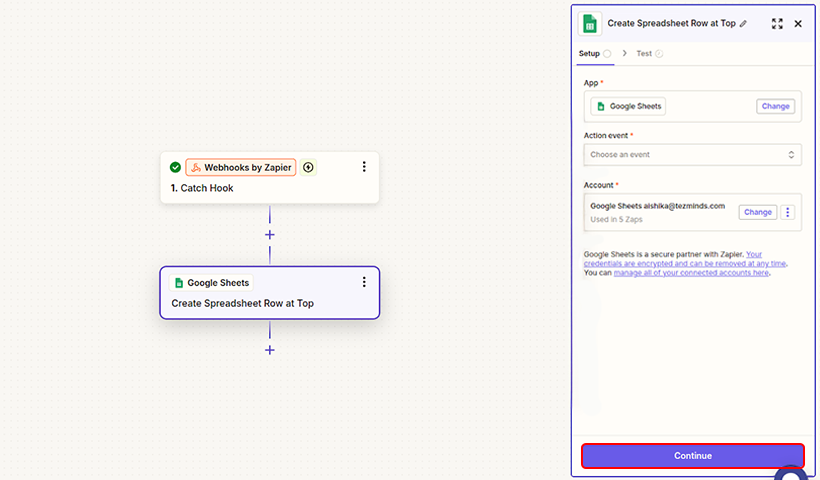
Step 3: Under the Setup tab, select ‘Action event,’ such as ‘Create Spreadsheet Row at Top.’
Step 4: Your Google Sheets is now linked to your Zapier account. Continue.
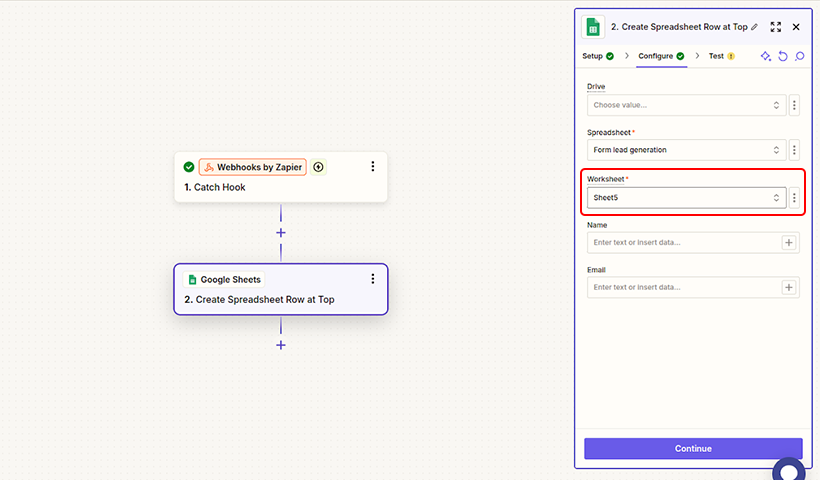
Step 5: In the Configure tab, select your Spreadsheet. Then, choose your Worksheet, such as Sheet 1 or Sheet 2.
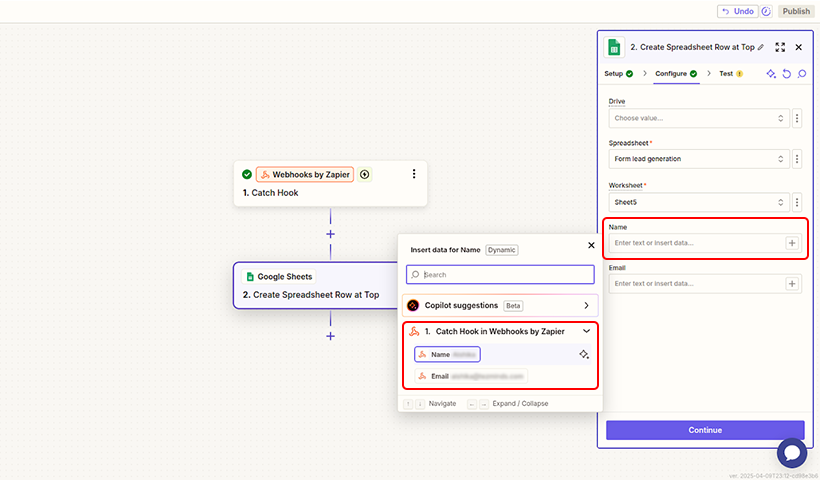
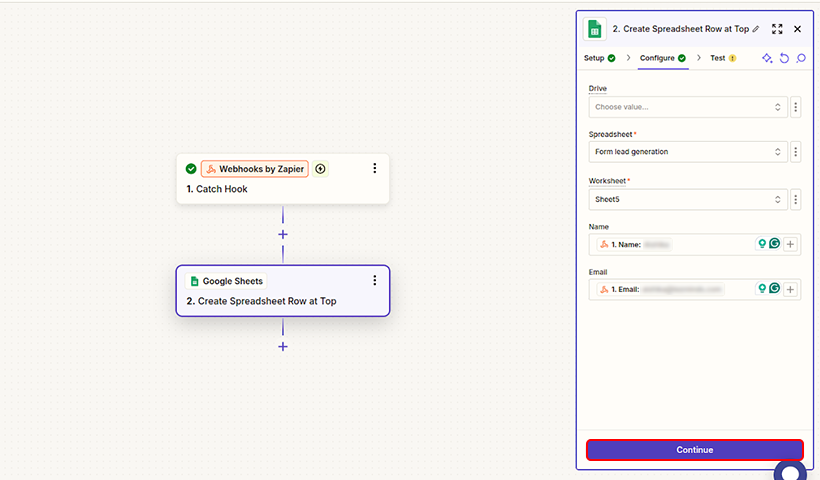
Step 6: Click on the + sign in the Name section and select the ‘Name’ field. Repeat this for the other sections. This is done to align the form data correctly in your CRM.
Step 7: Click on Continue.
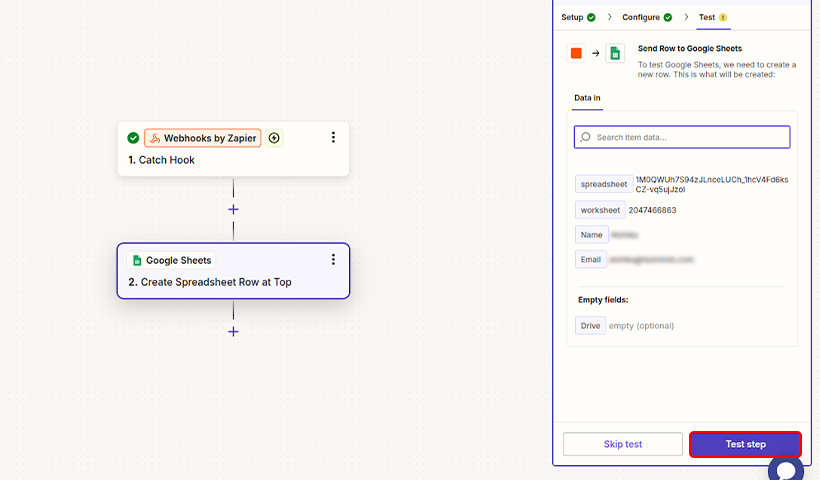
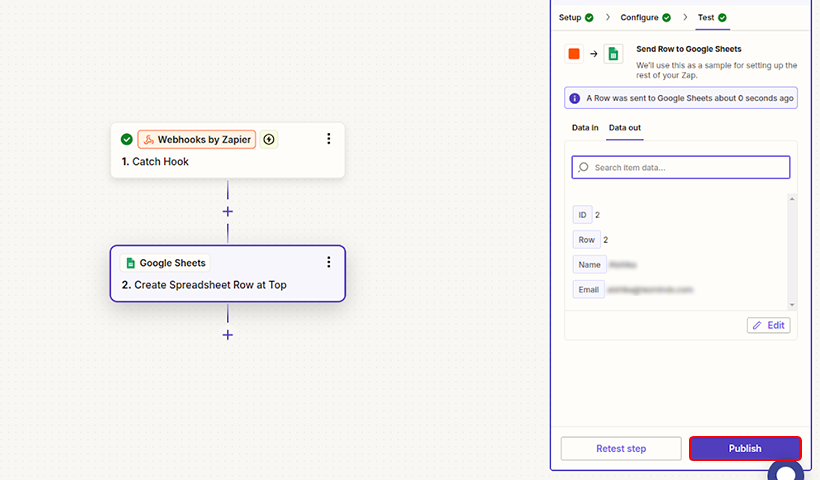
Step 8: In the Test tab, click on Test Step. A notification saying “A Row was sent to Google Sheets about 0 seconds ago” will appear. Below, you can see the form fields aligned in the correct order.
Step 9: Finally, click on Publish. A notification saying ‘Zap published’ will appear at the top center of the screen.
Your form data is now successfully integrated into your CRM system, i.e., Google Sheets. Go to Google Sheets to ensure the data has been recorded correctly.
Benefits of integrating forms with a CRM system
Here are the key benefits of API integration in QRCodeChimp forms to connect with your CRM system.
 Automated data transfer
A key benefit of API integration in forms to connect with your CRM platform is automated data transfer. This process eliminates the need for manually inputting form data, minimizes the risk of errors, and saves time. Moreover, it improves the workflow, enhances team productivity, and helps keep your CRM database up-to-date, enabling you to make data-driven decisions and personalize customer experiences.
Data centralization
When QR code forms are integrated with a CRM system, the data is automatically stored every time a customer submits their responses. API integration in forms allows data centralization, making the information more organized and accessible for further analysis or retrieval.
 Read more: SMS Integration in Forms on QRCodeChimp
Better lead management
Integrating form data into a CRM system can help you better track and manage your leads, resulting in high conversion rates and improved sales. For example, your company shares an online form via a QR code. Every time a potential customer scans the code, fills out the form, and submits it, the data is instantly transferred to your CRM system. The system generates a new lead record and assigns it to someone, say, a sales representative, who utilizes the data to offer personalized customer service.
Enhanced customer experience
Efficient customer data management helps enhance customers’ experiences. This is possible with a CRM system that helps personalize customer interactions and build stronger relationships. When customer data is integrated into your CRM system, you have a complete view of your customers’ specific interests, needs, preferences, past interactions, etc. This enables you to offer tailored customer experiences, increase satisfaction, and improve retention rates.
Use cases of form integration with CRM systems
The following explains briefly how API integration in forms works in different cases. Take a look.
 Customer feedback collection
When you integrate feedback collection forms into your CRM system, all the data is automatically transferred and stored in the system. The centralized data is easier to analyze, helping you better understand the needs of each customer and improve their experiences.
Event registration & management
Integrating event registration forms, such as webinar registration or workshop sign-up forms, into your CRM allows you to automate and streamline the registration process, saving time and reducing manual errors.
Lead capture forms
These forms are designed to gather information, such as name, contact number, and email, from website visitors to capture leads and convert them into customers. Integrating these forms into a CRM system allows real-time lead capture, streamlines conversions, and boosts sales.
Conclusion
Though API integration in forms sounds complicated, it is, in fact, an easy and straightforward process. This tutorial explains how to connect QR code forms seamlessly to your respective CRM platform by enabling the API integration feature.
Integrating forms into your CRM system automates data transfer, reduces manual errors, and improves your organization’s overall workflow. Master API integration today to integrate form data into your CRM and offer enhanced customer experiences.
Frequently asked questions
Can I transfer the data from my QRCodeChimp forms to my CRM system?
Yes. QRCodeChimp’s API integration feature helps automate form data transfer to your CRM system.
Can I use the API integration feature on QRCodeChimp’s free version?
No. You must upgrade to QRCodeChimp’s Pro or Ultimate plans to use the API integration feature in forms.
What CRM platforms are compatible with QRCodeChimp’s API integration?
Several CRM platforms, including Salesforce, Zoho CRM, HubSpot CRM, and Microsoft Dynamics 365, are compatible with QRCodeChimp’s API integration.
How secure is the data transfer between QRCodeChimp forms and my CRM?
QRCodeChimp is SOC 2 type II certified and GDPR compliant. Moreover, the platform offers data privacy features such as data encryption and passcode protection, making it highly secure for users. Hence, to ensure safe data transfer between QRCodeChimp forms and your CRM, you must also check the security protocols of your CRM system.
Do I need coding knowledge to integrate QRCodeChimp forms with my CRM?
No. Coding knowledge is not usually required when your’re integrating QRCodeChimp forms with your CRM system, especially when you’re using integration platforms such as Zapier, known for its user-friendly interface and no-code API integrations.
You may also like
How To Create RSVP QR Codes: 4 Easy Methods for Any Event
Learn how to create invitation using RSVP cards with QR codes to streamline event RSVPs. QRCodeChimp helps you make RSVP for different events and different ways. Explore our QR code generator now.
How to Create a QR Code?
QR codes stand for quick-response code and they are two-dimensional barcodes. QR codes can be read on scanning by mobile devices or online scanners. The simplest way to create QR code is to use a free online QR code generator such as QR Code Chimp...
How to Scan Wi-Fi QR Code on Android and iPhone + Steps to Create
Create and scan Wi-Fi QR codes with Android and iPhone effortlessly. Simplify connectivity & enhance user experience! Learn how to create and share Wi-Fi QR codes effortlessly on both Android and iPhone devices.
Track Event Attendance with QR Code Ticketing
Track event attendance in real-time, prevent fraud, and streamline check-ins with QRCodeChimp. Gain data-driven insights for smarter event planning. Learn more now!
Most Popular
Contact Sales
