How to create digital business cards in bulk?
Do you find creating digital business cards one by one tedious and time-consuming? QRCodeChimp's bulk upload feature lets you create multiple digital business cards simultaneously, saving you valuable time and effort. Discover the benefits of digital business cards by trying it out today.
To get started with the bulk upload feature, check out our tutorial video on YouTube: https://youtu.be/stzFLBukqr8 or follow these below-mentioned steps:
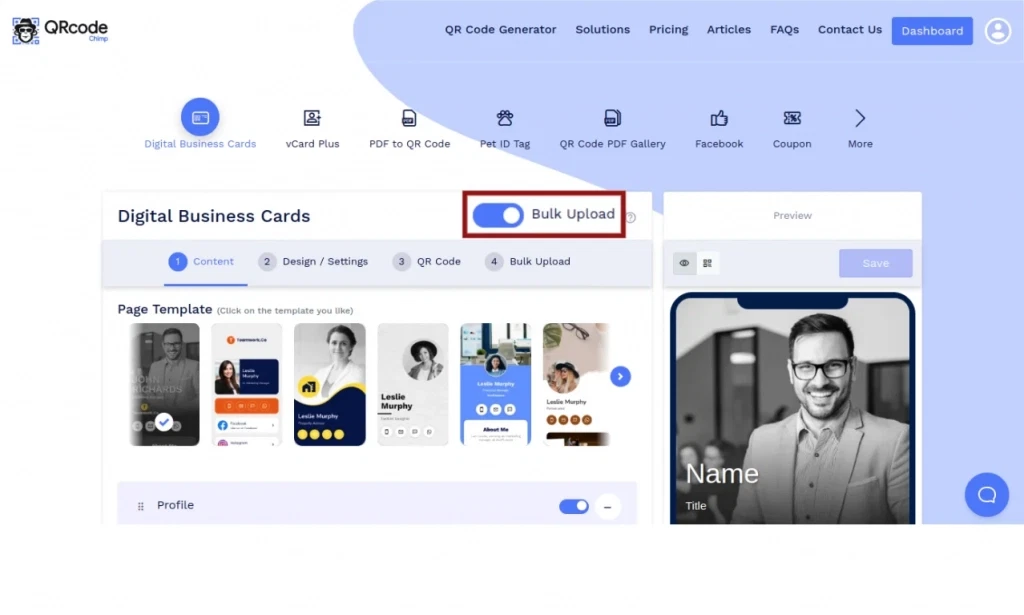
Step 1: Enable the Bulk Upload
Visit https://www.qrcodechimp.com/digital-business-cards and enable the bulk upload switch and read the instructions before clicking on the OK button.
Step 2: Set the Page Content Structure
In the Content tab, select the desired page template and customize the page components by enabling, disabling, adding, or deleting the components as required.

Step 3: Customize the Page Design
Go to the Design/Settings tab and customize the page design with a background image or video, colors, font style, and more.

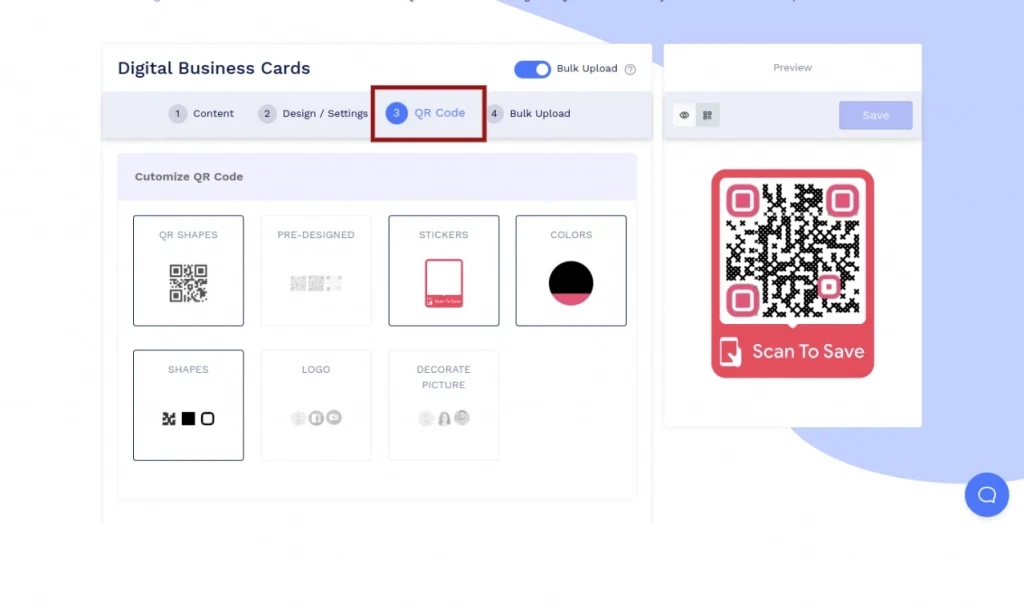
Step 4: Customize the QR Code Design
Go to the QR Code tab and customize the QR Code design using QR shapes, colors, logos, and other customizable options. Remember to click on the 'x' icon of the popup to save any changes made.
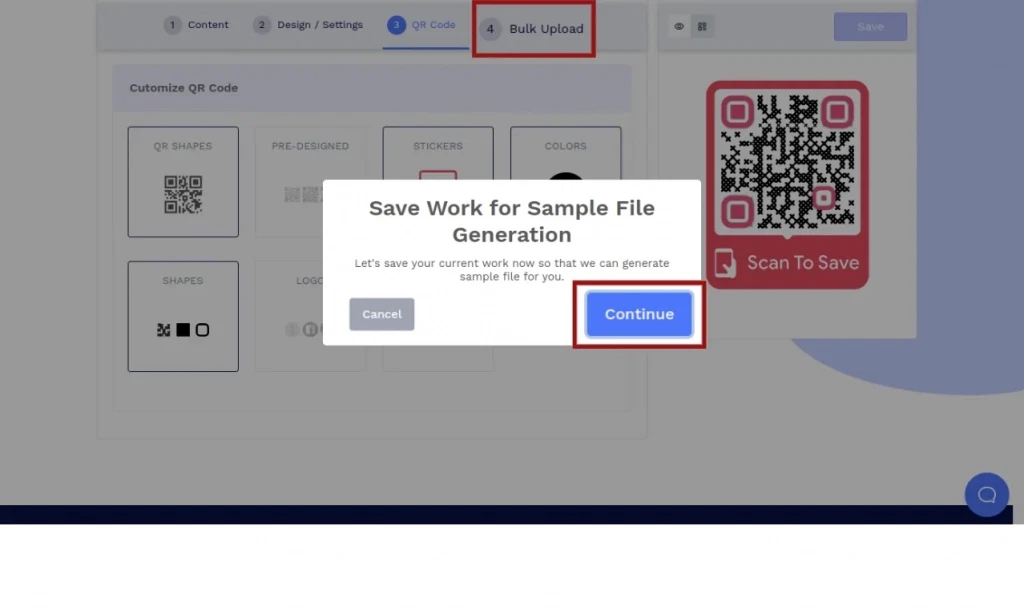
Step 5: Proceed to Save the Bulk Structure
Click on the Bulk Upload tab and then on the Continue button to proceed to save the content structure, page design, and QR code design for this bulk.
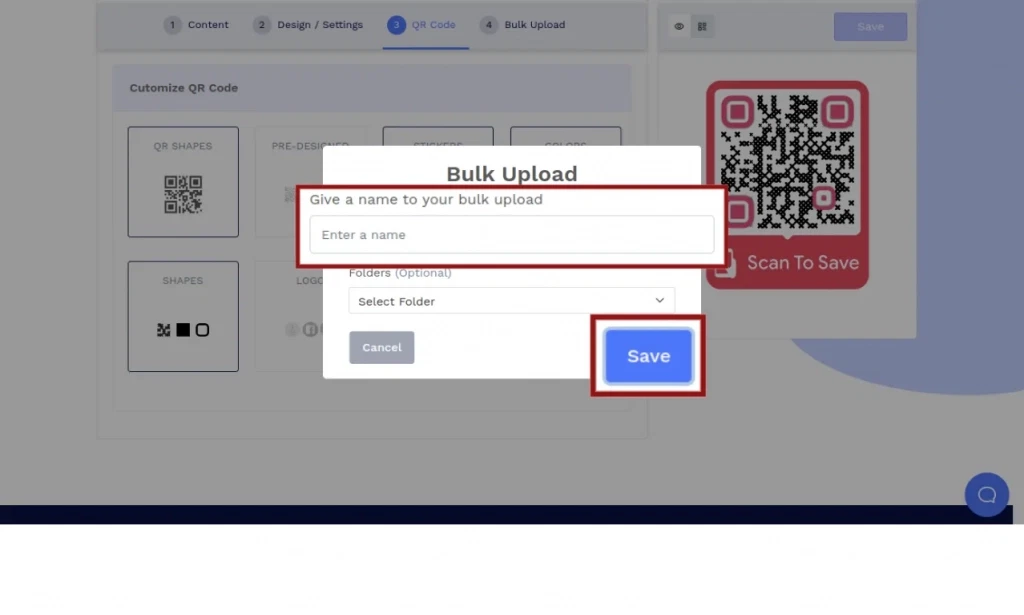
Step 6: Save the Bulk Structure
Add a name to your bulk, select a folder (optional), and click on Save to save the bulk structure.
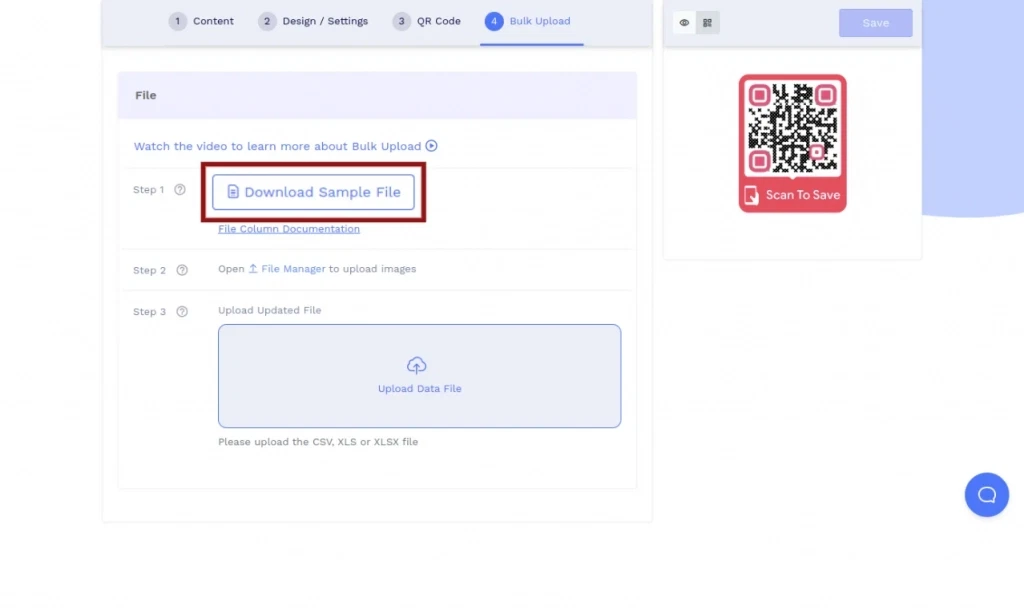
Step 7: Download the Sample File
Click on Download Sample File to download a sample file with columns corresponding to the saved content structure. Click here for the detailed description of each column in the Digital Business Card Sample File.
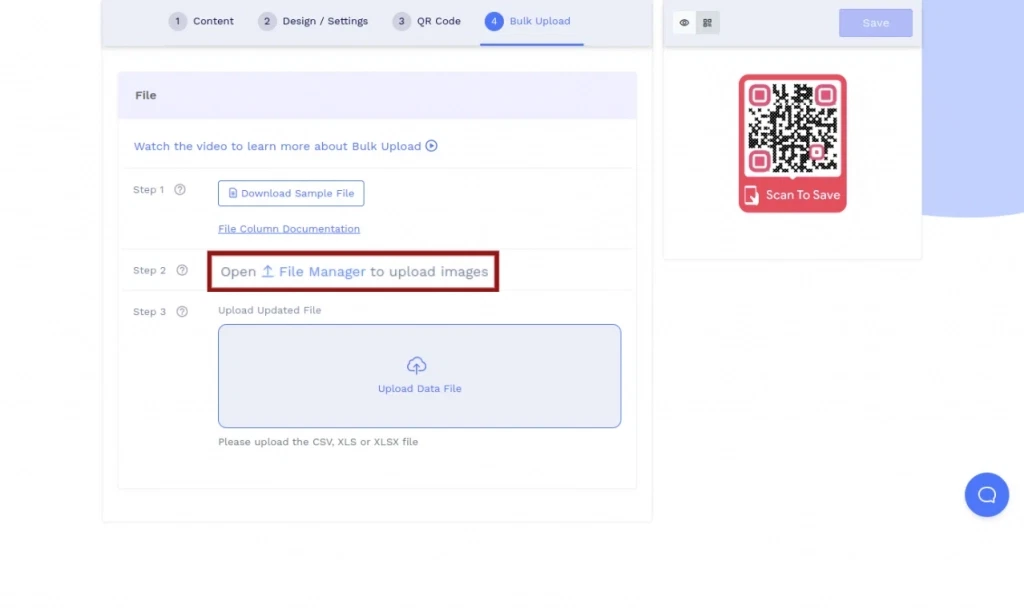
Step 8: Upload the Media Files
Click on the File Manager link to upload media files (images, PDFs) into the file manager.
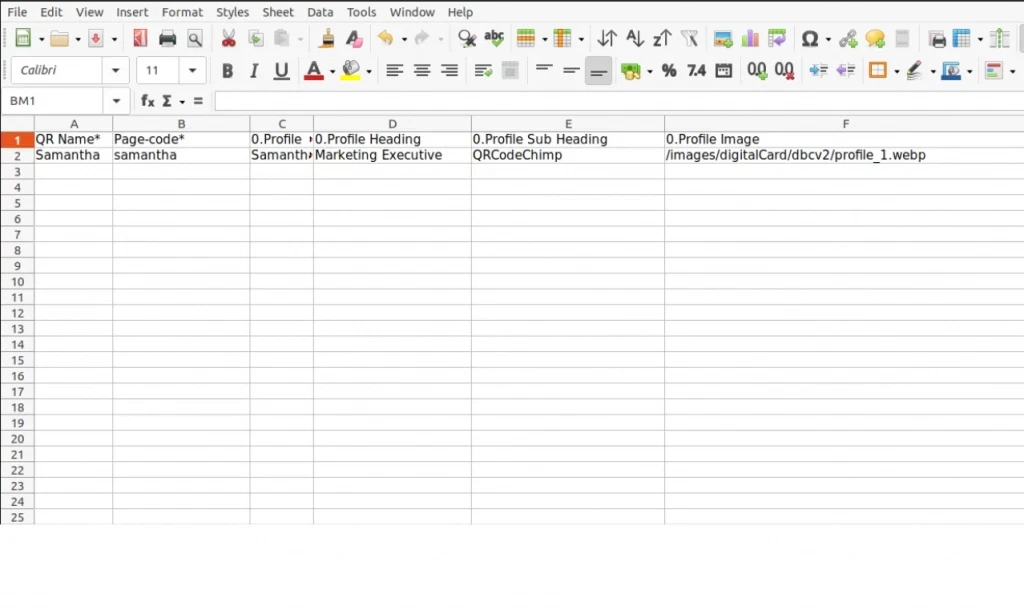
Step 9: Add Data
Add data to the downloaded sample file and save the data file in XLSX, XLS, or CSV format.
Step 10: Upload the Data File
Upload the saved data file. After successful validation, click on the upload button.

