Distributing business cards to staff members is a widespread tradition across numerous companies. However, an increasing number of businesses are now shifting towards digital business cards deployment, motivated by several advantages.
These include the ability to share without physical contact, the simplicity of making updates without reprinting, and the capacity to include more detailed personal information. Furthermore, business cards with QR codes are more visually appealing and can be tailored to meet specific branding or personal preferences.
This guide is here to assist you in selecting the perfect plan for Digital Business Cards deployment throughout your organization.
- Key considerations before digital business cards deployment for your organization
- How to create digital business cards for all employees with QRCodeChimp
- How to distribute digital business cards to employees
- Important elements to include in business cards for employees
- How to update digital business cards in bulk
- How to manage individual digital business card information update requests
- How to pause or delete the digital business cards of ex-employees
- Best practices for digital business cards deployment across organizations
- Take the next step
- Frequently asked questions
Key considerations before digital business cards deployment for your organization
How many virtual business cards do you want? Do you want white labeled cards? Here are a few things you need to consider before deploying digital business cards:
Which plan is suitable for my organization?
Refer to the table below to choose the right plan based on your organization’s size and scan requirements.
| Plan | Digital Business Cards Count | Monthly Scan Limit | Features |
|---|---|---|---|
| Free | 1 | 1000 | Basic Analytics, Add to Apple Wallet, Add to Google Wallet, Normal Email Support, 2 Folders |
| Starter | 5 | 10000 | Intermediate Analytics, Google Analytics, Priority Email Support, 5 Folders |
| Pro | 30 | 150000 | 2 Total Accounts, Advanced Analytics, Daily Analytics in Email, Bulk Uploads, Share Edit Access, 10 Folders, Export Digital Business Card Links for NFC |
| Ultima | 90 | No Limit | 4 Total Accounts, Analytics Excel Download, White Labeling a Domain, High Priority Email Support, 50 Folders |
Check our pricing details and make a smart choice.
Brand enforcement with white labeling
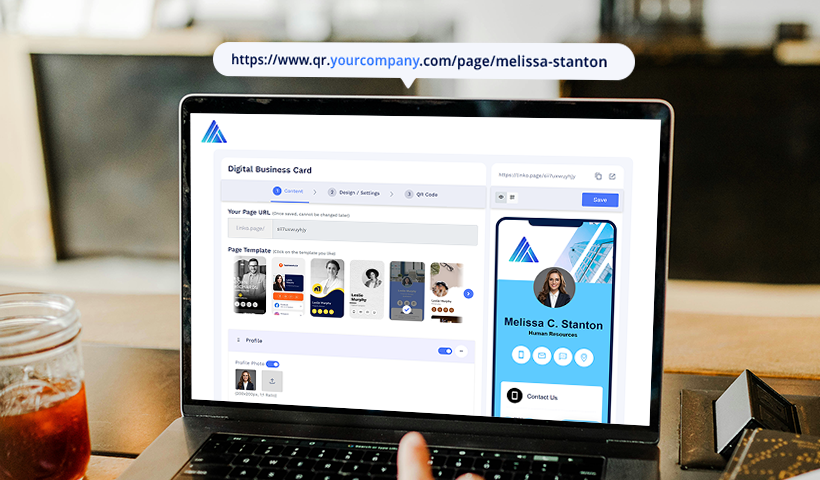
If you are serious about brand enforcement, white labeling is the way to go. Available for Ultima and higher plans, white labeling allows you to customize QR codes with your own subdomain and branding elements, giving your business a more professional and cohesive appearance.
Setting up whitelabeling
To help you get started with white labeling, we’ve put together a comprehensive guide that walks you through the entire process, from setting up white labeling in your account to creating a CNAME record with your domain host.
For detailed steps and instructions, please refer to our complete guide on white labeling with QRCodeChimp.
In this guide, you will find:
- How to set up white labeling in your account.
- Instructions for creating a CNAME record.
- Tips for ensuring a seamless setup process.
By following the steps outlined in the guide, you can ensure that your QR codes perfectly reflect your brand identity. If you need any assistance, our support team is always here to help.
Note: This process can take up to 2 business days after we receive your email.
How to create digital business cards for all employees with QRCodeChimp
Create individual digital business cards
Creating a digital business card with QRCodeChimp is simple. All you need is your basic details, contact information, and a display picture, and you’re good to go.
Visit the virtual business card generator, enter your details, design your QR code, save it, and you are ready.
For the detailed procedure, read Digital Business Card: A Complete Guide.
Create digital business cards in bulk
Creating virtual business cards in bulk is easy with QRCodeChimp. All you need to do is visit the business card generator and follow the steps:
Step 1: Enable the bulk upload.
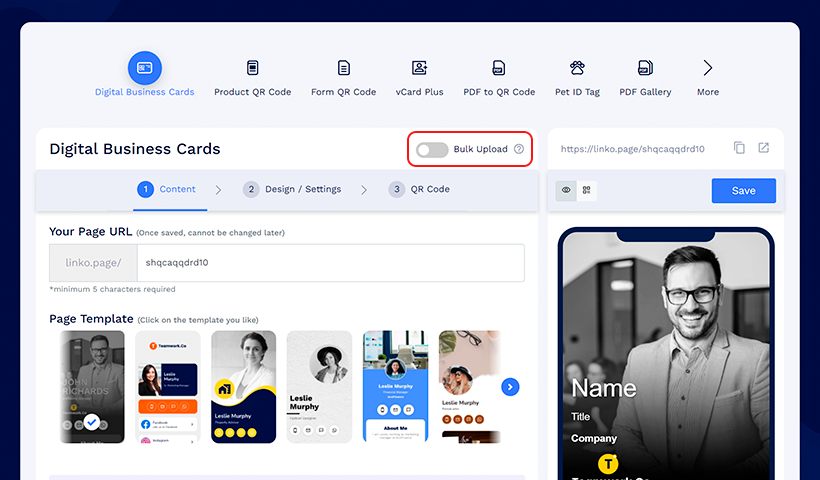
Step 2: Set the page content structure in the ‘Content’ tab.
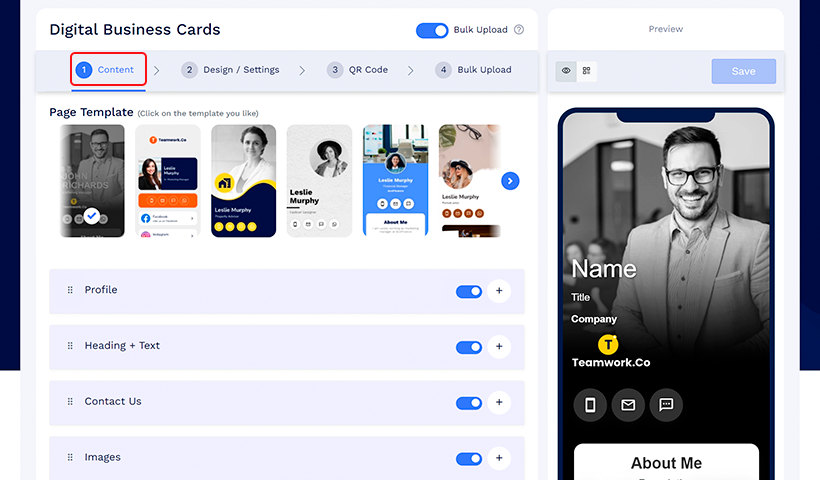
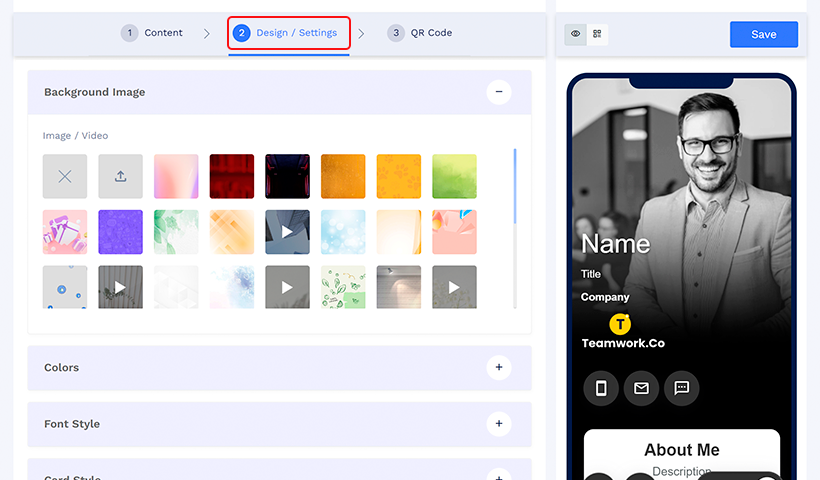
Step 3: Customize the page design in the ‘Design / Settings’ tab.
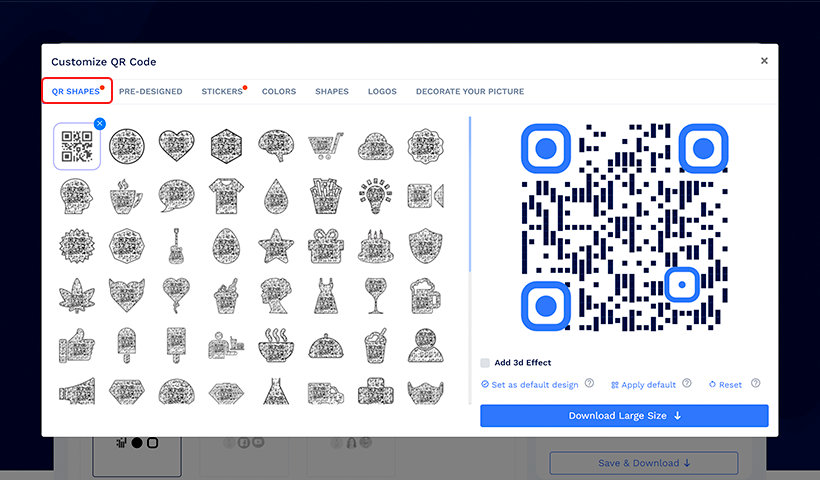
Step 4: Customize the QR code design in the ‘QR Code’ tab.
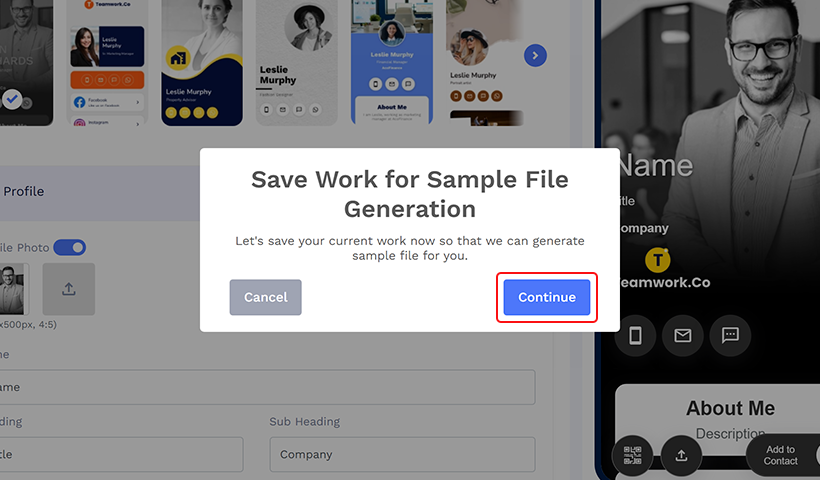
Step 5: Click ‘Next’ and you will see a popup- “Save Work for Sample File Generation”.
Step 6: Click ‘Continue’.
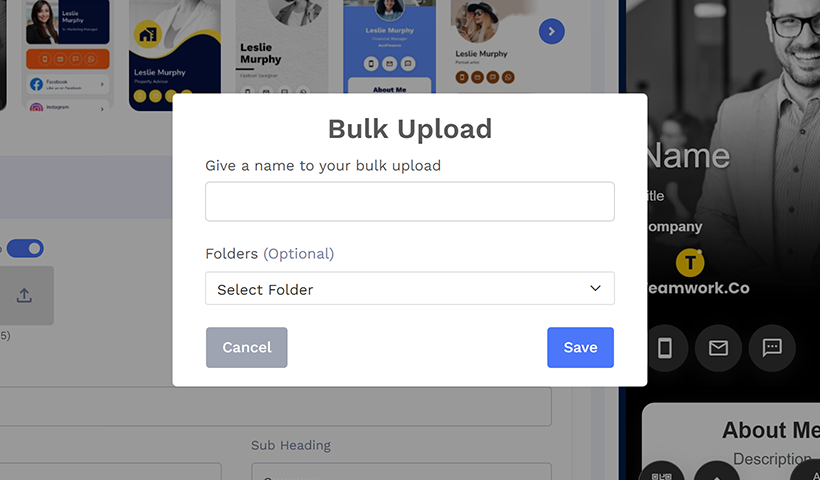
Step 7: Enter the bulk’s name, and you can add it to a folder. Then, click ‘Save.’
Step 8: Download the sample file.
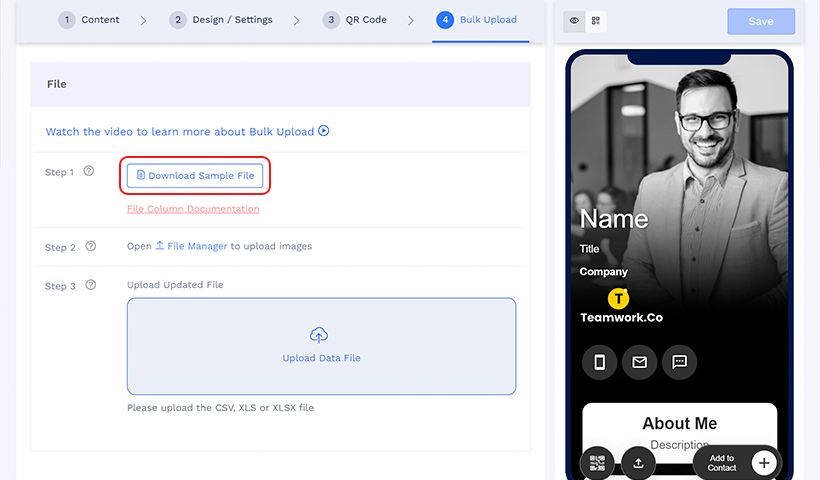
Step 9: Upload the media files with unique names.
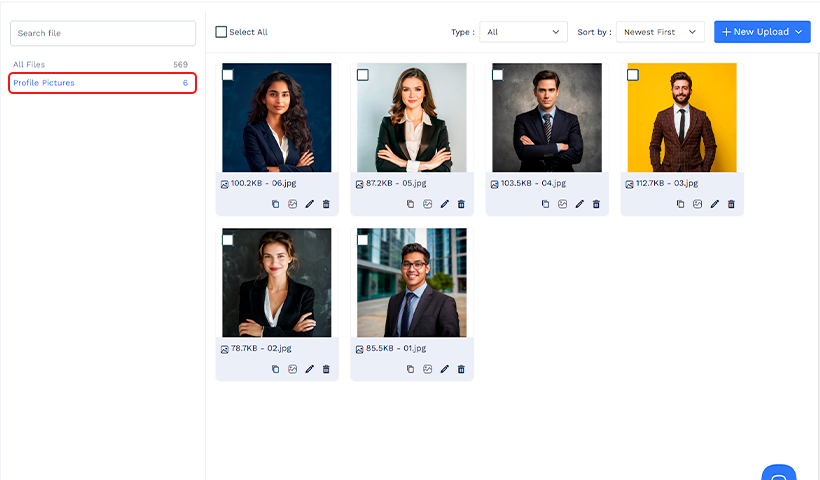
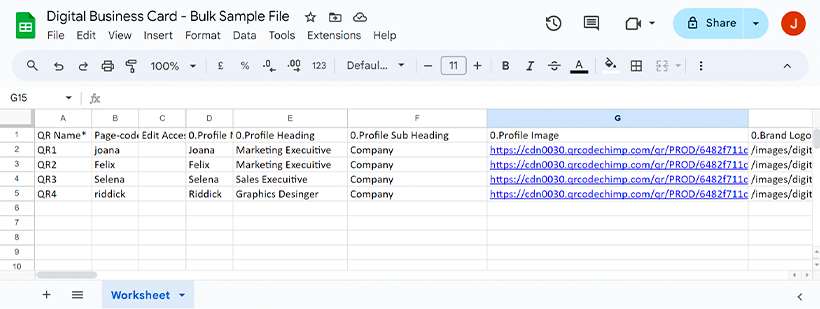
Step 10: Add details to the sample file with precision.
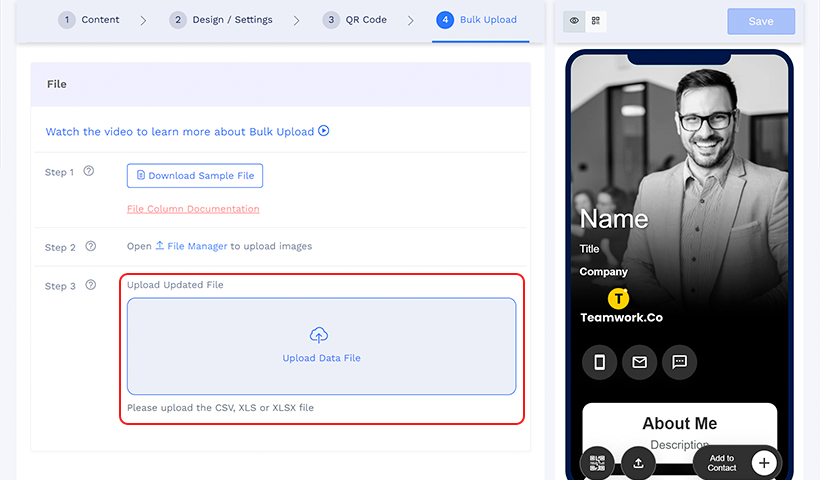
Step 11: Upload the data file.
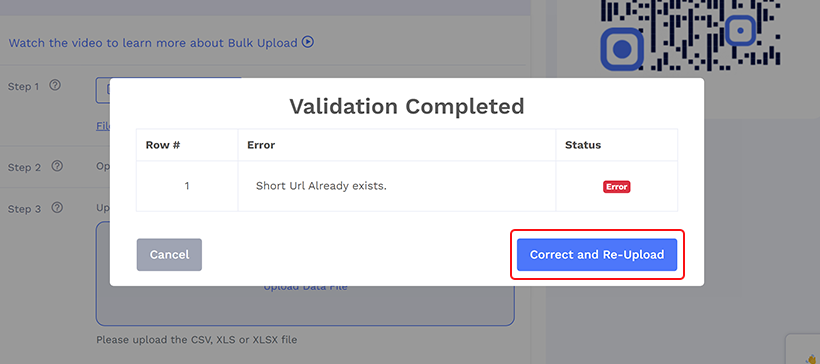
You will see either of the following two popups.
1. Validation Completed
2. Errors
Step 12: If you encounter errors during this procedure, click ‘Correct and Re-Upload’ and visit How to fix errors in bulk upload of digital business cards. Correct the errors and re-upload the data file.
Once your data file is validated, you will see a popup, ‘Validation Complete’ which tells you about the changes that will be made e.g., how many records will be added.
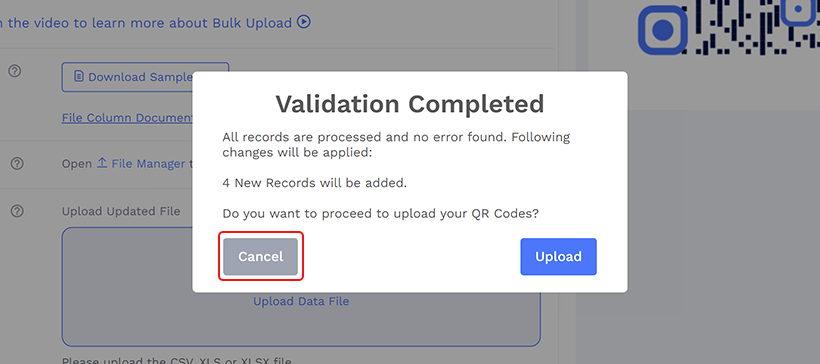
Step 13: Click ‘Cancel’ to upload another data file.
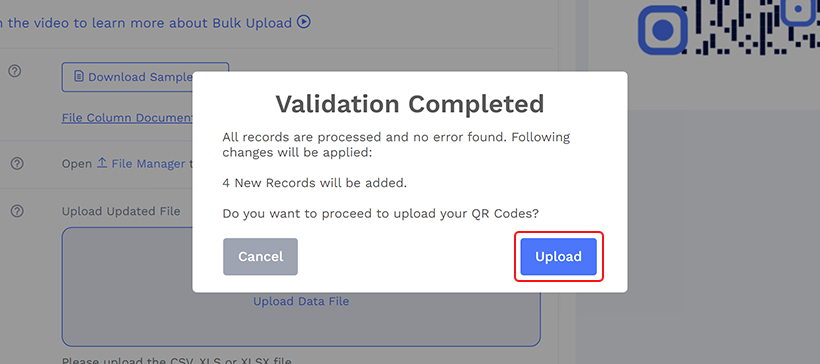
Step 14: Click ‘Upload’ to continue.
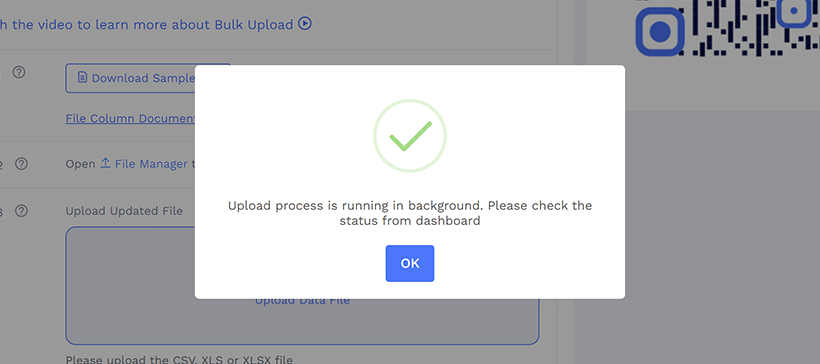
Step 15: You will see a popup ‘Upload process is running in background. Please check the status from dashboard’. Click ‘OK’.
You will be taken to the ‘QR Codes Bulk List’ page, where you can see the progress of your bulk.
This process might take a few minutes. Wait for a while and click ‘Refresh’ to check the status.
Once the cards are generated, you will see options to download, edit, decorate, and more.
To understand the details of this procedure, visit Step-by-Step Process To Create Digital Business Cards in Bulk.
How to distribute digital business cards to employees
After creating your bulk, you are at the second step of digital business cards deployment. QRCodeChimp’s business cards offer versatile distribution options. You can easily share them via email or other communication methods. Visit the dashboard, click ‘Bulk QR Codes’, and then identify your bulk. Now follow either of the options below ways:
1. Download QR codes in bulk and share individually
Step 1: Click ‘Download’ in the Action column, select your desired file formats, and click ‘Download’.

Note: Optionally, click ‘Add name below QR’ to avoid misplacing QR codes.
Step 2: Share the downloaded QR codes with your team members via email or other platforms.
2. Extract QR code URLs from Excel and share individually
Step 1: Click the three dots (more options) and then click ‘Download QR Excel’.

Step 2: Open the Excel file and copy the QR code URLs.

Step 3: Share the URLs with your team members via email or other means per your organization.
3. Export links for NFC
Step 1: Click the three dots (more options) and then click ‘Export links for NFC’.

Step 2: Share the exported URLs with your team members.
Step 3: If creating NFC business cards, embed these links into the respective cards.

By following these steps, you can efficiently distribute your custom virtual business cards to your employees.
Note: The URLs in the QR Excel file and Export links for NFC are the same.
Important elements to include in business cards for employees
To make your company’s business cards attractive, we recommend you add the following elements to them:
Employee information: Add the name, designation, and a picture of the employee. You can also add their profile summary or bio in the ‘About Me’ section.
Company information: The virtual business cards should include the company’s name and website. Adding a blog or other helpful resources for the audience is also a great idea.
Contact information: Add the employee’s business phone number and professional email address. Add the company’s email address, postal address, and Google Maps location.
Social network links: Depending on your company and industry, add social or professional links such as LinkedIn, Twitter, YouTube, Facebook, Instagram, and more.
Multimedia: If relevant, add PDFs, presentations, images, and videos to your employees’ virtual business cards.
Branding: Make the best of customization features and make the cards truly yours. Add the company logo and choose a template that suits you best. You can also enforce your brand identity by adding colors and fonts according to your brandbook.
Collect Contacts Form: Add forms to your business cards and make contact exchange easier.
How to update digital business cards in bulk
Updating your digital business cards in bulk is a simple process that can save you time and effort. Whether you need to modify contact details, add new cards, or update templates for your entire team, it can be done in just a few minutes.
Please refer to our guide here. This guide covers all the necessary steps to efficiently manage your digital business cards without repeating the same content. This guide will help you with:
- Editing the contents of digital business cards in bulk
- Adding new digital business cards to an existing bulk
- Editing the template and adding new sections to digital business cards in bulk
How to manage individual digital business card information update requests
When an employee gets promoted or needs to update their information on a digital business card, you don’t need to use bulk edits. Instead, sharing edit access is a practical solution.
You can allow any person within your organization to easily edit their digital business card without affecting the rest. With business cards managed in bulk, you can adjust data in the ‘Content’ tab, such as names, contact details, job titles, and more.
Follow the process below to share edit access to an existing bulk:
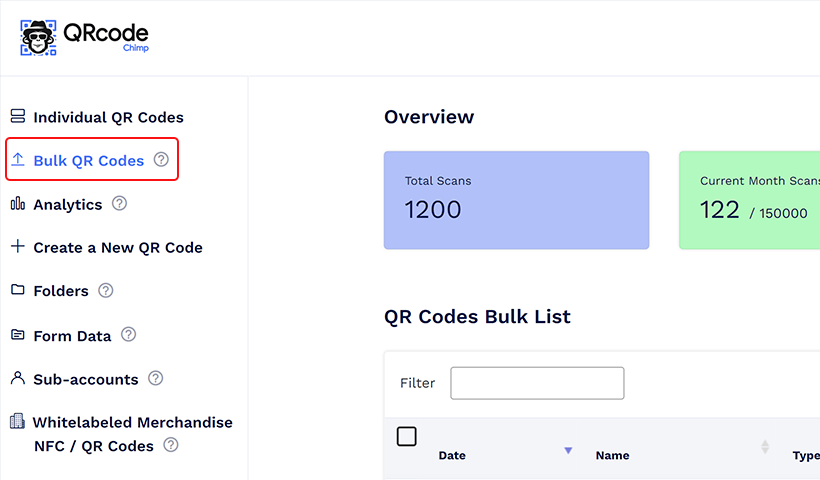
Step 1. Visit the dashboard and then click ‘Bulk QR Codes’ on the left panel.
Step 2. Identify the bulk you want to share edit access with and click ‘more options (3 dots)’ in the Action column.

Step 3. Next, click the ‘Share Edit Access’ option.

Here, you have three options:

- Primary email in the card profile
Primary emails of all business cards will receive an email with shared edit access. - “Edit Access Email” column in the uploaded Excel
The respective email addresses will receive an email with shared edit access. - Remove all the existing access (if other options are checked, this action is executed first)
Step 4. Select an option and click ‘Share’.
(For Bulk QR codes, the edit access will permanently be restricted)
The cardholder will receive an email with a link to edit access. Once they click on the link for the first time, they will be asked to set the password and then will be redirected to the edit page of the digital business card.
For detailed instructions on how to share edit access, please refer to our guide here.
You can manage your business cards easily with two methods:
1. Sub-accounts
With sub-accounts, you can enable different departments within your organization to manage their digital business cards independently.
A retail chain with multiple stores can use sub-accounts to allow each store manager to create and manage digital business cards for their staff. This ensures that all cards align with the company’s branding but are tailored to each store’s specific needs.
To understand sub-accounts better, go through Enhance QR Code Management with Multiple Sub-Accounts.
2. Folders
Folders help organize digital business cards by department, project, client, or other categorization method, making them easier to manage and access.
You can use folders for your organization to categorize digital business cards by the categories you find convenient.
Learn more about folders by reading Folders for Your QRCodeChimp account.
How to pause or delete the digital business cards of ex-employees
If an employee leaves your organization or is on a temporary leave, you can easily delete or disable their business cards. Let’s check how.
Disable a digital business card from bulk
Step 1: Go to the dashboard and click ‘Bulk QR Codes’ in the left panel to access ‘QR Codes Bulk List’.
Step 2: Identify the bulk that contains the card you want to disable or pause. Click ‘View All’ in the Action column.
Step 3: Identify the digital business card that you want to disable or pause. Click ‘More Option (three dots)’ and then ‘Pause’.
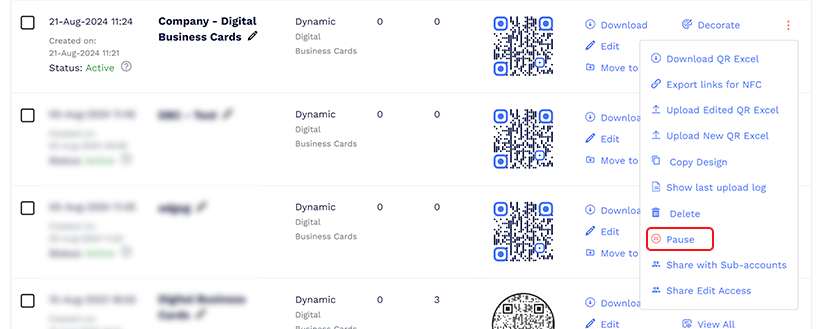
That’s all. You can see the card with the status ‘Paused’.
You can enable or reactivate it using the same process. Click ‘More Option (three dots)’ and then ‘Activate’.
Delete a digital business card from the bulk
Step 1: Go to the dashboard and click ‘Bulk QR Codes’ in the left panel to access ‘QR Codes Bulk List’.
Step 2: Identify the bulk that contains the card you want to delete. Click ‘View All’ in the Action column.
Step 3: Identify the digital business card that you want to delete. Click ‘More Option (three dots)’ and then ‘Delete’.

Step 4: You will see a popup asking for confirmation. Click the ‘Delete’ button. The deleted digital business cards will be moved to ‘Trash’.
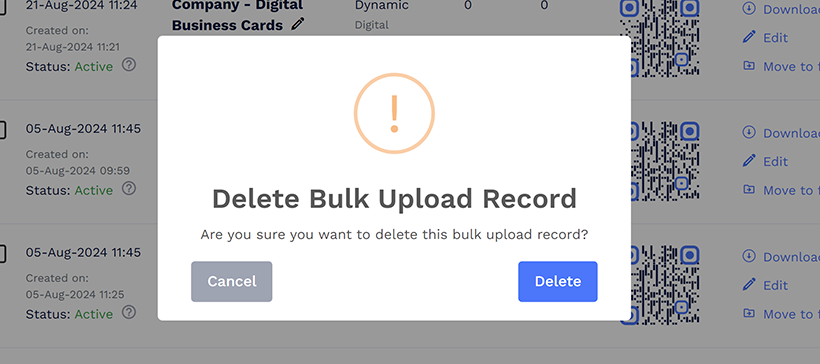
Note: To see this card, visit the ‘Trash’ page and click ‘Bulk Uploads’ at the top right. You can restore, view, or delete permanently in the’ Action’ column.
Digital business cards in the trash will be deleted permanently after 30 days of deletion.
Best practices for digital business cards deployment across organizations
Create a prototype of your business cards with QR codes
First, create a prototype, and then design and print it. Further, test your prototype QR code with different devices.
If it meets all your requirements, make a bulk copy of that business card.
Create bulk based on your requirements
Create bulk based on various categorizations for easy management.
You can create bulk based on departments, seniority, locations, etc. If you want some business cards to be passcode-protected, create them in one bulk.
If some teams want to add forms, create their cards in a different bulk.
Analytics and reports
You can access analytics and track the performance of your virtual business cards. You can check timeline analysis, hour-wise analysis, and day-wise analysis. Further, you can check the device, browser, and geo analysis.
You can also check the top-performing QR codes and locations.
Note: The locations traced here are based on the scanner’s IP.
To best use analytics, read A Complete Guide to QR Code Analytics.
Use NFC cards
Your business cards with QR codes are versatile. You can take an NFC card and embed your digital profile link to it to have an NFC business card.
With NFC cards, you can share your business card by tapping the card on the back of someone’s NFC-enabled smartphone.
Learn more about NFC cards with NFC Business Cards: A Comprehensive Guide.
Take the next step
QRCodeChimp offers a powerful solution for streamlining networking within your organization.
With digital business cards deployment, you empower your team with efficient tools and enhance your professional image. Schedule a free consultation with a QRCodeChimp expert to explore how this innovative approach can revolutionize your networking strategy.
The future of business cards is here!
Frequently asked questions
What are digital business cards?
Digital business cards are virtual versions of traditional business cards that can be shared electronically. They can include more detailed personal and professional information and can be easily updated without reprinting.
How do digital business cards benefit my organization?
Digital business cards provide several advantages, such as easy sharing without physical contact, quick updates, detailed information, customization, lead collection, and more to match your brand. They also support eco-friendly practices by reducing paper waste.
What should I consider when choosing a digital business card plan?
Consider the number of cards needed, the monthly scan limit, desired features (such as analytics and support levels), and whether you need white labeling for branding purposes.
What support is available for deploying digital business cards?
QRCodeChimp offers various support options depending on the plan you choose. You can also schedule a meeting with our experts for customized plans or additional details.
How long does it take to set up white labeling?
The white labeling setup process can take up to 2 business days after receiving your email. Contact us for detailed instructions and support.
You may also like
Step-by-Step Process To Create Digital Business Cards in Bulk
Learn how to use a bulk QR code generator to create and distribute personalized digital business cards for your entire team.
QR Codes for Public Transport: Making Travel Faster and Easier
Want to see how QR codes for public transport can transform passenger experiences? Dive into this blog to discover their smart use cases, major benefits, and some real-world uses.
From Booking to Boarding: How QR Codes for Airline Streamline Digital Aviation
Discover how QR codes for airline transform airport experiences - from digital boarding passes and seamless airport navigation to digital staff IDs and smart baggage tracking.
How to Create YouTube QR Code: The Complete Easy Guide
Learn how to create a YouTube QR Code with our easy, comprehensive guide. Also, discover how the tool enhances views and boosts engagement on your YouTube channel.
Most Popular
Contact Sales
