Created a stunning email signature? The next step is to add it to your email account. Here’s a quick tutorial for adding an email signature in Gmail, Outlook, Apple Mail, and Yahoo! Mail accounts.
Let’s get started.
📝 Note: The steps to add an email signature may vary over time as email providers update their platforms. For the most up-to-date instructions, please refer to your email provider’s official documentation.
💡Before you start: Want to add your QRCodeChimp Digital Business Card to your email signature? Learn how
How to add an email signature in Gmail?
Follow these steps to update your email signature in Gmail:
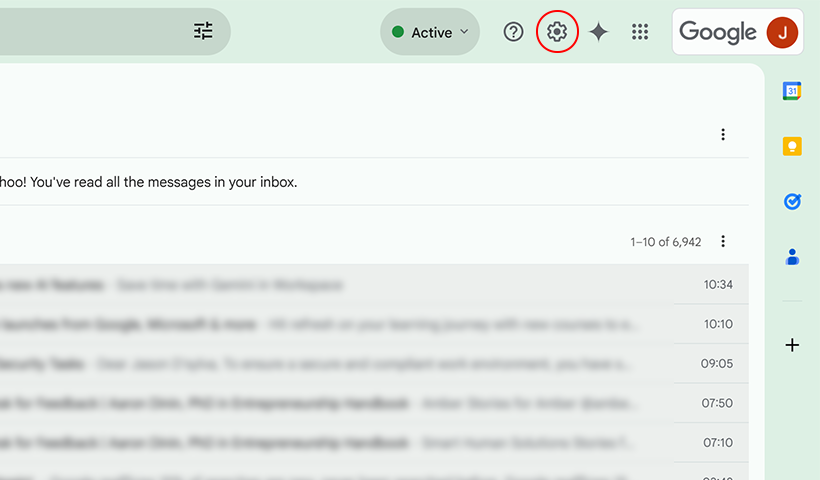
Step 1
Log in to your Gmail account and click on the Settings icon in the top right. The Quick Settings menu will appear.
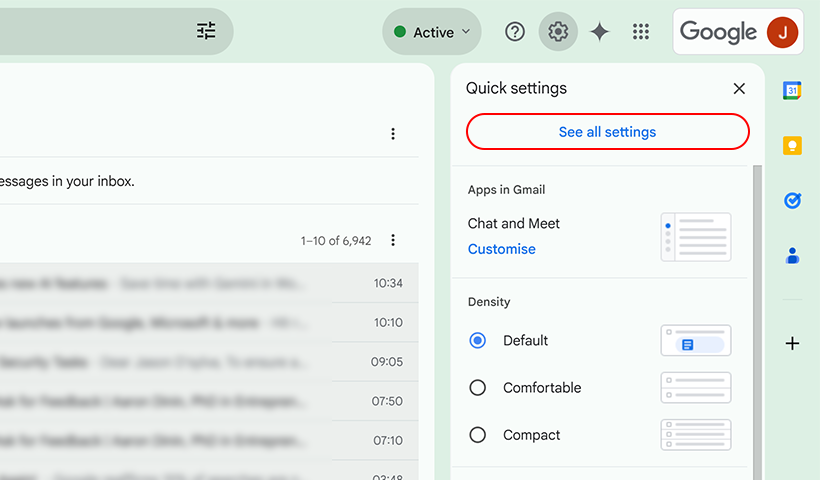
Step 2
Click on ‘See All Settings‘ to open the complete settings page.
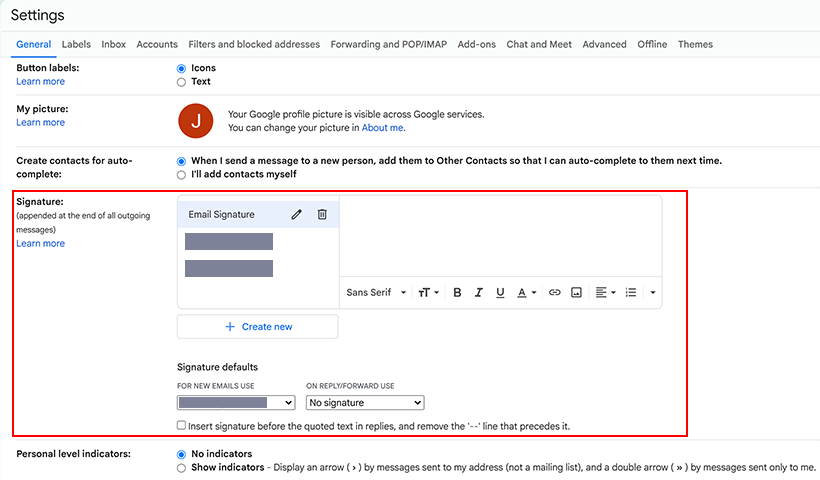
Step 3
In the ‘General‘ tab, scroll down to the Signature settings.
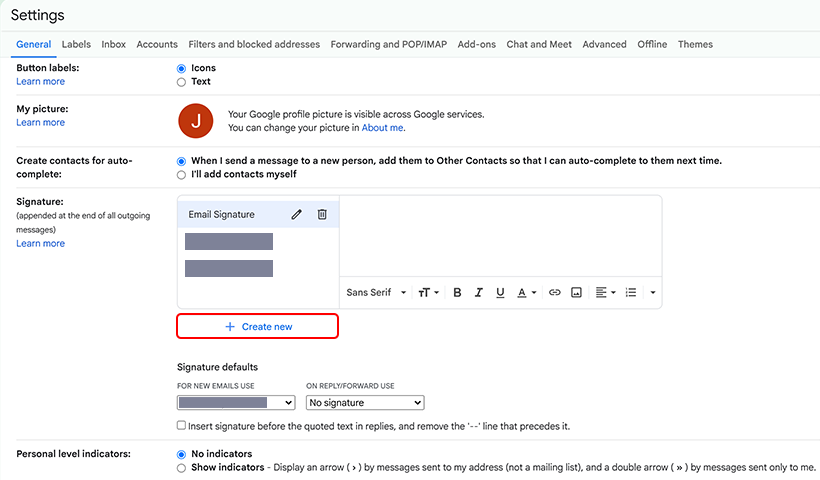
Step 4
Click ‘+ Create new’, give your signature a name, and click “Create.” A new signature will be added to your Signatures section.
Step 5
Add your email signature to the email signature field box.
To insert an image, click the Insert Image button and upload the file.
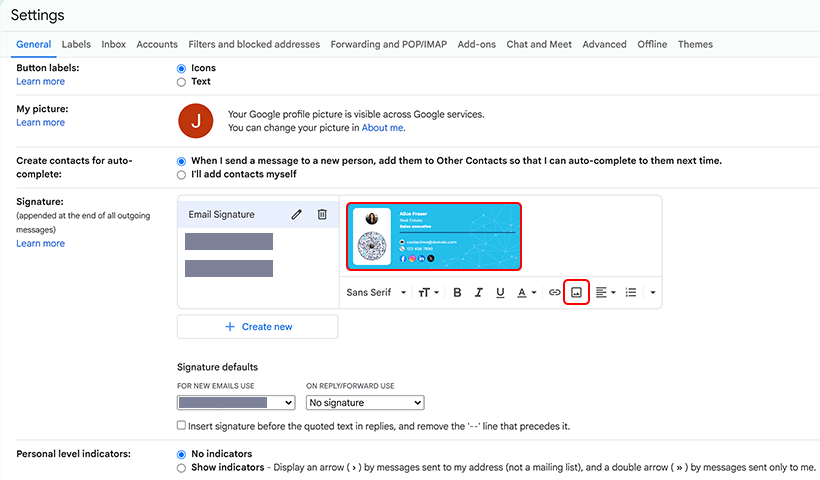
If you have copied a signature, paste it directly into the signature box.
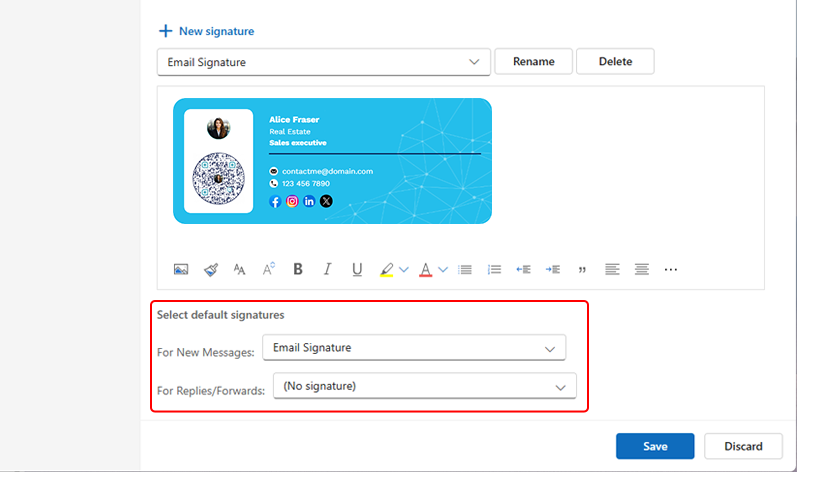
Step 6
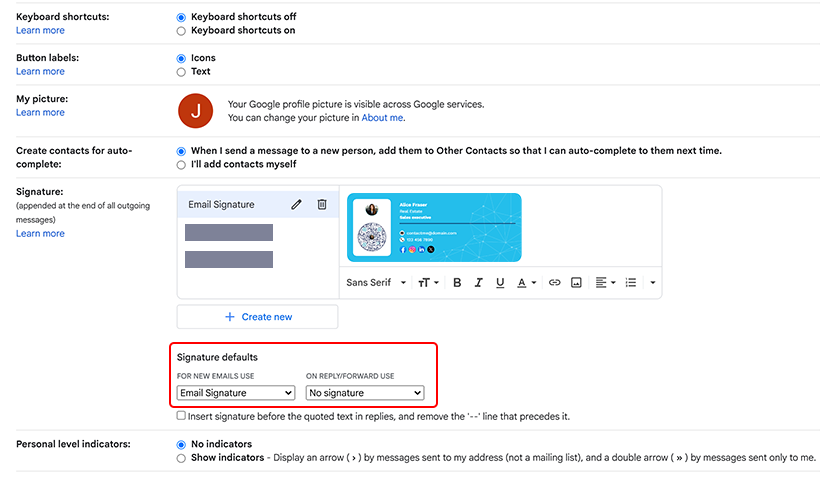
In the Signature defaults section, select the email address and the email signature you want to use in ‘FOR NEW EMAILS USE’ and ‘ON REPLY/FORWARD USE‘ dropdowns.
Step 7
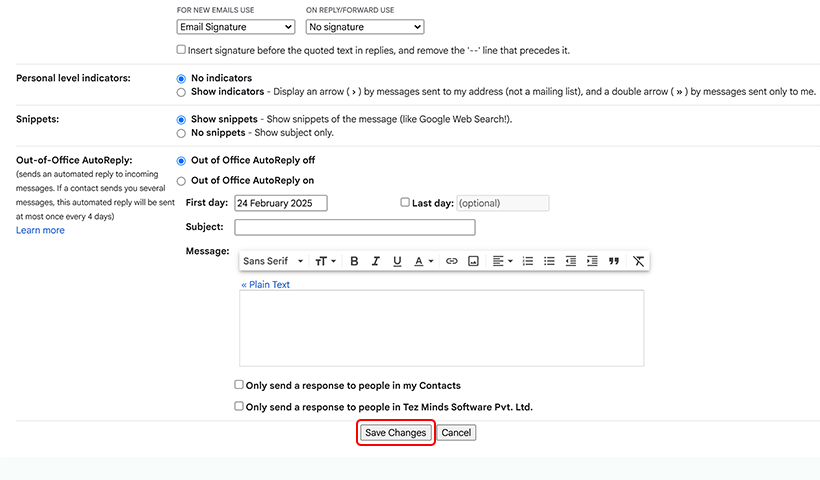
Click “Save Changes.”
That’s it! Your email signature is now updated.
📌Note: If you experience any changes in the steps mentioned above, you may refer to Gmail help here: Create a Gmail signature

How to add an email signature in Outlook (Microsoft 365)?
Follow these steps to add an email signature in Outlook.
Step 1
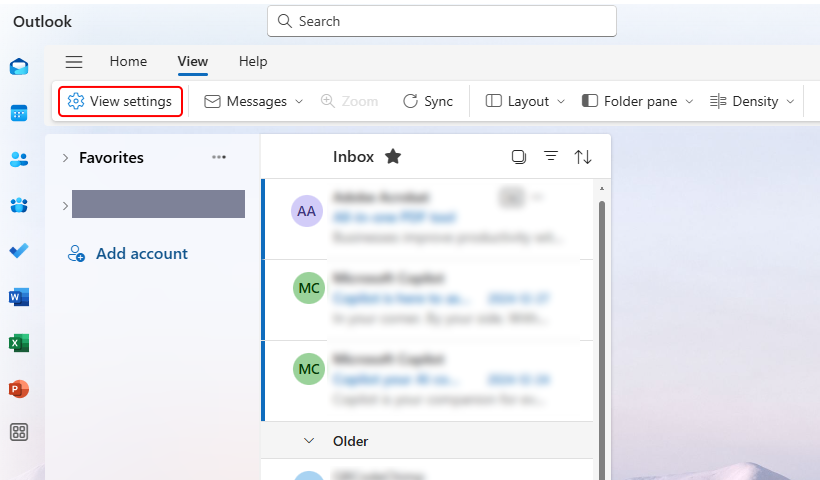
Log into your Outlook email account and click ‘View Settings’ under the View menu.
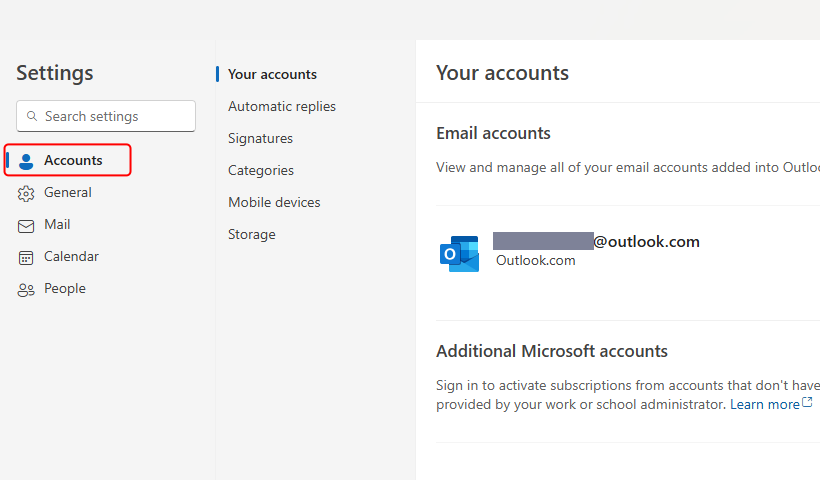
Step 2
The Outlook email settings will open in a new popup. Click ‘Accounts’, and the ‘Your accounts’ section will appear.
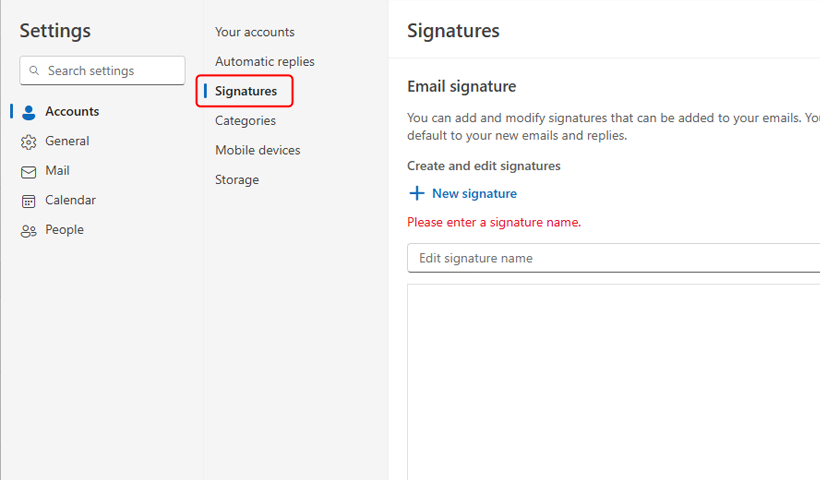
Step 3
Click ‘Signatures’ to open the signature settings, then click ‘+ New signature’. Enter a name for your new signature in the ‘Edit signature name’ box.
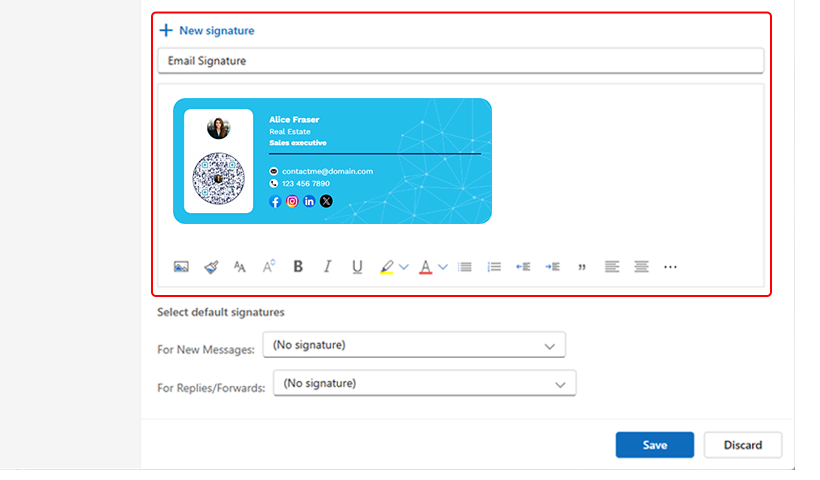
Step 4
Add your signature content in the box below the ‘Edit signature name’ box.
To add text, type directly into the ‘Edit signature’ section. To add an image, either copy and paste it or click ‘Insert picture inline’ to upload an image from your local storage.
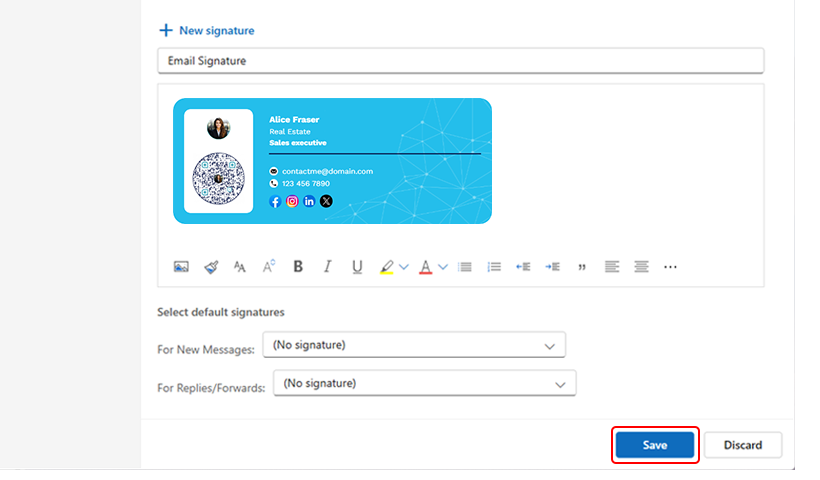
Step 5
Click ‘Save’ to save your signature.
Step 6
In the ‘Choose default signatures’ section, select the email account to which you want to add the new signature. If you want it to be added automatically, choose your newly saved signature in the ‘For New messages’ and ‘For Replies/Forwards’ drop-down menus.
Click ‘Save’ again to apply the changes.
That’s it! Your email signature is now added to your Outlook email account.
📌Note: The steps mentioned above are for the Outlook version “1.2025.213.300 (Production)”. If you experience any changes in the steps, you may refer to Outlook help here: Create and add an email signature in Outlook
How to add an email signature in Apple Mail?
Follow these steps to add an email signature in Apple Mail:
Step 1
Open the Mail app on your Mac and log into your email account.
Step 2
Click Mail > Preferences, then navigate to the Signatures tab.
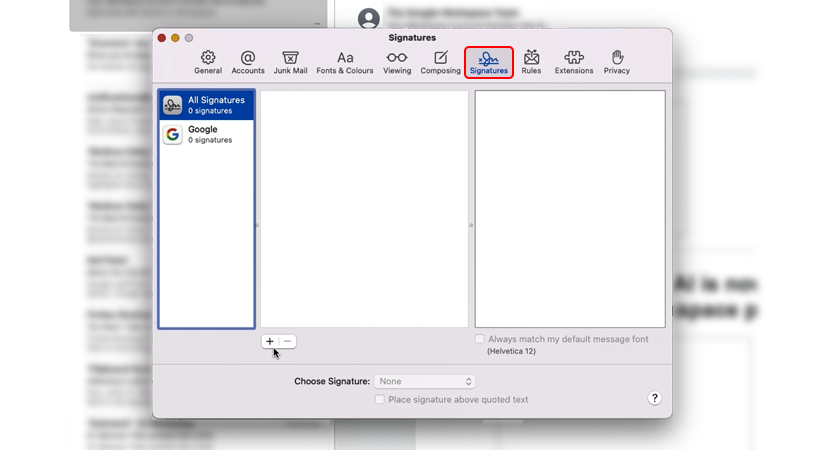
You’ll see all your connected email accounts listed in the left column.
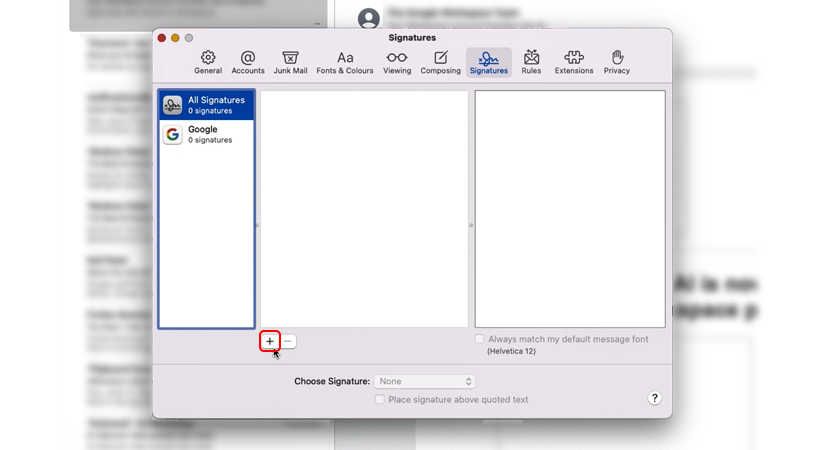
Step 3
Select the account to which you want to add the signature, then click the “+” icon to create a new signature.
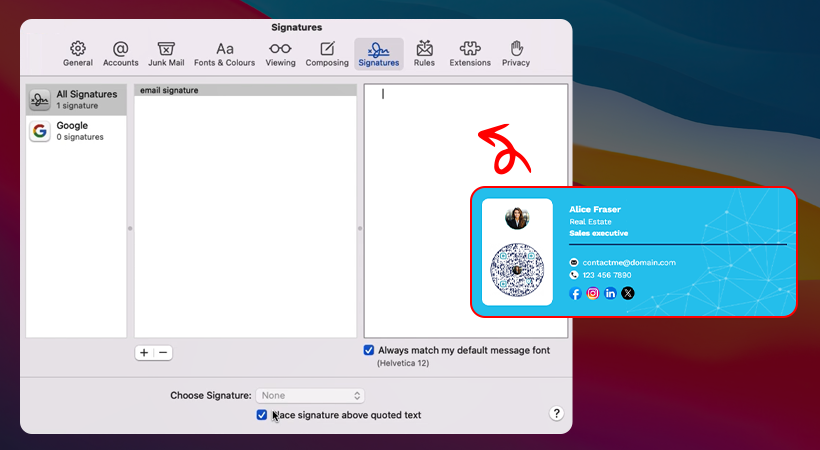
Step 4
Remove the default signature text and add your email signature. To add an image, drag your signature image into the preview area.
Step 5
Choose the desired signature from the “Choose signature” dropdown menu.
That’s it! Your email signature is now updated.
📌Note: If you experience any changes in the steps mentioned above, you may refer to Apple Mail help here: Create and use email signatures in Mail on Mac
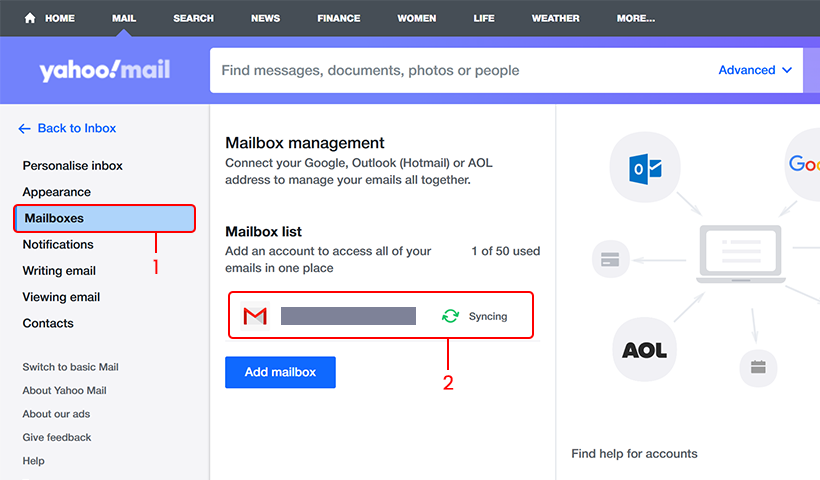
How to add an email signature in Yahoo! Mail?
Follow these steps to add a signature in Yahoo! Mail:
Step 1
Log into your Yahoo! Mail account and click on the Settings icon.

Step 2
Click on “More Settings.”
Step 3
Head to “Mailboxes” in the left menu and select your email address.
Step 4
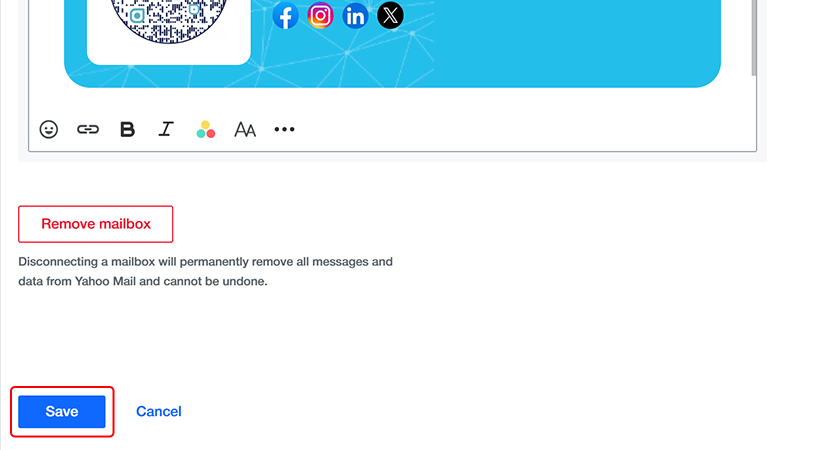
Scroll down and click on the “Signature” box. If the section isn’t accessible, enable it first.
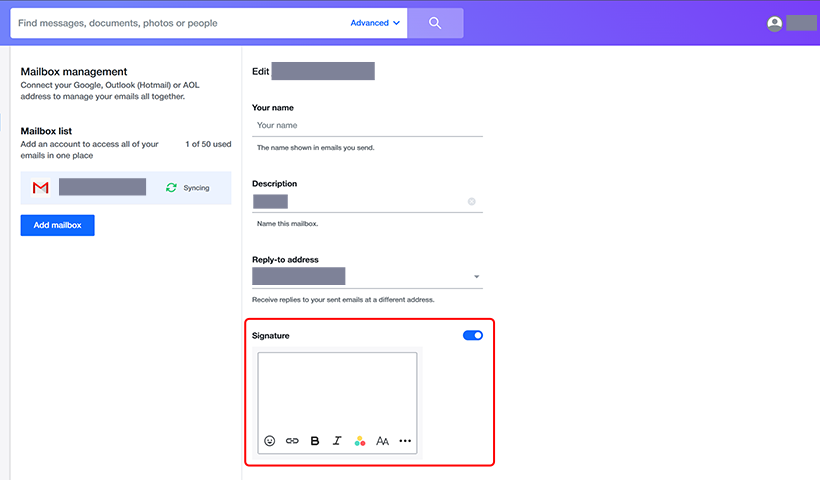
Step 5
Add your signature in the signature box.
Yahoo! Mail doesn’t allow you to attach images in the signature box. But you can directly paste the image in the signature box.
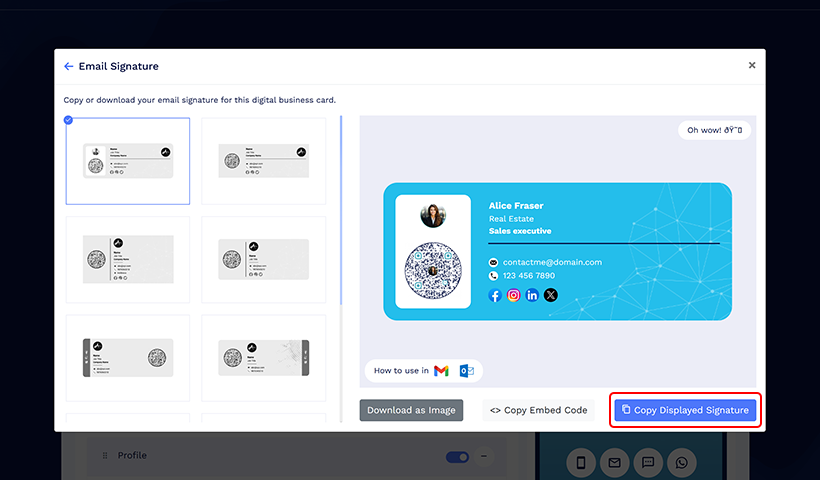
When you create an email signature in QRCodeChimp, you can copy the image by clicking ‘Copy Displayed Signature.‘
If you have an image on your local storage, you need to host the image online on any image hosting site (like Imgur), copy the image, and paste it into the signature box.
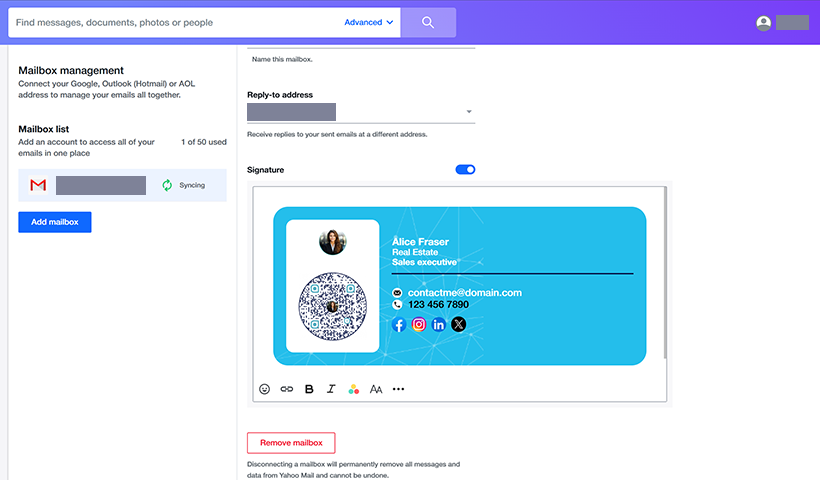
Step 6
Click on “Save” to save your changes.
That’s it. The email signature will be added to your Yahoo! Mail account.
📌Note: If you experience any changes in the steps mentioned above, you may refer to Yahoo Mail help here: Add, edit, or disable your email signature in the Yahoo Mail app
Use your HTML signature across the internet
QRCodeChimp also provides the HTML code of your email signature. You can use the code across channels to share your contact details and increase awareness.
Let’s say you have a blog and want to show your email signature on the homepage. All you need to do is copy the embed code and paste it into your website’s HTML code.
Similarly, you can use the embed code on landing pages and other destinations that support HTML.
You may also like
QR Codes for Public Transport: Making Travel Faster and Easier
Want to see how QR codes for public transport can transform passenger experiences? Dive into this blog to discover their smart use cases, major benefits, and some real-world uses.
From Booking to Boarding: How QR Codes for Airline Streamline Digital Aviation
Discover how QR codes for airline transform airport experiences - from digital boarding passes and seamless airport navigation to digital staff IDs and smart baggage tracking.
How to Create YouTube QR Code: The Complete Easy Guide
Learn how to create a YouTube QR Code with our easy, comprehensive guide. Also, discover how the tool enhances views and boosts engagement on your YouTube channel.
What is a Social Media QR Code and Why You Should Have One?
Take audience to all your social media accounts with a single QR Code Nothing screams 'engagement' and 'visibility' more than social media marketing. Furthermore, Social Media QR code is the smartest way to bring the audience to the real action. Other...
Most Popular
Contact Sales
