First-party data is a reliable business resource that boosts the company’s revenue and operations. 92% of top marketers see first-party data as essential for growth. Unlike external data sources, organizations collect and own first-party data, giving them control over what information is gathered from their audience.
If you are in a business, you would know the importance of first-party data and how challenging it is to gather in the offline world. QRCodeChimp’s Form QR codes are a fantastic way to enable firsthand data collection directly from your offline customers.
What is first-party data?
First-party data is information collected directly from customers. As a result, it is highly accurate and reliable. This includes, but is not limited to, their demographics, contact details, preferences, satisfaction with your products and services, suggestions, and other basic details.
Companies and marketing agencies use surveys, polls, and cookies on websites to collect first-party data. This often requires large amounts of resources and money.
How to make a QR Code to collect first-party data
Visit QRCodeChimp’s solution page and select ‘Form QR Code’ to create your own Form QR code. Continue reading for step-by-step guidance.
Step 1: Customize page URL (optional)
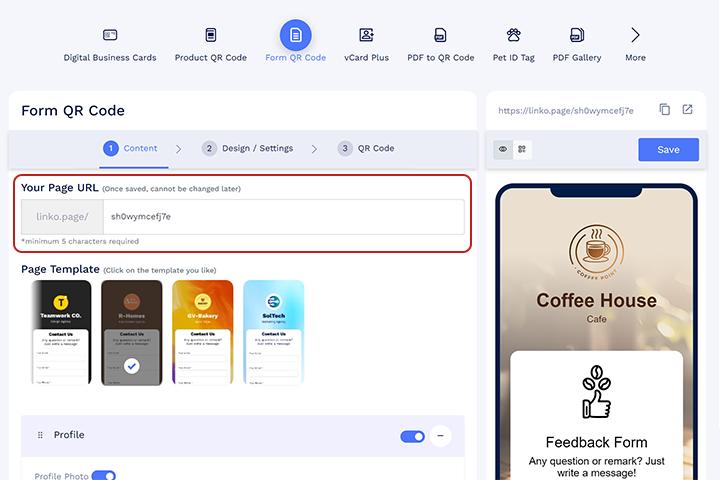
Edit your URL in the ‘Your Page URL’ section.
Step 2: Select the page template
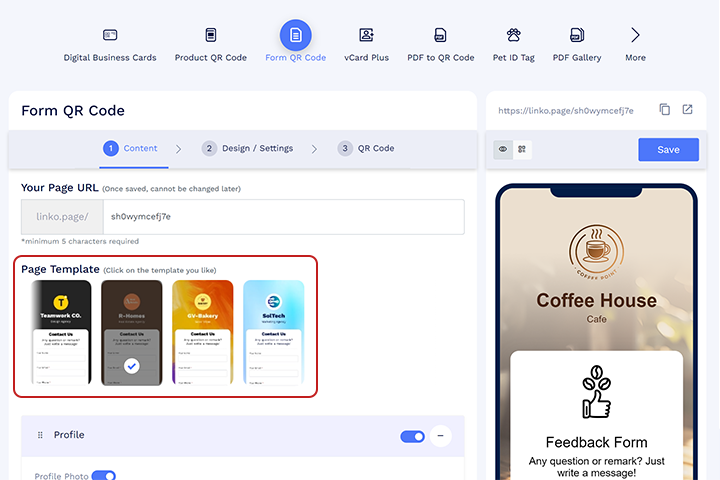
Select the suitable page template that aligns with your requirements.
Step 3: Fill out the profile section
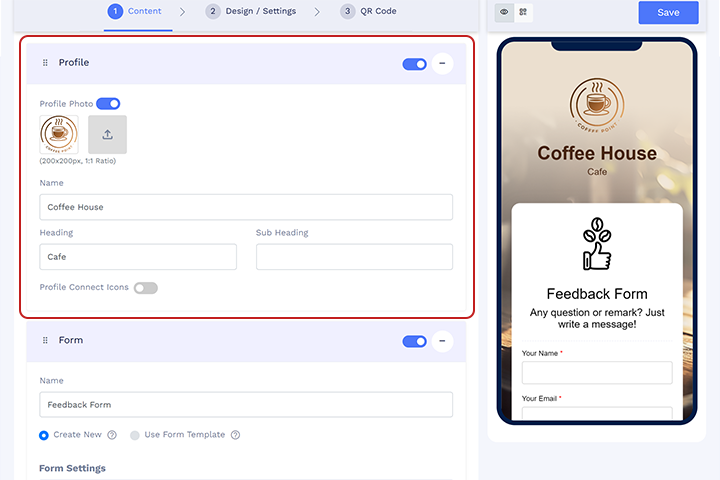
In this section, you can add the following profile details to give your customers essential information about your company.
- Add a profile photo: You can upload a photo to the form by clicking on the upload icon.
- Enter your company name: Fill out the name field with your company name.
- Add headings and subheadings: Include any headings or subheadings you want.
- Add profile connect icons (optional): Enabling profile connect icons allows you to add your e-mail, phone, WhatsApp number, and more. Customers can then contact you directly by clicking on it.
Step 4: Create your form
You have two options to create a form. We will discuss both methods separately.
Provide a name for your form by filling in ‘name.’ Click on ‘Create New’.
Select your form type under form settings. By default, it will be ‘Inline.’ You have the option to change it to ‘overlay’. You can unclick ‘Don’t show this form multiple times to the same user’ to show your form multiple times to a user after submission.
Customize your form content
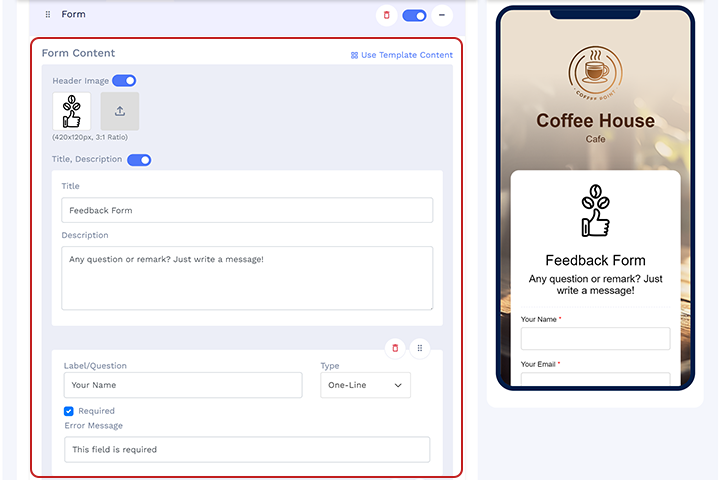
Customize your form content by adding a header image, title and description, and your form input fields.
- Header image: To add a header image, click on ‘header image’ and upload a suitable image that reflects your form or business. You can turn it off if you don’t want your form to have a header image by clicking on the ‘Header Image’ radio button.
- Title and description: You can give a title and description for your form by filling in the title and description. If you don’t want your form to have a title and description, you can turn it off by clicking on the ‘Title, Description’ radio button.
- Add your input fields for the form: Enter your input fields in the label/question section. Choose the type of answer needed from the ‘Type’ dropdown. For example, select ‘one line’ for names and ’email’ for email addresses.
Note: You can add more questions/input fields by clicking the ‘add’ button. And delete input fields by clicking on the delete icon.
You can also use pre-designed form templates to create your form. These templates come with filled-out questions and answer formats. After selecting the form template, you can easily customize the input fields by adding or removing questions as per your requirements.
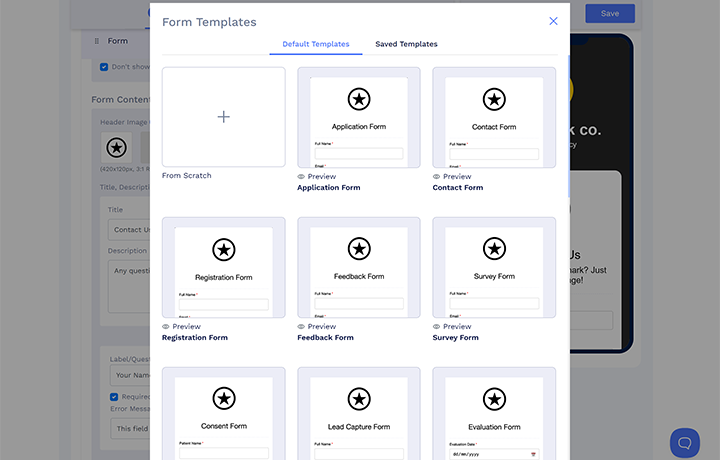
Select your form type and add a header image, title, and description by following the steps Method 1.
Edit your input fields: Check the input fields and response formats that have already been provided in the form template. If needed, edit your questions/input fields in the label and question section.
You can add more questions by clicking on the ‘add’ button. And delete questions by clicking on the delete icon.
Step 5: Update your terms and conditions
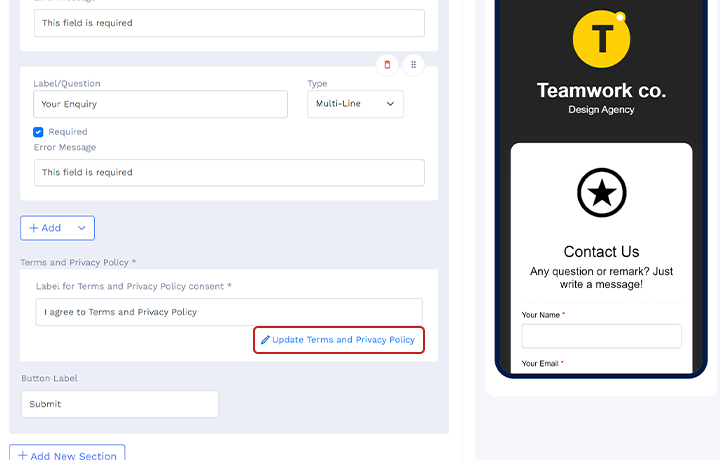
Providing and updating terms and conditions for collecting data through Form QR code is essential.
Click on ‘Update terms and privacy policy’ to update your terms and conditions. Provide support e-mail, a description of your terms and conditions, a privacy policy, etc. After updating, click on save.
Step 6: Provide a completion message
The completion message shows after a customer fills out the form. You have two options here.
- Option 1: Shows a message like ‘Thank you for your response’. Click ‘Toast’ and add your message to the description to show this kind of message.
- Option 2: Redirect customers to your website. Click on ‘Pop-up,’ add a heading, description, and a call-to-action text, and provide your website link in the ‘link.’
Step 7: Design and settings
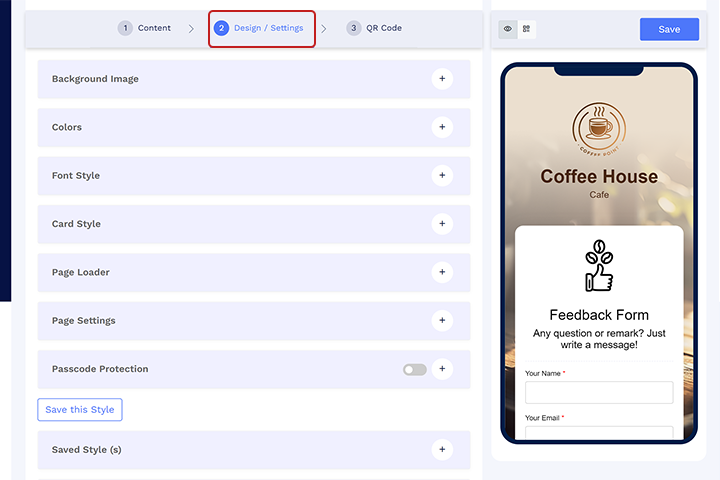
You can design your forms by choosing the perfect font style and colors to match your brand or create a unique look. Additionally, you can add a background image or even a video from available images and video formats. This will provide a visual appeal to your form.
Step 8: Customize your QR code (Optional)
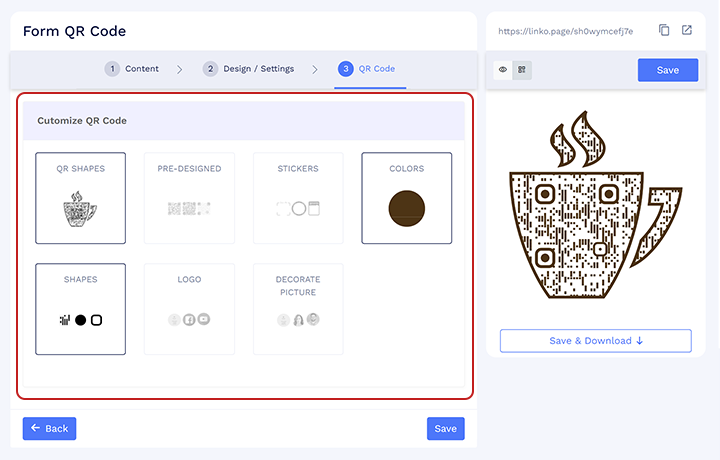
You can customize your QR code by clicking on the QR code. It is possible to make a unique QR code by adding a logo, shapes, and stickers to your QR code.
Step 9: Save and download
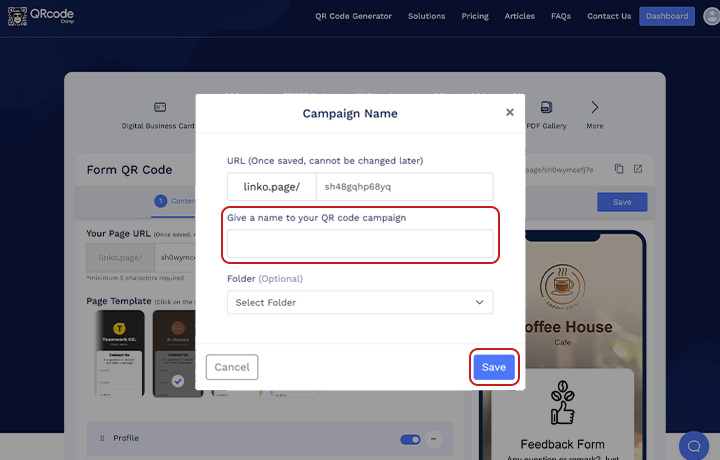
To save your form QR code, click on ‘Save,’ provide the name of your QR code, and select a folder to save it in.
You can go to the dashboard of your QRCodeChimp account to download your Form QR code at any time.
How to view and export the Form QR code responses
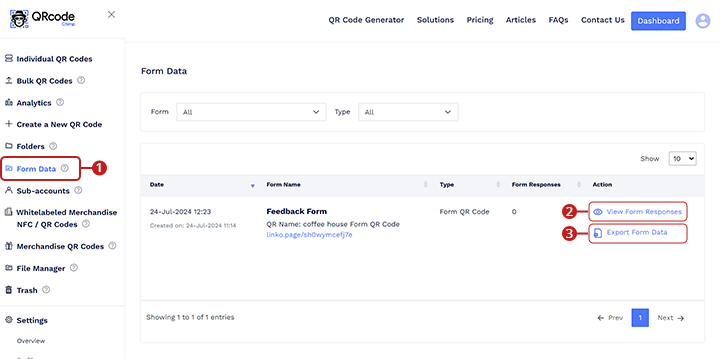
Collecting and analyzing responses through the Form QR code is straightforward. Your data is saved in your QRCodeChimp dashboard and can be exported anytime. Follow these steps to view and export your first-party data:
- Go to QRCodeChimp’s dashboard and click ‘Form Responses.’ You can access a list of all your form QR codes hereby form QR code name and creation date.
- Click ‘View Responses’ to see the collected responses.
- To export the collected responses, click ‘Export Responses’ and download the data as an Excel sheet.
Important considerations when creating a Form QR code for collecting first-party data
QRCodeChimp’s customization options for questions and answer types improve the customer experience.
- Terms and conditions: Update and provide your terms and conditions with your supporting e-mail while creating your form QR code. Detailed terms and conditions with a privacy policy can build trust with your customers.
- Required questions: Mark certain questions as ‘required’ to prevent blank responses and ensure respondents cannot submit the form without answering them.
- Prevent multiple submissions: You can prevent multiple submissions of your form QR code from a single user by clicking ‘Don’t show this form multiple times to the same user’ in the form settings.
 Learn more: QRCodeChimp offers the option to integrate forms with various QR code solutions, making it easier to collect first-party data through your marketing campaigns. Read the article How To Use Forms With Various QR Code Solutions to know more.
Conclusion
Collecting first-party data is essential for any business looking to grow and attract new customers. With QRCodeChimp’s Form QR Code, this process becomes easy, secure, and efficient. By designing, creating, and analyzing your forms all in one place, you can gather valuable insights directly from your customers without relying on external sources.
QRCodeChimp’s Form QR code offers a range of customizable options, from designing the form to setting required questions, ensuring you get the precise data you need.
Frequently Asked Questions
How to create a Form QR Code?
You can create a form QR code by using QRCodeChimp’s Form QR Code solution. Read the above article for step-by-step guidance.
Can I use the Form QR code exclusively?
Yes. You can use your form QR code exclusively by adding a password to it. As a result, only those with the password can view and submit your form QR code.
How can I ensure respondents complete all required questions on the form?
You can mark certain questions as ‘required’ to ensure respondents cannot submit the form without answering them. This prevents blank responses and ensures you receive complete data.
Why is QRCodeChimp’s Form QR Code the best in the market?
You can collect first-party data using QRCodeChimp’s Form QR code. You can use the extensive form builder and professional templates for no additional cost. Additionally, you can integrate form QR codes on digital business cards and business QR codes. This feature allows you to design, create, and analyze forms all in one place without the need for external sources like Google Forms.
You may also like
QRCodeChimp’s Analytics Dashboard: A Step-by-step Guide
A guide to QRCodeChimp’s analytics dashboard. Leverage the unique advanced features and metrics to optimize your marketing campaigns.
Google Analytics and QR Codes – Tracking & Optimizing Performance
Learn how to monitor QR code analytics with Google Analytics. Our step-by-step guide helps you track QR code performance, optimize strategies, and measure ROI for effective marketing campaigns.
Why You Should Add a Digital Business Card to Your Email Signature
Turn every email into a branding tool by adding a digital business card in email signature. Stand out, drive traffic, and capture more leads.
Google Review Cards: A Detailed Guide
Step up your review game with Google Review Cards. Learn the ins and outs and how to create one for your business with our detailed guide.
Most Popular
Contact Sales
