Form QR codes are an efficient tool for generating leads. With a scan on their smartphones, a prospect can instantly fill out the digital forms and click the submit button. However, you could easily miss the leads, which would cost your business dearly if you don’t follow up on time after the form submission.
How about getting an SMS notification instantly on your phone whenever someone submits the form? With the SMS feature, you can instantly acknowledge the form submission and start a follow-up call to understand your prospect’s needs better.
This guide walks you through enabling and setting up SMS notifications for form submissions on the QRCodeChimp platform. If you’re already using email alerts, SMS notifications add an extra layer of responsiveness to keep you ahead.
Let’s get started!
How does SMS integration work in forms?
When someone scans a QR code to access a form, fills in the details, and submits it, an SMS notification is generated and shared with the contact number associated with the form.
SMS integration on QRCodeChimp is available at the account and individual form.
Setting up an SMS alert at the account level allows you to integrate a message alert automatically for all form QR codes. Businesses often use this method to enable SMS notifications, by default, for every form they create, regardless of different marketing campaigns.
On the other hand, an SMS alert at the individual form level allows you to enable a message notification for specific forms only and turn it off for others. This method is designed for businesses that prefer to use SMS notifications for selected form campaigns.
Depending on your needs, you can switch from one level to another.
 Explore more:
 Step-by-step instructions for SMS integration on QRCodeChimp
Here is the detailed step-by-step process for setting up SMS integration at the account and individual form levels on QRCodeChimp.
Method 1: At the account level
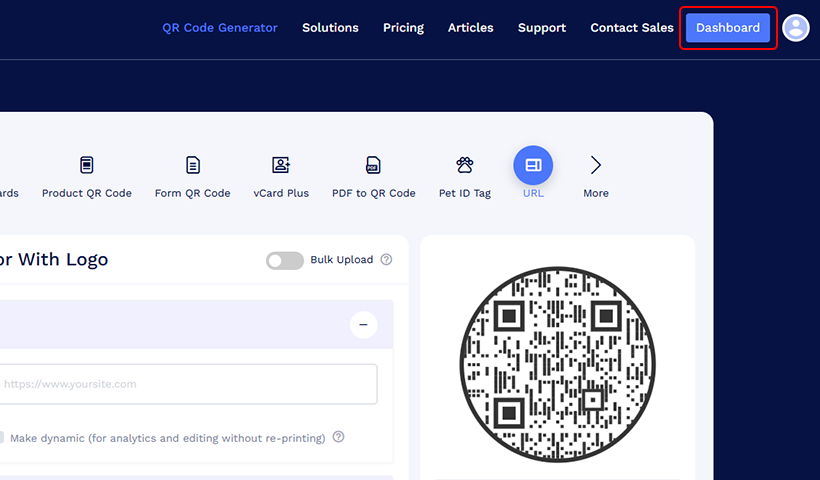
Step 1: Go to Dashboard
Log in to QRCodeChimp and navigate to ‘Dashboard.’
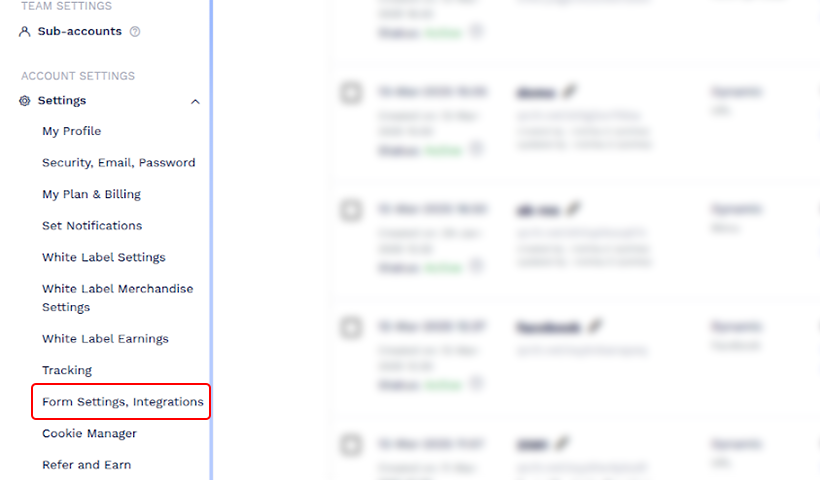
Step 2: Click ‘Form Settings, Integrations’
Find the ‘Form Settings, Integrations’ option under Account Settings on the sidebar and click it.
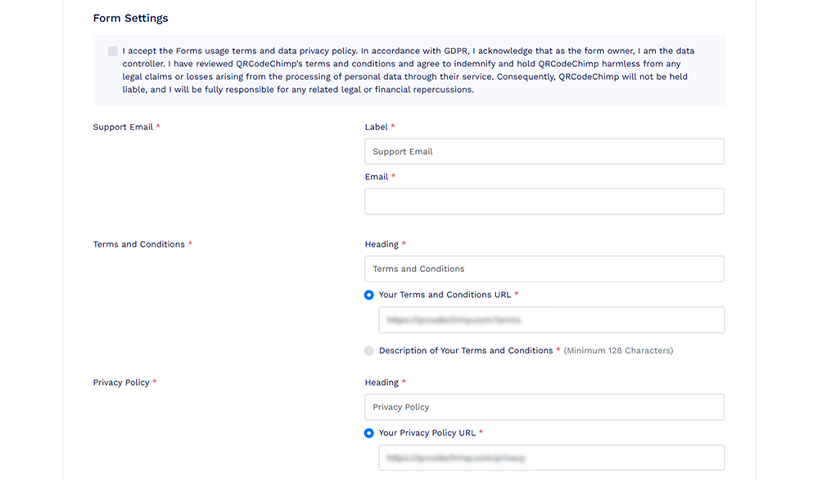
Step 3: Complete the Form Settings and Integrations
 Step 3.1 Form Settings
- Tick the checkbox to accept the QRCodeChimp’s terms and data privacy policy.
- Provide support email with a proper label.
- Add your terms & conditions and privacy policy.
- Save it.
Step 3.2 Form Integrations
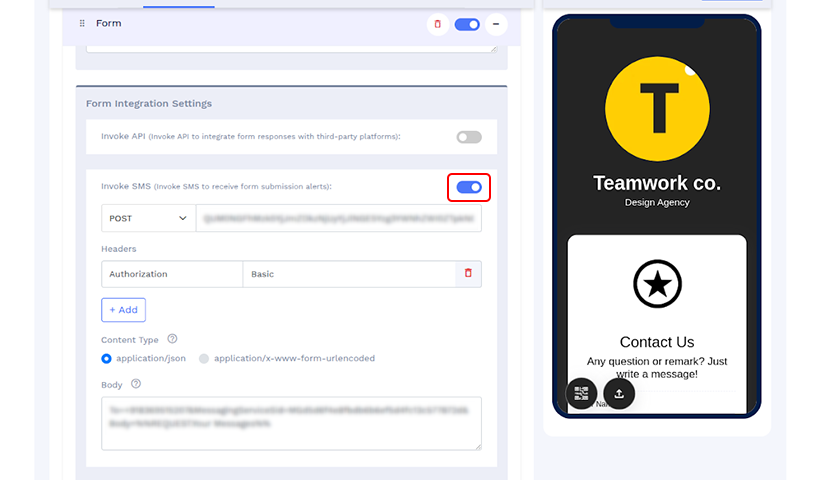
- Enable ‘Invoke SMS’ by turning on the toggle.
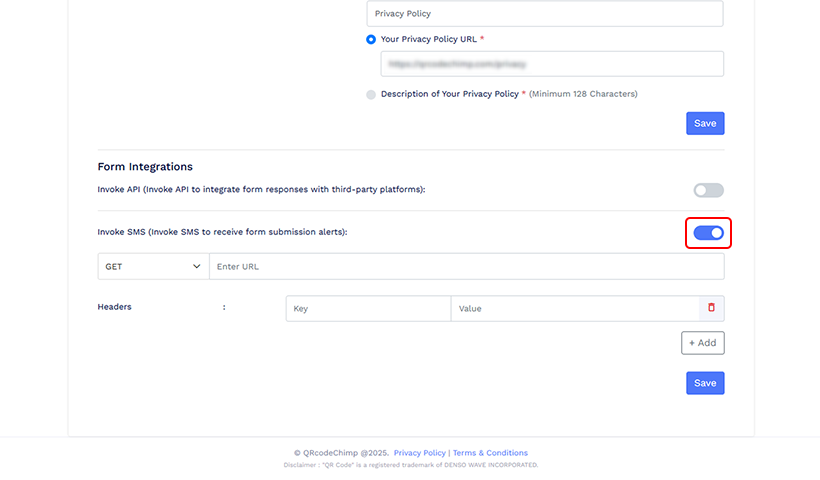
Step 4: Setting up Form Integrations
Select the HTTP methods: POST or GET. POST is used for real-time, customizable requests, while GET retrieves pre-configured data.
Note: Your SMS invocation service provider will provide the HTTP method. Talk to the service provider about SMS charges.
 Method 1: POST
- Select POST and enter the API URL.
- Enter ‘Key’ and ‘Value’ in the Headers section if your SMS service provider provides them (optional).
- Choose the content type: ‘application/json’ or ‘application/x-www-form-urlencoded’ as provided by your SMS service providers.
- Provide the syntax for the ‘Body’ section. Only a specific data format is used in the body.
- Save it.
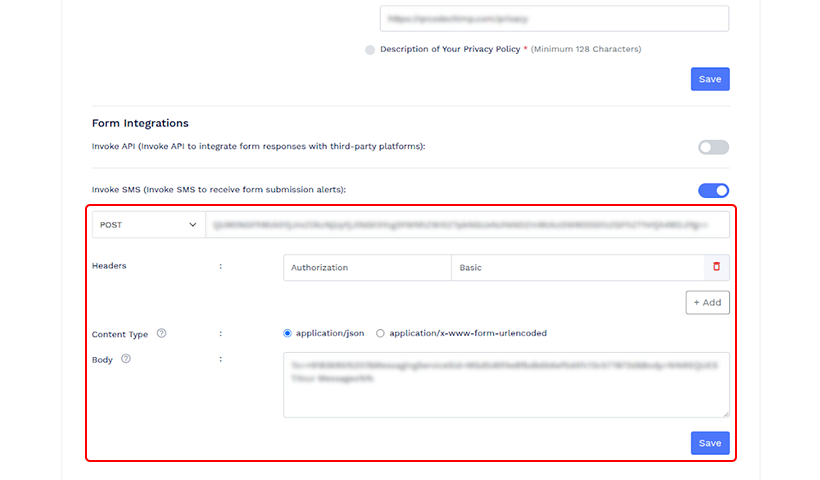
Notes: Under POST, you’ll get a dynamic API, which allows you to use dynamic body text (syntax) and content type to send data in the body to the servers.
To help you understand, we’ll explain Twilio (SMS service provider) and its syntax style. Again, syntax will vary from one service provider to another (due to different API systems). You may encounter different terminologies, such as ‘Receiver’ against ‘To’ and ‘Message’ against ‘Body’, that are used in various APIs.
Here is an example of Twilio’s syntax:
To=+19XXXXXXX10&MessagingServiceSid=MFd5d6f4e8fbdb6b6ef5d4f13c577872f&Body=%%REQUEST.Your Messages%%
Breakdown of each element/structure of the above example
3 sections
For providing the recipient’s phone number, messaging service provider ID, and body, each separated by ‘&’.
Recipient’s phone number
Scenario 1: If you, as the creator/owner of the QR code form, want to receive form submission notifications, provide your phone number. To do so, you must replace the ‘To’ section with your number. For example, if you’re a resident of the US and your number is +19XXXXXXX10, do this.
To=+19XXXXXXX10&MessagingServiceSid=MFd5d6f4e8fbdb6b6ef5d4f13c577872f&Body=%%REQUEST.Your Messages%%
Scenario 2: If you want to send an SMS notification to the user, confirming their successful form submission, you can do so. This is what you can do.
To=%%REQUEST.Your Phone%%&MessagingServiceSid=MFd5d6f4e8fbdb6b6ef5d4f13c577872f&Body=%%REQUEST.Your Messages%%
Note: Use the placeholder, and the label name given in the placeholder should exactly match the one in the form. Here, the example is “Your Phone” (label name).
Service ID
Different service providers use different terminologies. Some don’t provide a service ID at all. For example, Twilio uses the term “MessagingServiceSid” and “MFd5d6f4e8fbdb6b6ef5d4f13c577872f” is its service ID. You can replace them with the exact terminology and ID provided by your service provider.
Body/message
You can see a single placeholder “%%REQUEST.Your Messages%%” in the body or message section. This means the recipient will receive the information provided on the form’s “Your Messages” label. You can add additional information from users by creating multiple requests (placeholders). This is how to create numerous requests in the body section.
To=+19XXXXXXX10&MessagingServiceSid=MFd5d6f4e8fbdb6b6ef5d4f13c577872f&Body=%%REQUEST.Your Messages%% ; %%REQUEST.Your Email%%
Now, you’ll receive the user’s email address with the message. Alternatively, you can simply share a message with users like “Hi, you’ve successfully submitted the form.”
Note: Remember to keep the message short, as most SMS service providers allow 160 characters.
Method 2: GET
- Select GET and enter the API URL.
- Enter ‘Key’ and ‘Value’ in the Headers section if your SMS service provider provides them (optional).
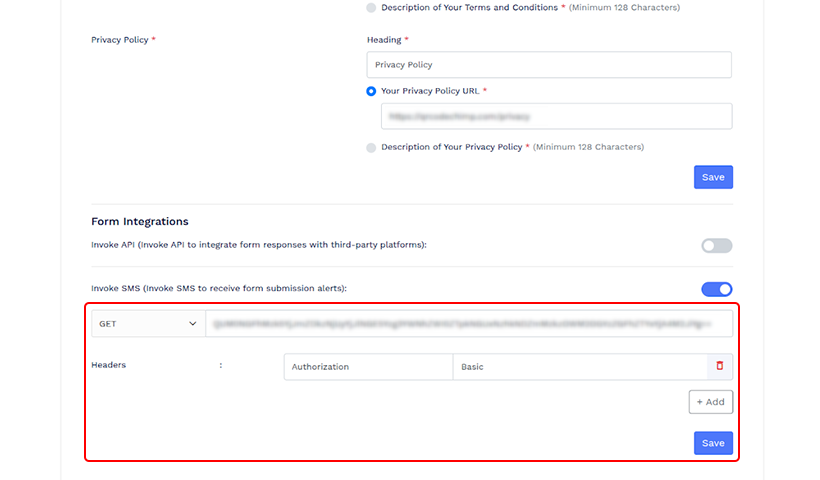
Note: The GET method has a static API (pre-generated information). The ‘Key’ and ‘Value’ are the sources for authenticating the API.
Step 5: Click on Save
Click ‘Save’ to complete the SMS integration for forms. Now, you’ve completed setting up SMS notification at the account level, and you’ll receive an SMS alert for every form submission.
Method 2: At the form level
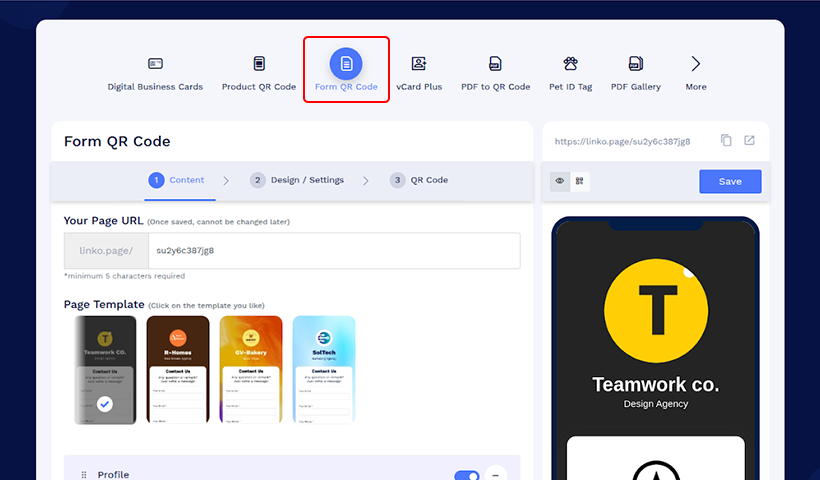
To integrate SMS at the form level, log in to QRCodeChimp and navigate to the form QR code solution.
Step 1: Create a form
Choose a form page from templates or create a new form by adding relevant questions/labels.
Read on: A complete guide to generating a form QR code for a detailed explanation of each step.
Step 2: Add a terms and privacy policy
Set the terms and privacy policy.
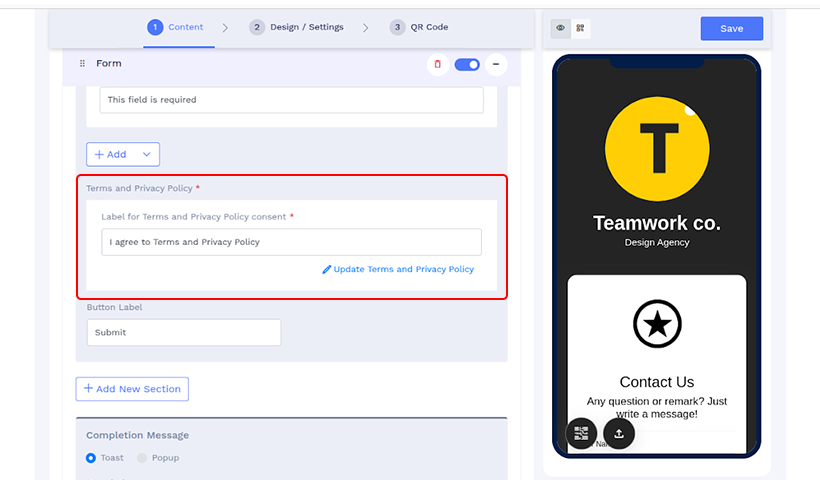
Note: If you have already added a privacy policy at the account level, you don’t need to add it here again.
Step 3: Enable or disable Invoke SMS under ‘Form Integration Settings’
You’ll see the ‘Invoke SMS’ toggle when creating a new form by default. The ‘Invoke SMS’ toggle activates SMS notifications for form submissions. If you don’t want SMS notifications for specific forms, turn off the toggle to disable the feature.
Note: The information will be pre-filled if you have already completed ‘Form Integration Settings’ at the account level.
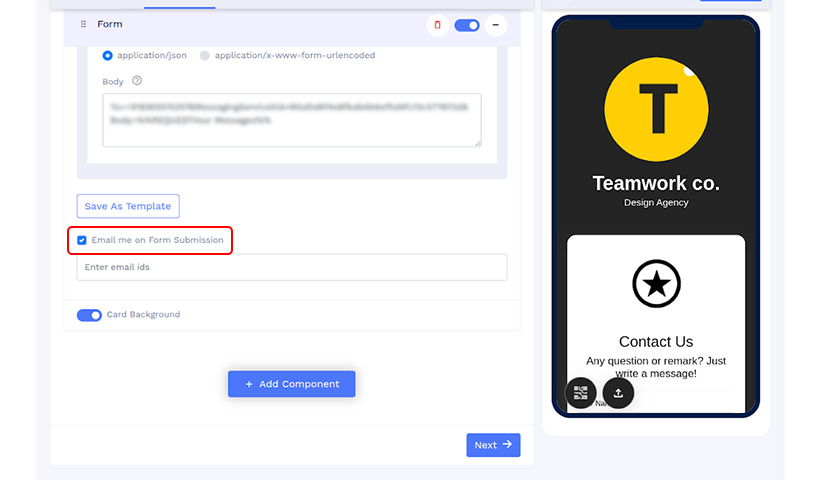
Step 4: Enable email notification
In addition to SMS, you can also enable email notifications for form submissions. Tick the ‘Email me on Form Submission’ checkbox to enable email notification.
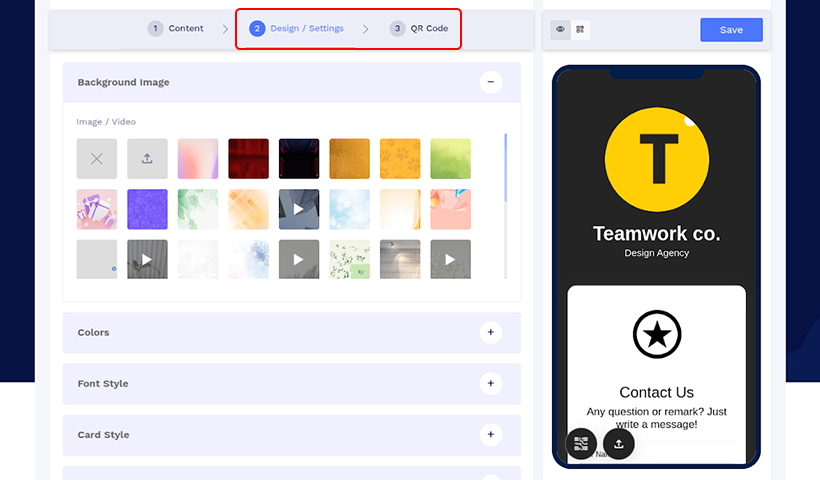
Step 5 (optional): Customize the form and QR code
To customize the form and QR code, click ‘Next’ to the ‘Design/Setting’ and ‘QR code’ tabs.
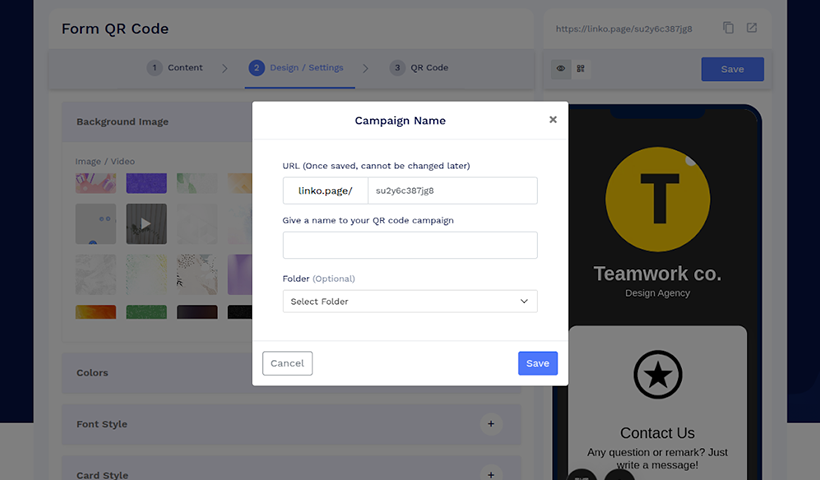
Step 6: Save it
Give a campaign name and choose a folder to save the form QR code.
How do you view or export form responses on QRCodeChimp?
On QRCodeChimp, you can view or export form responses collectively and individually. To manage the form responses, follow the steps:
Step 1: Go to Dashboard.
Step 2: Click ‘form responses’ under the Collected Data on the sidebar.
Step 3: Find the target form QR code and click ‘View Responses’ or ‘Export Responses.’
Step 4: Select the timeframe (a maximum of 92 days) for exporting the files. Give a file name and click ‘Export Responses.’
Step 5: A pop-up will appear, and click ‘Go to Downloads.’
Step 6: Your report is downloaded in an Excel file.
Conclusion
Enabling SMS notifications for form QR codes can streamline lead generation without missing a single opportunity. You can use the feature for target campaigns using a form-level option or automatically integrate it for all forms using an account-level method. With instant notification, businesses can speed up their follow-up processes and convert them from prospects into customers.
Frequently asked questions
Who will receive the SMS notification?
After the form submission, an SMS notification will come to the phone number integrated in the API or the syntax in the body. Also, users who submit the form can receive the notification.
What information should be included in the form for lead generation?
Name, email, and phone number are vital information that should be collected when using forms for lead generation. Include a “message” section in the form to know the user’s queries or needs.
You may also like
How to Save a Digital Business Card on iPhone and Android?
Want to know how to save digital business cards on your smartphone? Explore our article to learn the easy steps to save a digital business card on iPhone and Android.
The Ultimate Guide to QR Code White Labeling: Boost Branding and Conversions
If you're using QR codes, you need to stand out. Here's an ultimate guide to QR code white labeling, including how to set it up and it's benefits and best practices.
How to Create a White Label Digital Business Card?
This guide will walk you through creating a white-label digital business card to streamline your network and improve brand consistency.
A Complete Guide to QR Code White Labeling
QRCodeChimp offers white labeling to users with the Ultima plan and above. By enabling white labeling, you can use your company's domain (like info.MyBusiness.com) instead of the default scan URL and landing page URL. Here's all you need to know...
Most Popular
Contact Sales
