As a reseller, after good sales, you also want to ensure your customers are using the products happily. Once you have sold white labeled digital business cards, pet tags, or other merchandise, your users will activate and personalize their digital profile linked to the products. This process is called claiming the merchandise/products.
Providing a seamless claiming process for your customers enhances their experience with your whitelabeled merchandise. This guide walks you through the step-by-step process of how your customers can claim their whitelabeled digital business cards, pet tags, and Google Reviews QR codes for the first time. This process differs slightly from the non-whitelabeled merchandise claim process.
Whitelabeled merchandise QR code claim process
Your customers can claim their whitelabeled merchandise through a QR code, enabling them to personalize their product. Below is a breakdown of the process for each type of product.
How to claim digital business cards
When a user purchases a whitelabeled digital business card, they can claim it on a desktop by following these steps:
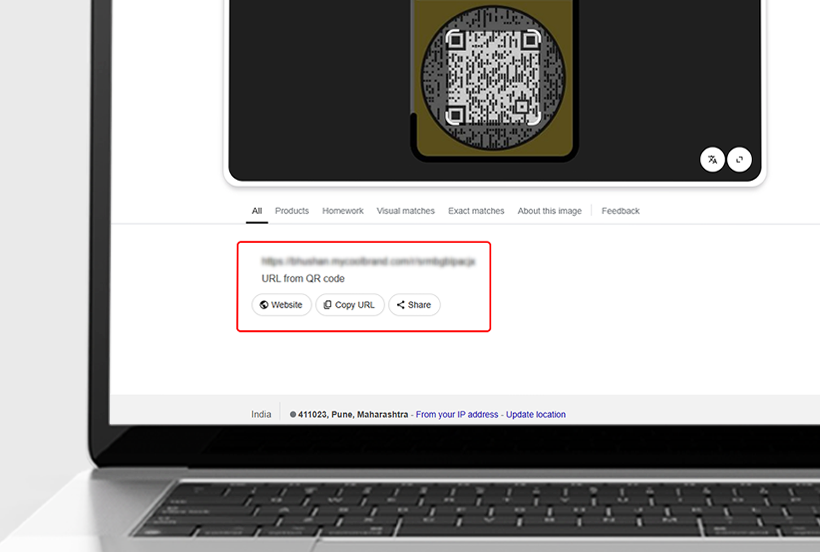
Step 1: Open the URL: The user visits the provided link to access the claim portal.
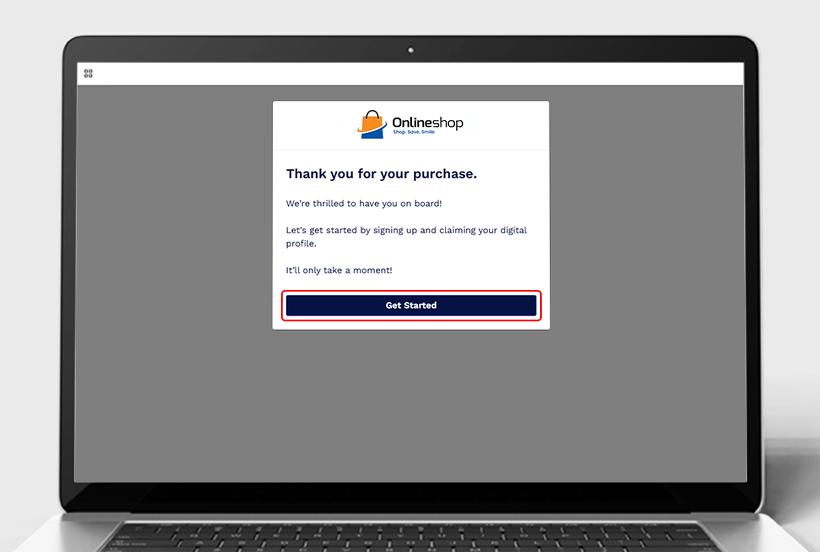
Step 2: Welcome Screen: A welcome message appears, prompting the user to begin the setup process.
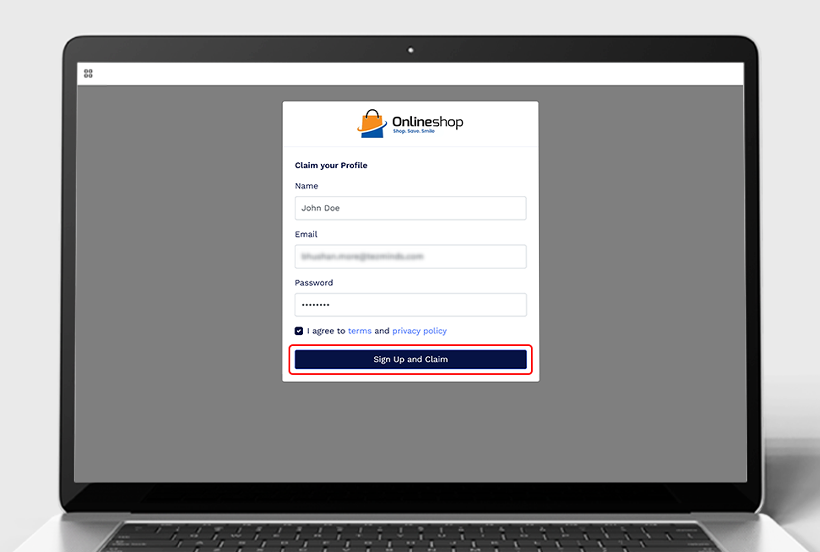
Step 3: Claiming Profile: The user enters name, email address, and password before clicking the Sign Up and Claim button.

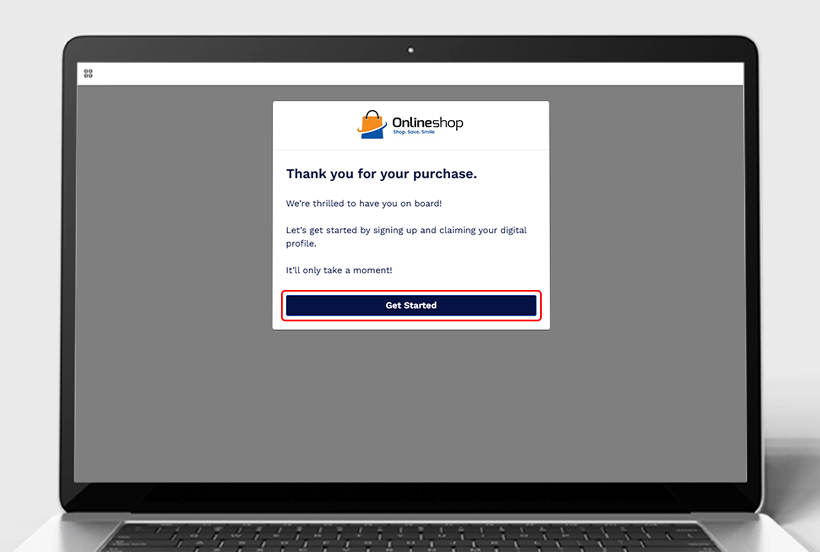
Step 4: Successfully Claimed Confirmation: The system confirms the digital business card has been successfully claimed.
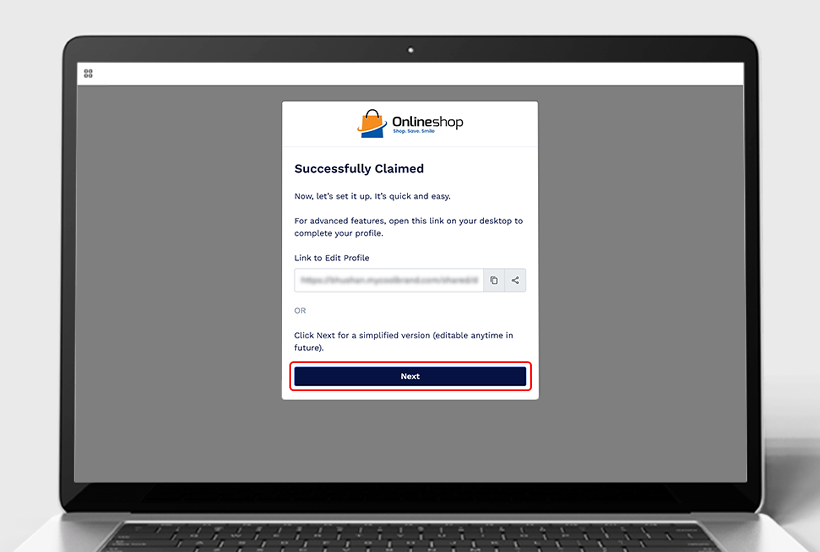
Step 5: Access the Dashboard: Once claimed, the user is redirected to the dashboard where they can begin personalizing their digital business card.

Step 6: Enter Contact Details: Users input name, job title, company, phone, email, and branding elements.
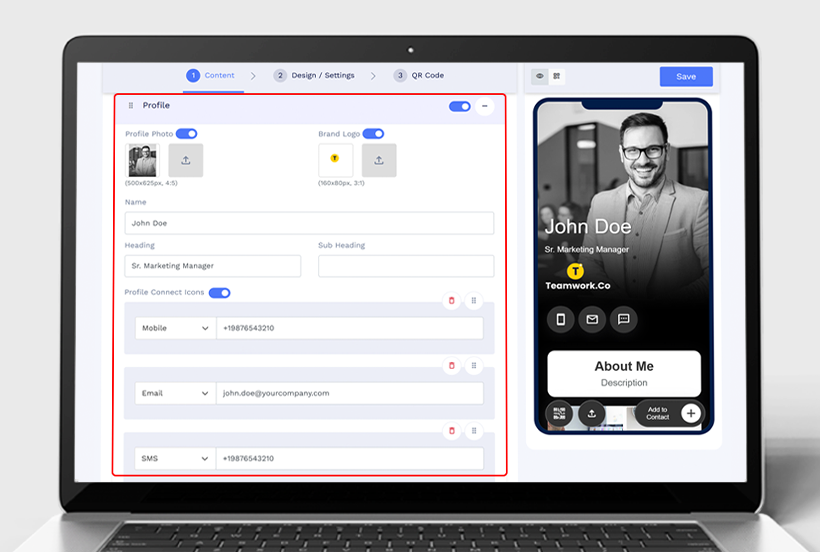
Step 7: Customize the Landing Page: Modify layout, colors, call-to-action buttons, and social media links.
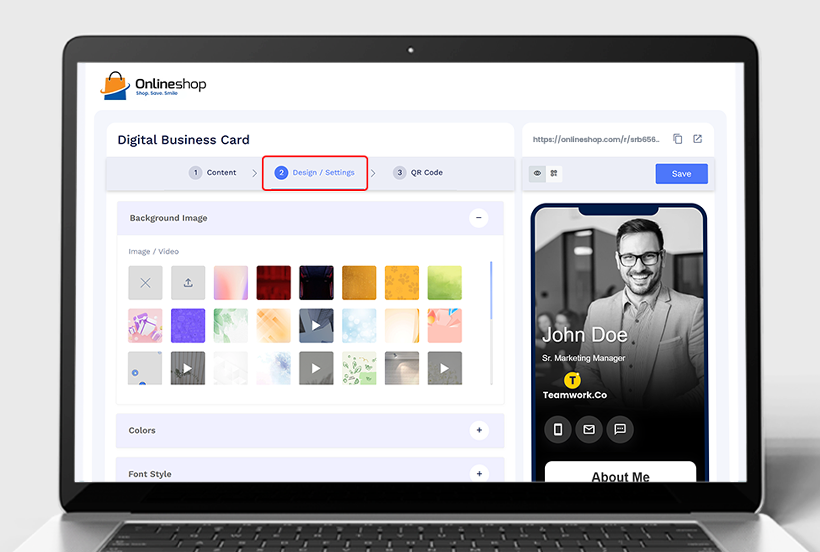
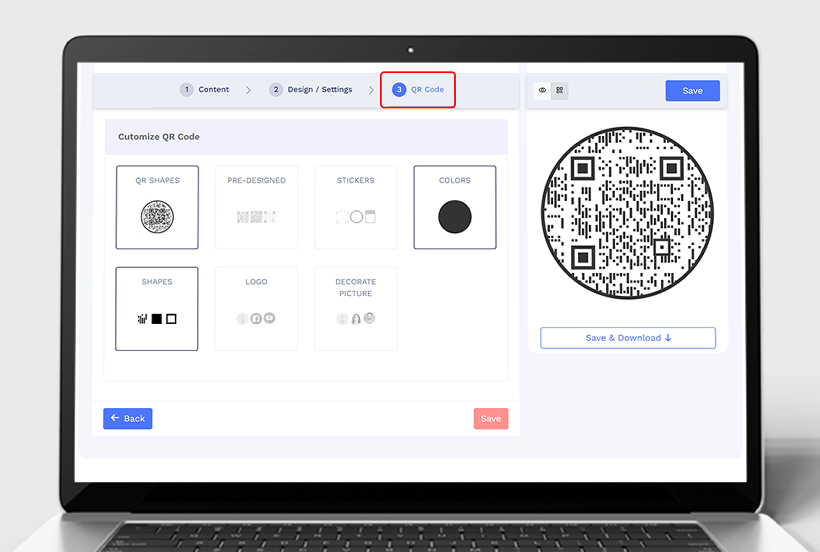
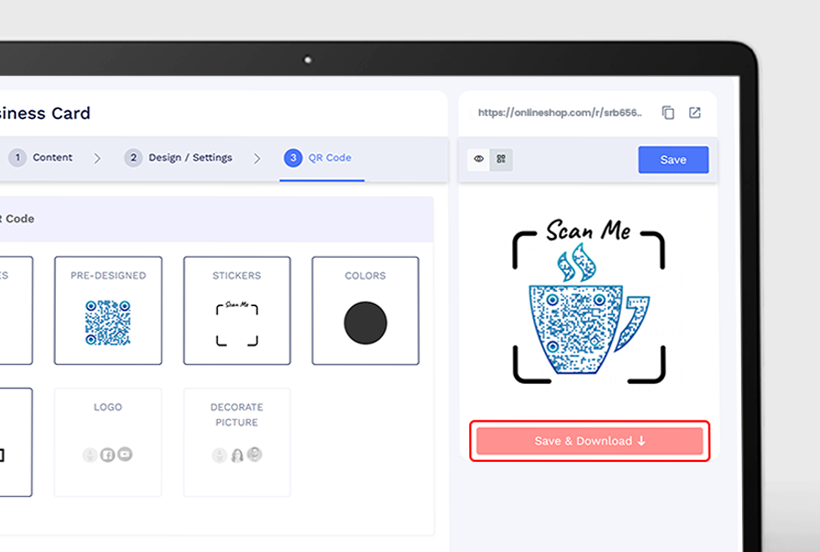
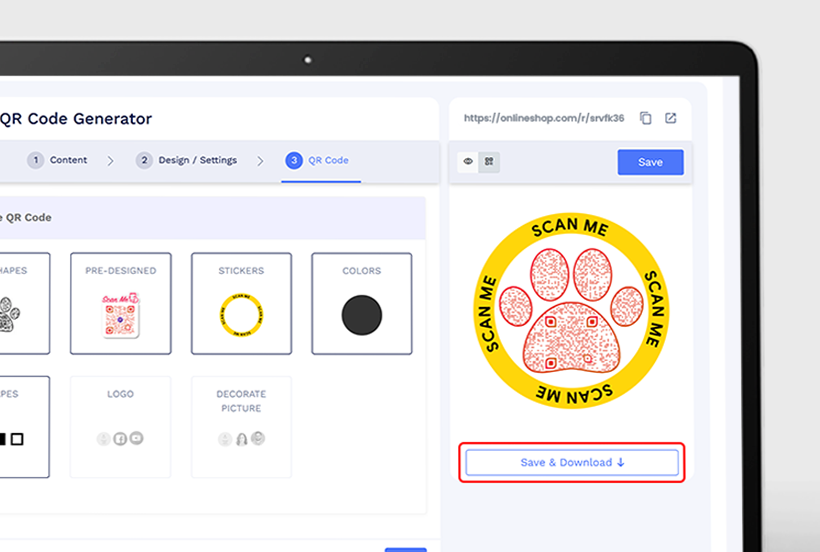
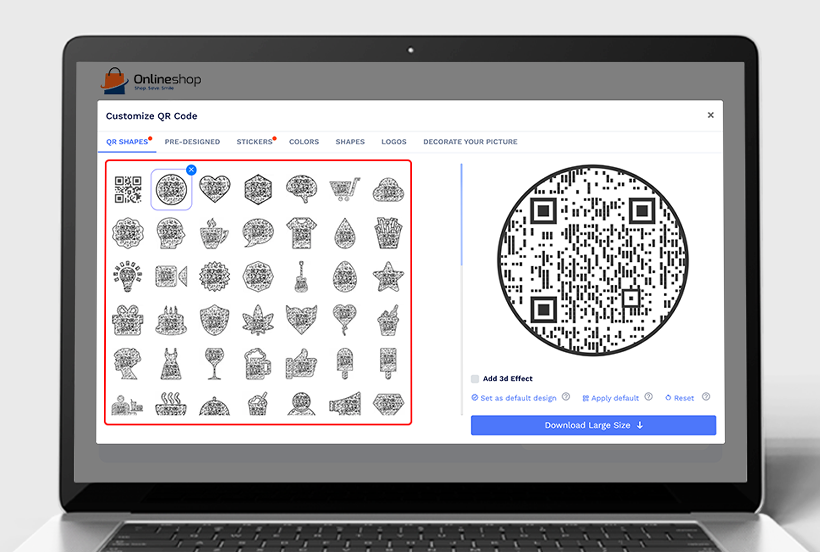
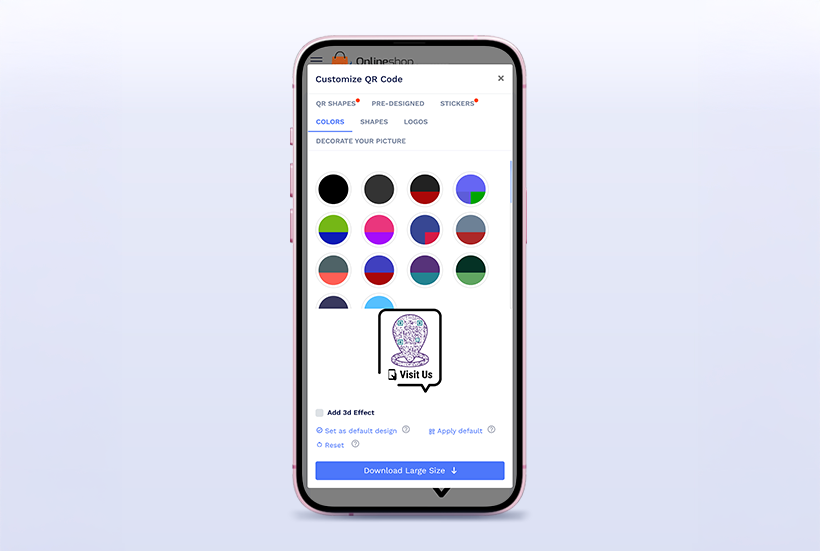
Step 8: QR Code Customization: Adjust QR code design, frame, colors, and logo placement.
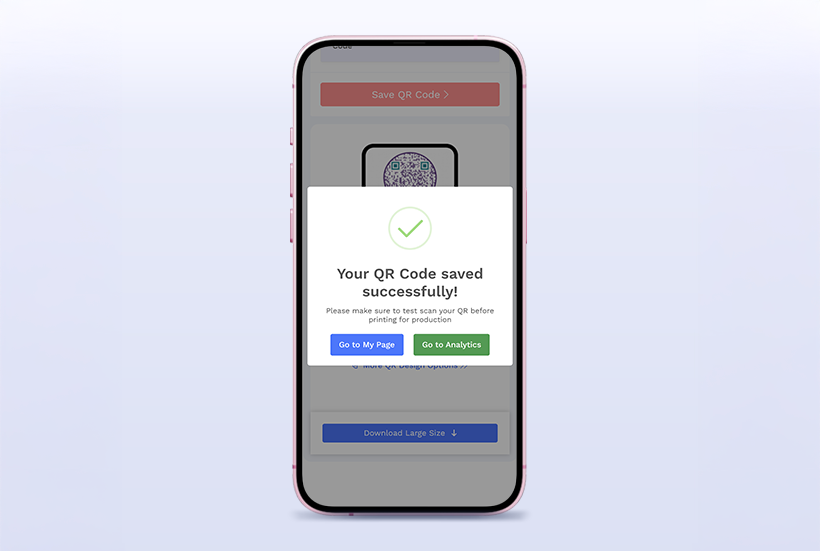
Step 9: Save and Activate: Users review and save changes before sharing via QR code, NFC, or direct link.
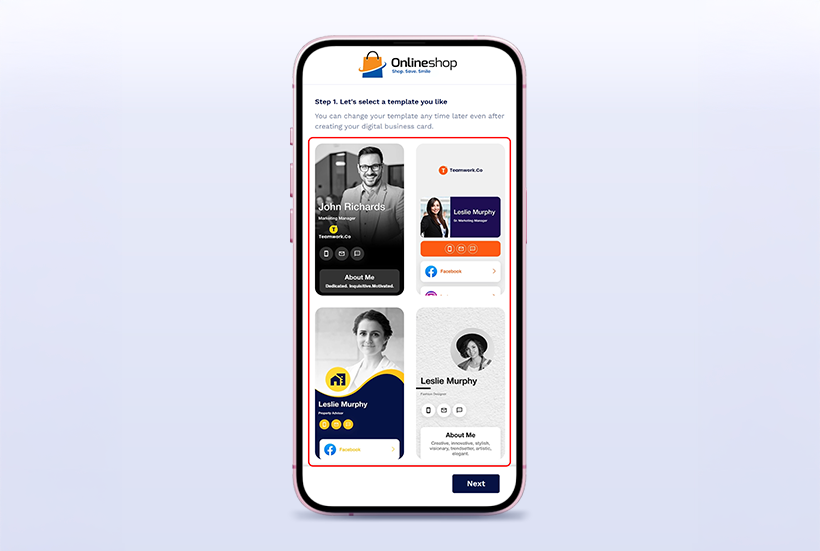
When a user purchases a whitelabeled digital business card, they can claim it on their smartphone by following these steps:
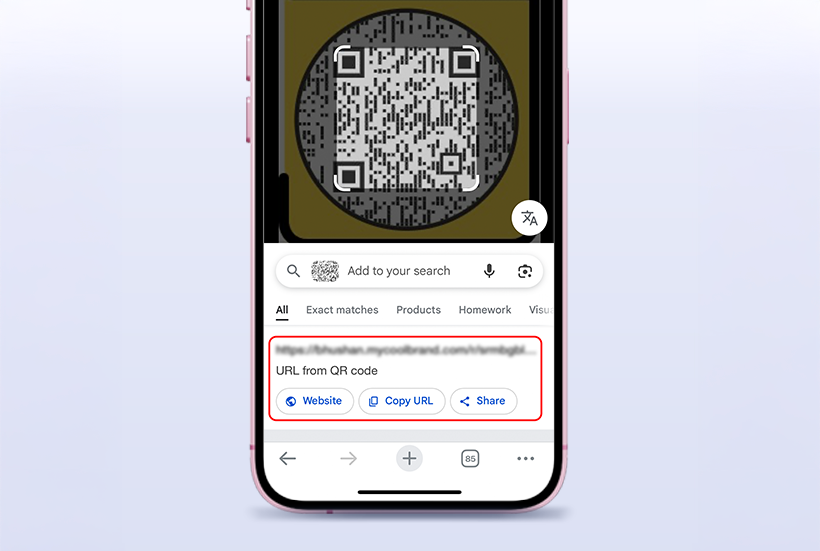
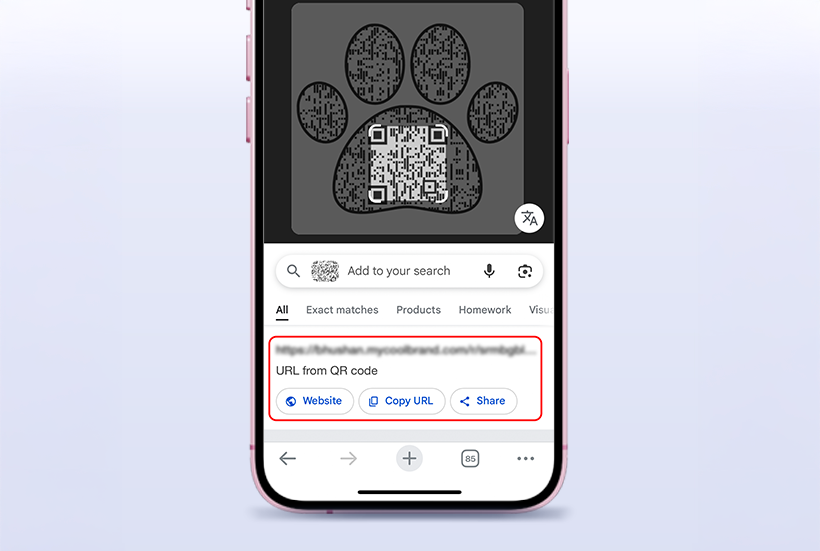
Step 1: Scan the QR Code or Tap NFC: The user scans the QR code or taps their NFC-enabled phone on the NFC card.
Step 2: Welcome Screen: A welcome message appears, prompting the user to begin the setup process.

Step 3: Claiming Profile: The user enters name, email address, and password before clicking the Sign Up and Claim button.

Step 4: Successfully Claimed Confirmation: The system confirms the digital business card has been successfully claimed.

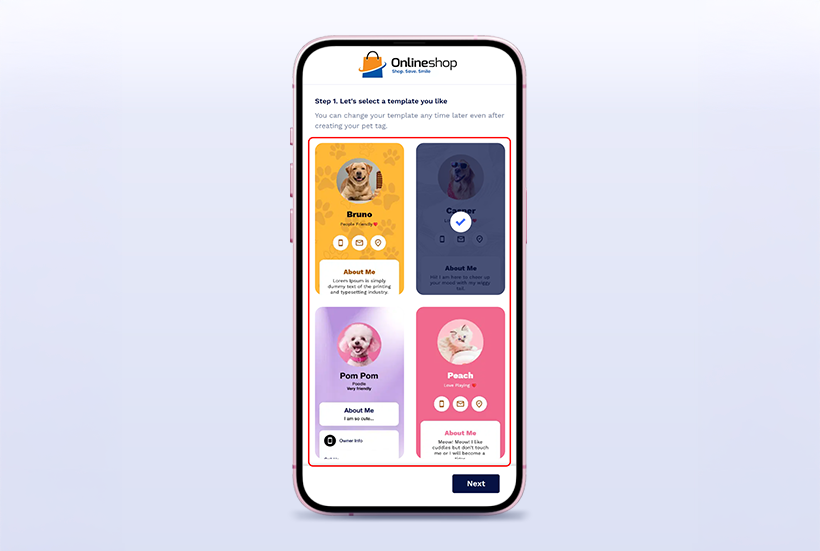
Step 5: Select a Template: Users choose a preferred layout and color scheme.
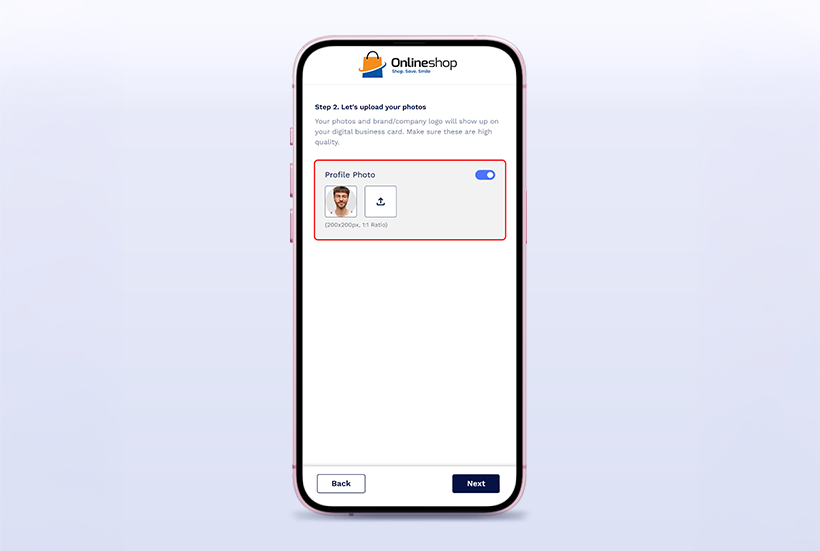
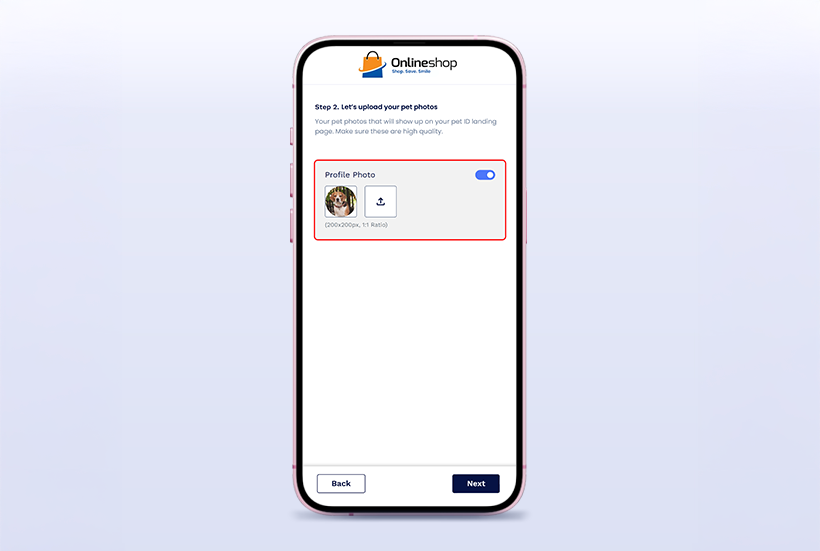
Step 6: Upload Profile and Branding Photos: Users add a profile image and brand logo.
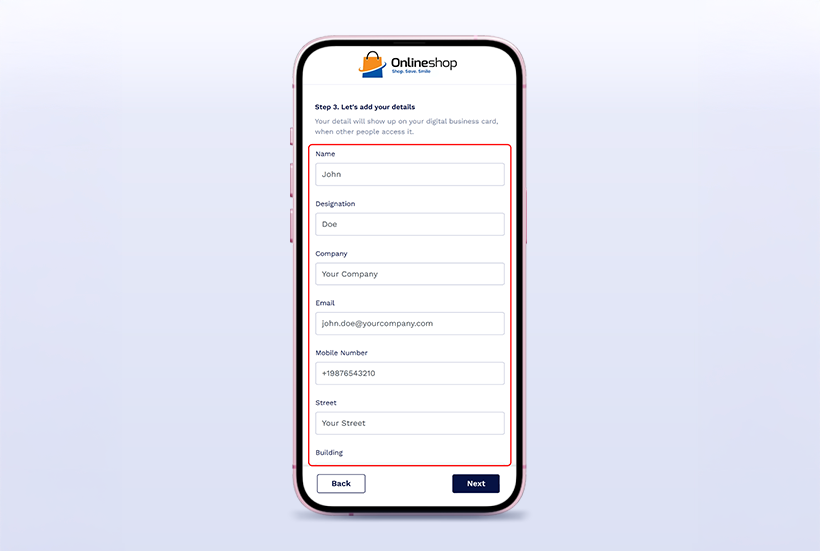
Step 7: Enter Contact & Business Details: Users input name, designation, company name, email, phone number, and social links.
Step 8: Preview and Save: Users finalize and save their personalized digital business card.

How to claim pet ID tags
When a user purchases a whitelabeled Pet ID Tag, they can claim it on their desktop by following these steps:
Step 1: Open the URL: Users access the provided link after purchasing the pet ID tag.
Step 2: Welcome Screen: A welcome message appears, guiding them to claim their pet tag.

Step 3: Sign up: Enter your details to sign in and click Sign Up and Claim.
Step 4: Successfully Claimed Confirmation: The system confirms the pet tag has been successfully claimed.

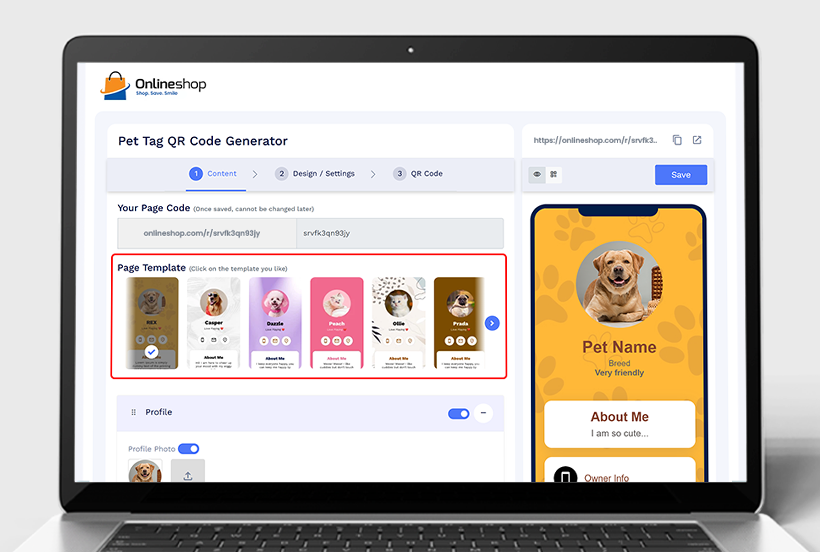
Step 5: Select a Template: Users choose a preferred profile layout for their pet’s digital page.
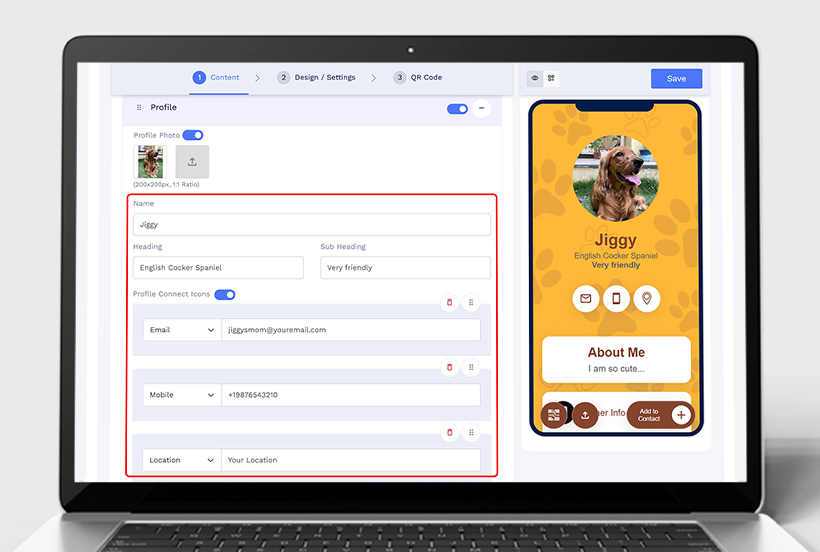
Step 6: Upload Profile and Pet Photos: Users add a pet profile image.
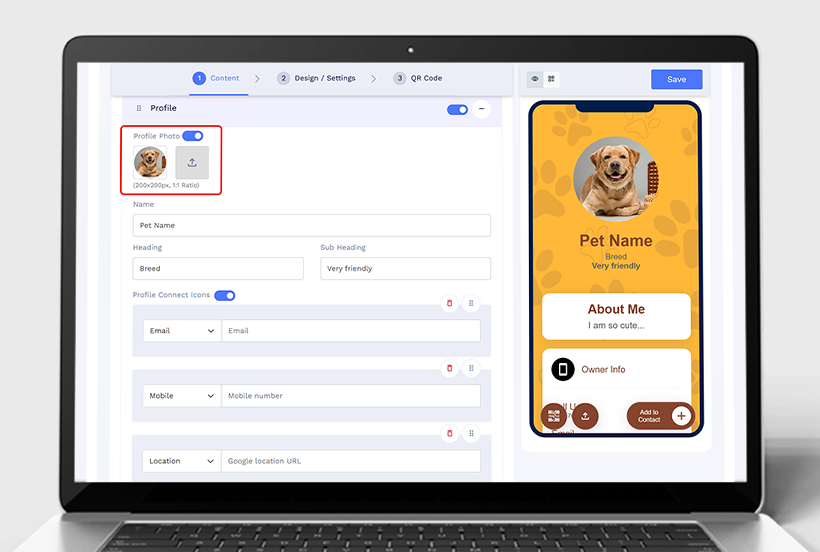
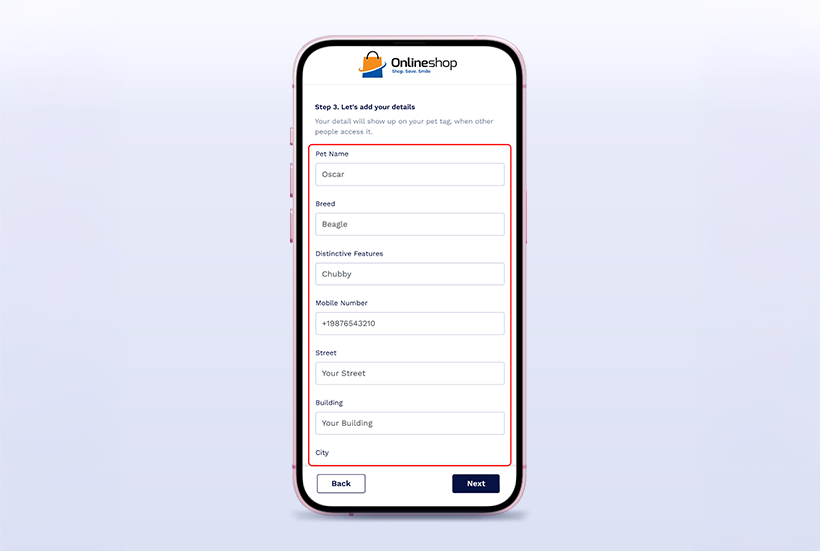
Step 7: Enter Pet & Owner Details: Users input pet name, breed, distinctive features, owner’s contact information, and emergency details.
Step 8: Customize Contact & Social Links: Users can add vet contacts and social profiles if applicable.

Step 9: Customize QR Code: Users can customize the QR codes.

Step 10: Preview and Save: Users review and save changes before sharing the pet profile via QR code.
When a user purchases a whitelabeled Pet ID Tag, they can claim it on their smartphone by following these steps:
Step 1: Scan the QR Code or Tap NFC: The user scans the QR code or taps their NFC-enabled phone on the pet tag.
Step 2: Welcome Screen: Users see a welcome message and begin the claim process.

Step 3: Sign Up: Enter your details to sign in and click Sign Up and Claim.

Step 4: Successfully Claimed Confirmation: The system confirms the pet tag claim.

Step 5: Select a Template: Users choose a profile design for their pet.
Step 6: Upload Profile and Pet Photos: Users add a pet image.
Step 7: Enter Pet & Owner Details: Users provide pet name, breed, contact details, and emergency information.
Step 8: Customize QR Code: Users can customize the QR codes.

Step 9: Preview and Save: Users finalize and save the profile for easy access via QR code or direct link.
How to claim Google Reviews cards
When a user purchases a whitelabeled Google Reviews Card, they can claim it on their desktop by following these steps:
Step 1: Open the URL: Users visit the provided link to claim their review card.
Step 2: Welcome Screen: A message guides them through the setup process.
Step 3: Claim Your Profile: Enter details and click Sign Up and Claim.

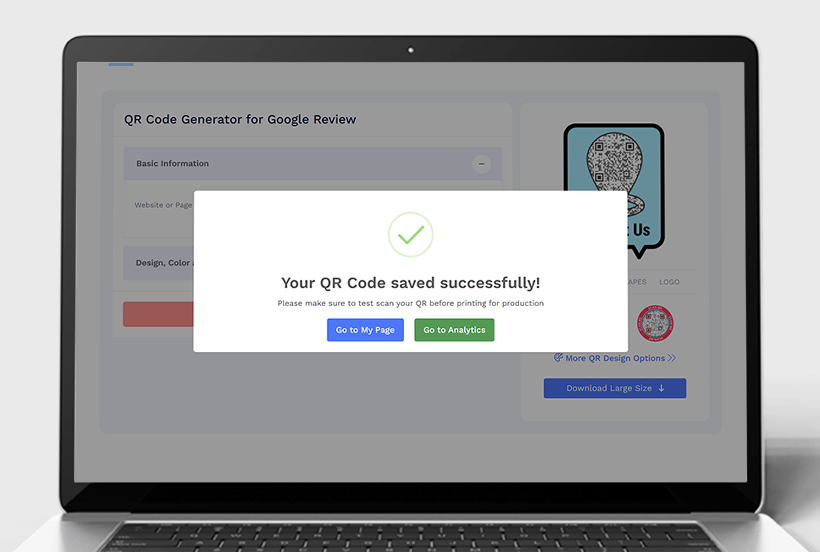
Step 4: Successfully Claimed Confirmation: The system verifies and links the Google Reviews Card.

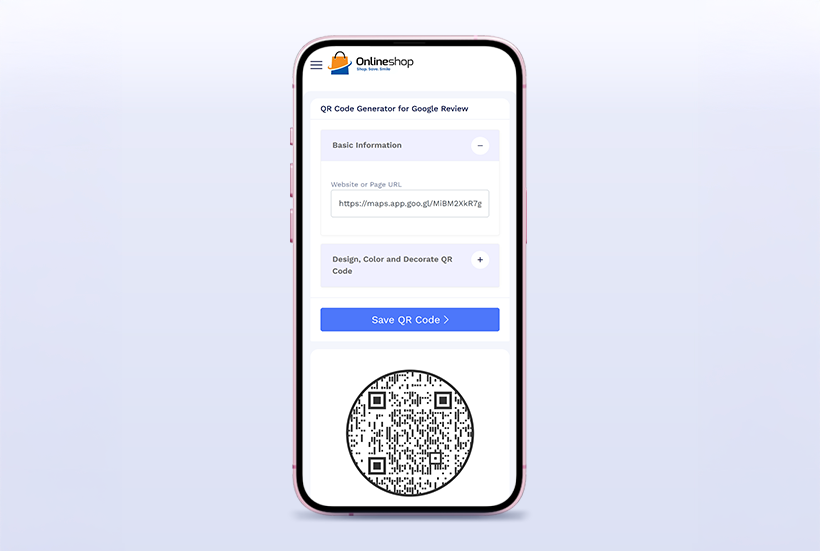
Step 5: Enter Business Information: Users input business name and Google Review Page URL.
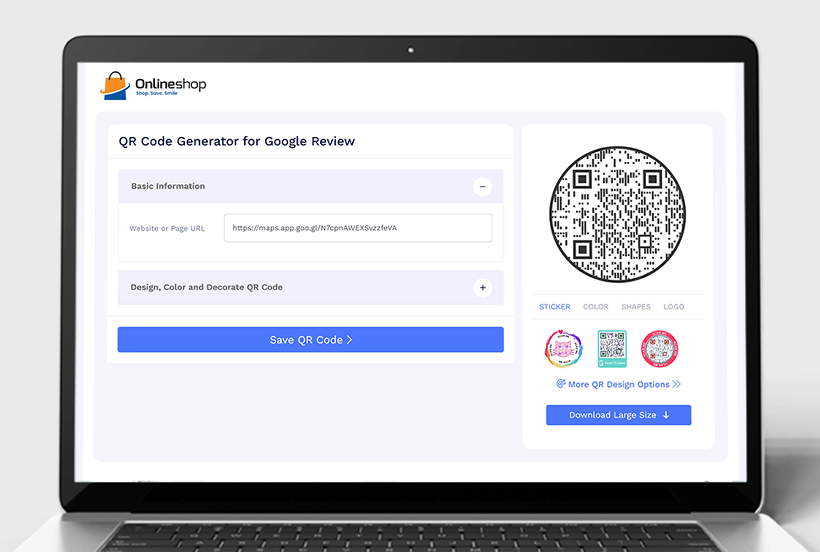
Step 6: Customize QR Code: Adjust QR design, branding, frame, and logo integration.
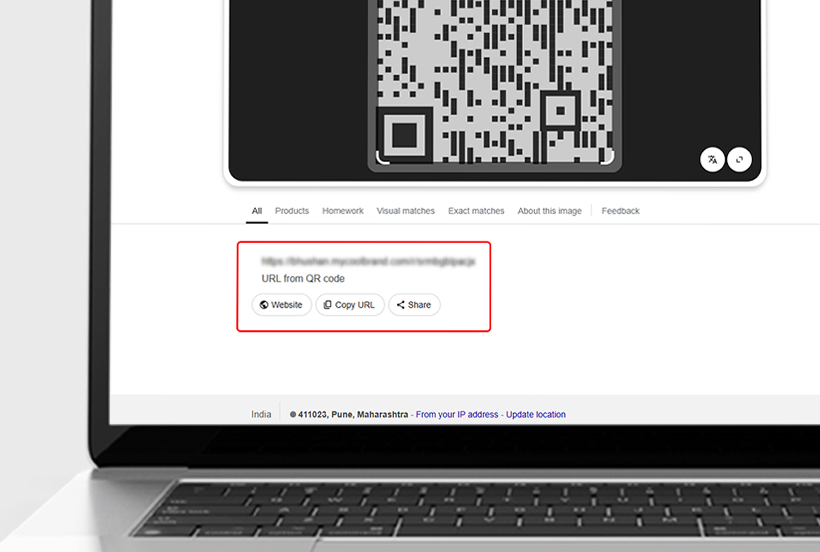
Step 7: Generate and Download QR Code: Users receive the final QR code, which they can test before sharing.
When a user purchases a whitelabeled Google Reviews Card, they can claim it on their smartphone by following these steps:
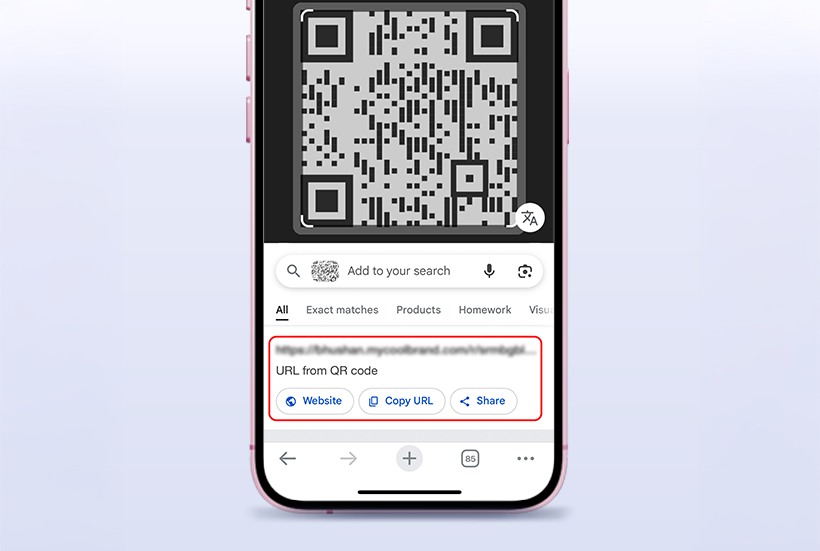
Step 1: Scan the QR Code or Tap NFC: Users scan the QR code or tap their NFC-enabled phone on the Google Reviews Card.
Step 2: Welcome Screen: A message guides them to claim their review page.

Step 3: Claim Your Profile: Enter details and click Sign Up and Claim.

Step 4: Successfully Claimed Confirmation: The system confirms and links the Google Reviews Card.

Step 5: Enter Business Information: Users input business name and Google Review Page URL.
Step 6: Customize QR Code: Adjust QR branding, colors, frame, and logo placement.
Step 7: Generate and Save QR Code: Users finalize and test their QR code before sharing.
How to personalize your digital business card QR code
To edit your digital business card, you can open its link (provided twice—once at claim and once after entering details) or scan the QR code or tap the NFC card from a logged-in device. The editor will open on your device, allowing you to make changes.
Editing process
- Open the provided link, scan the QR code, or tap the NFC card from a logged-in device.
- Modify details such as name, contact information, branding, and profile image.
- Adjust page layout, colors, and call-to-action buttons.
- Save changes and preview the card.
How to personalize pet tag QR code
To edit your pet tag, you can open its link (provided twice—once at claim and once after entering details), scan the QR code, or tap the NFC tag from a logged-in device. The editor will open on your device, allowing you to make changes.
Editing process
- Open the provided link, scan the QR code, or tap the NFC tag from a logged-in device.
- Modify pet details, emergency contacts, and profile picture.
- Customize pet name, breed, and owner details.
- Save the changes.
How to personalize Google Reviews QR code
To edit your Google Reviews QR code, you can open its link (provided twice—once at claim and once after entering details), scan the QR code, or tap the NFC tag from a logged-in device. The editor will open on your device, allowing you to make changes.
Editing process
- Open the provided link, scan the QR code, or tap the NFC tag from a logged-in device.
- Modify business details, branding, QR code design, and logo placement.
- Save changes to finalize updates.
Conclusion
The whitelabeled merchandise claiming process ensures customers can quickly claim, personalize, and start using their digital business cards, pet tags, or Google Reviews QR codes. As a reseller, understanding this process allows you to provide seamless support.
Frequently asked questions
What happens if a customer cannot claim their QR code?
Ensure they scanned the correct QR code and followed the on-screen instructions. If the issue persists, contact support.
Can customers edit their details after claiming the QR code?
Yes, they can log in anytime to modify their information.
Does the claiming process work on all devices?
Yes, it is compatible with desktops, mobile devices, and tablets.
How can customers share their QR code?
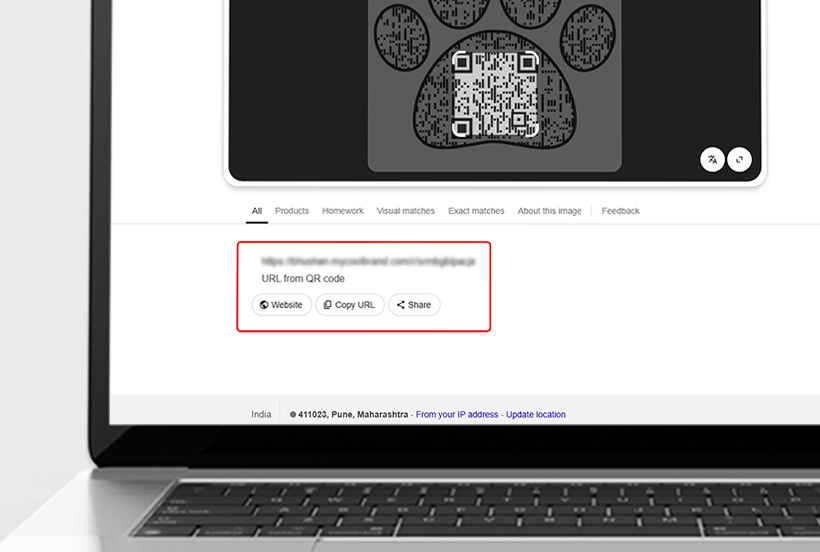
Once claimed, users can share their QR code by printing it, embedding it on websites, or using NFC-enabled cards.
You may also like
Easy Steps to Use NFC Business Cards on iPhone and Android
Dive into a guide on how to use NFC business cards effectively on your iPhone and Android devices. Step into the future of networking with NFC cards.
API Integration in QRCodeChimp Forms to Connect with Your CRMs
Refer to this tutorial on API integration in forms and seamlessly integrate QRCodeChimp forms into your CRM system for automated data transfer and streamlined workflow.
How To Create RSVP QR Codes: 4 Easy Methods for Any Event
Learn how to create invitation using RSVP cards with QR codes to streamline event RSVPs. QRCodeChimp helps you make RSVP for different events and different ways. Explore our QR code generator now.
How to Create a QR Code?
QR codes stand for quick-response code and they are two-dimensional barcodes. QR codes can be read on scanning by mobile devices or online scanners. The simplest way to create QR code is to use a free online QR code generator such as QR Code Chimp...
Most Popular
Contact Sales
